Version is available at: Dropbox\Download\DM-Xray\dm-xray-setup-ver-1.0.0.1-alpha39x64-prot-signed.exe
What's new?
- In this version we addressed to the problem of allocation of small cavities (with the depth from 0.5 to 3 voxels). In previous version of the program automatic algorithm in general simplification scenario missed cavities with depth less than 2 voxels, in convex simplification scenario it missed cavities less than 5 voxels by default (but we could tune the algorithm to build cavities with the depth bigger than 3 voxels). In rough scenario (when we do not launch window detection) all the cavities could be build if we set simplification accuracy of the algorithm less then its depth.
- For general and convex scenario in new version we added a special stage in the workflow that gives an opportunity to the user to add cavities to the model with the depth from 0.5 to 3 voxels by a new semi-automatic instrument. At the moment we cannot do it automatically because the cavity of such depth can be confused with a noise of Xray scanner, so the user has to sort possible cavities found automatically to 'approved' (real cavity) or 'rejected' (not a cavity).
- Also we optimized the render for visualization of polygonal model - it became faster and visualization of highlighted areas on the model became more intuitive.
Stage for possible cavity approvement
After automatical detection of windows, their manual corrections and approval, you will see a new stage:
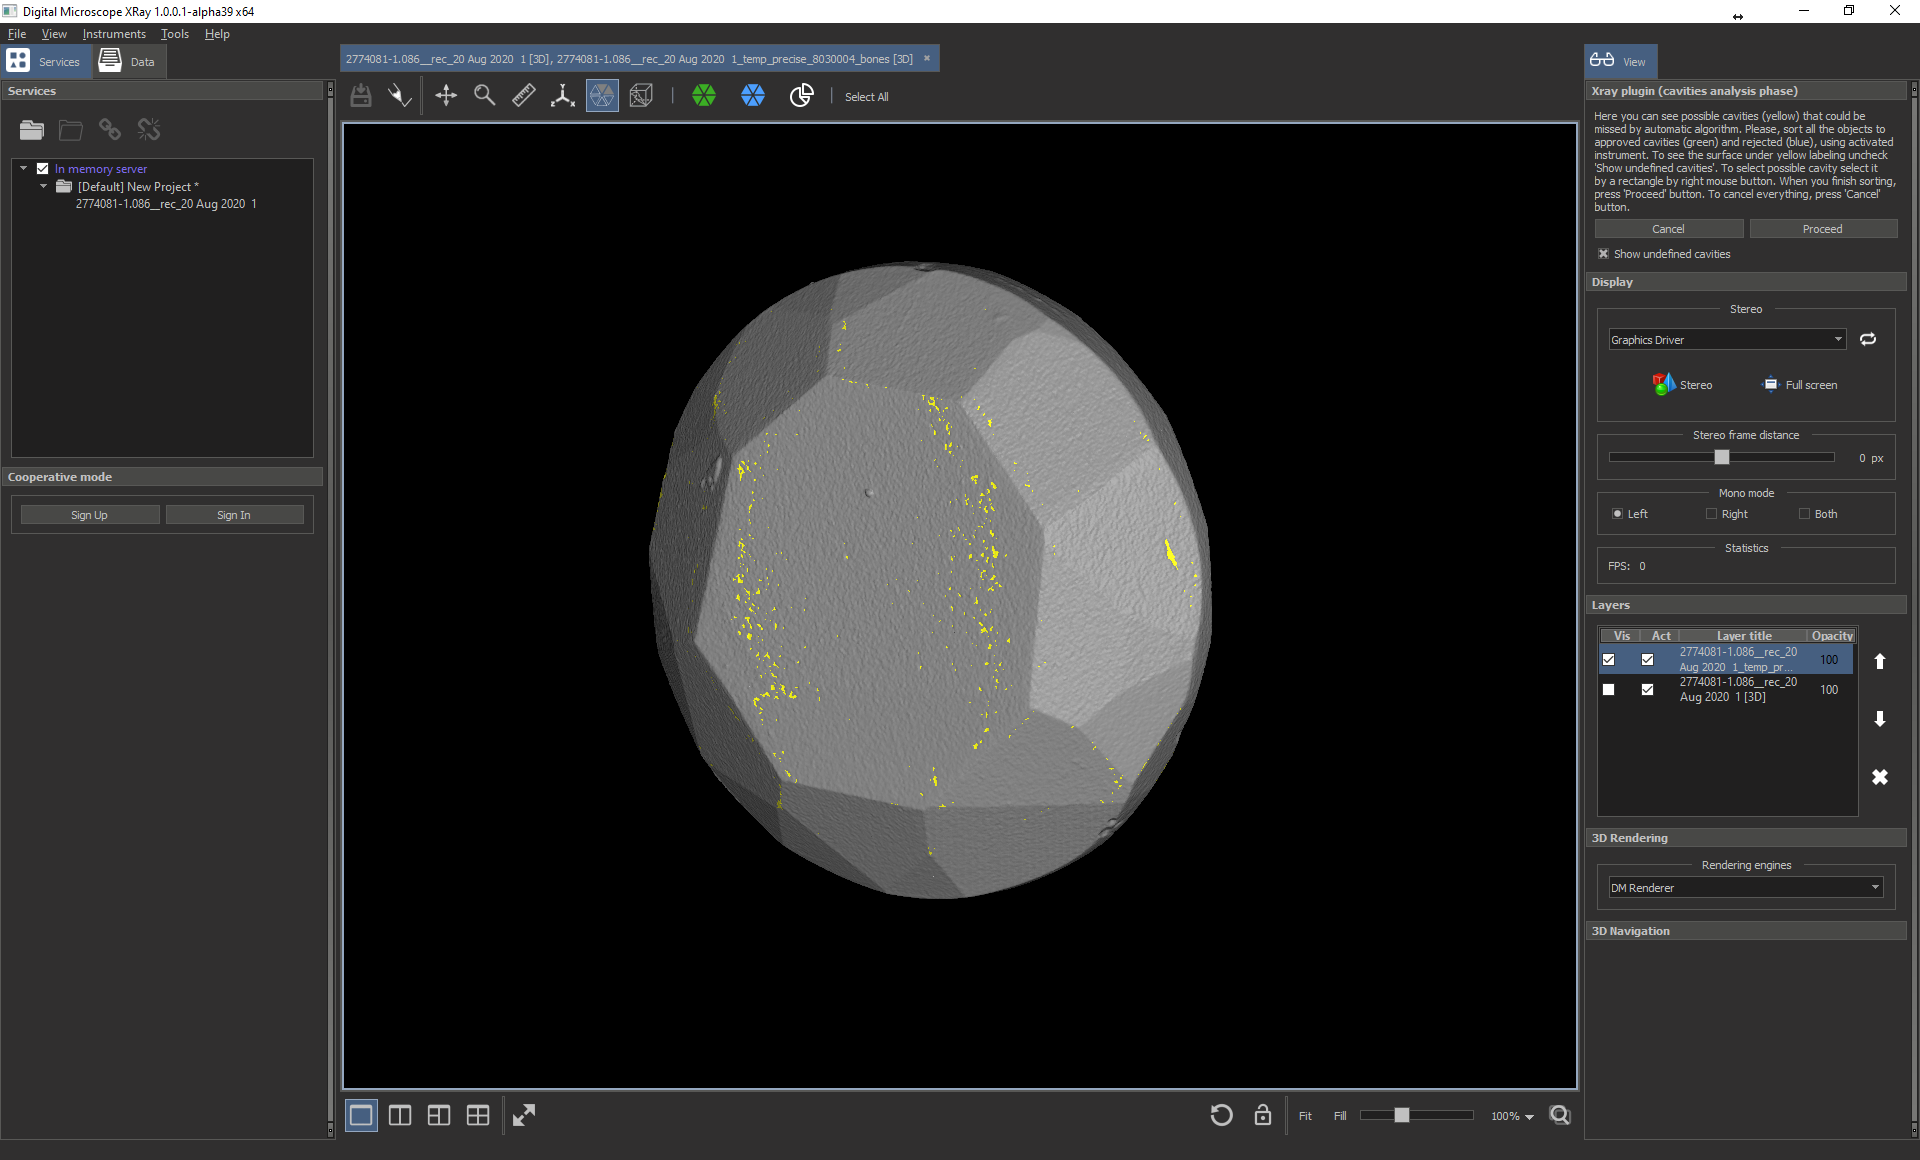
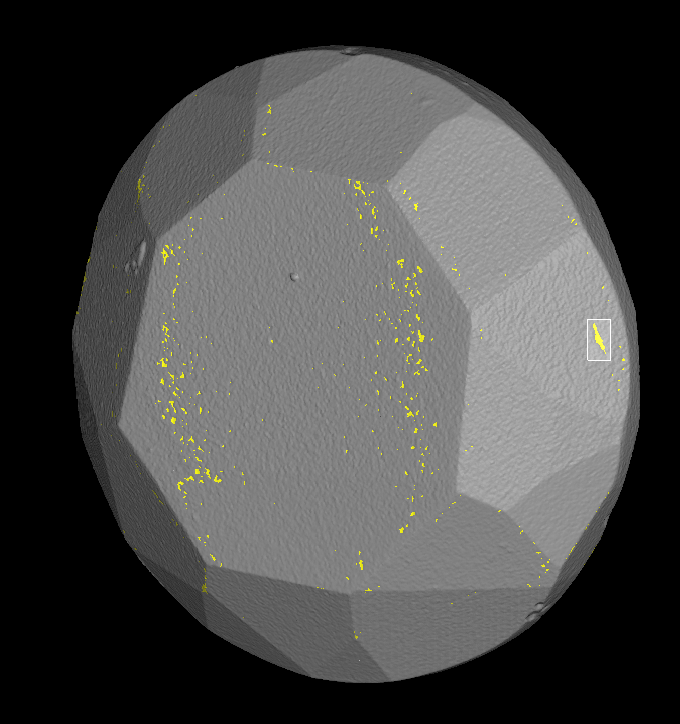
You will see a polygonal Xray model with yellow zones - these are all the candidates of cavities with depth from 0.5 to 3 voxels.
On the top you can see the activated instrument for selection and sorting cavities to approved (green color) and rejected (blue color):

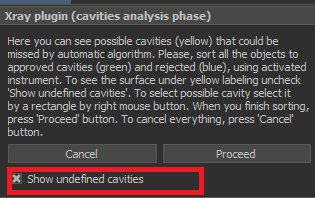
To see cavities under yellow highlighting you may uncheck this check-box (to see them again, check it again):
Instrument for selecting and sorting cavities to approved and rejected
Using this instrument you may:
- Rotate the model by left button of mouse
- Select the cavity/cavities by drawing a rectangle over the part of the cavity with a right mouse button pressed
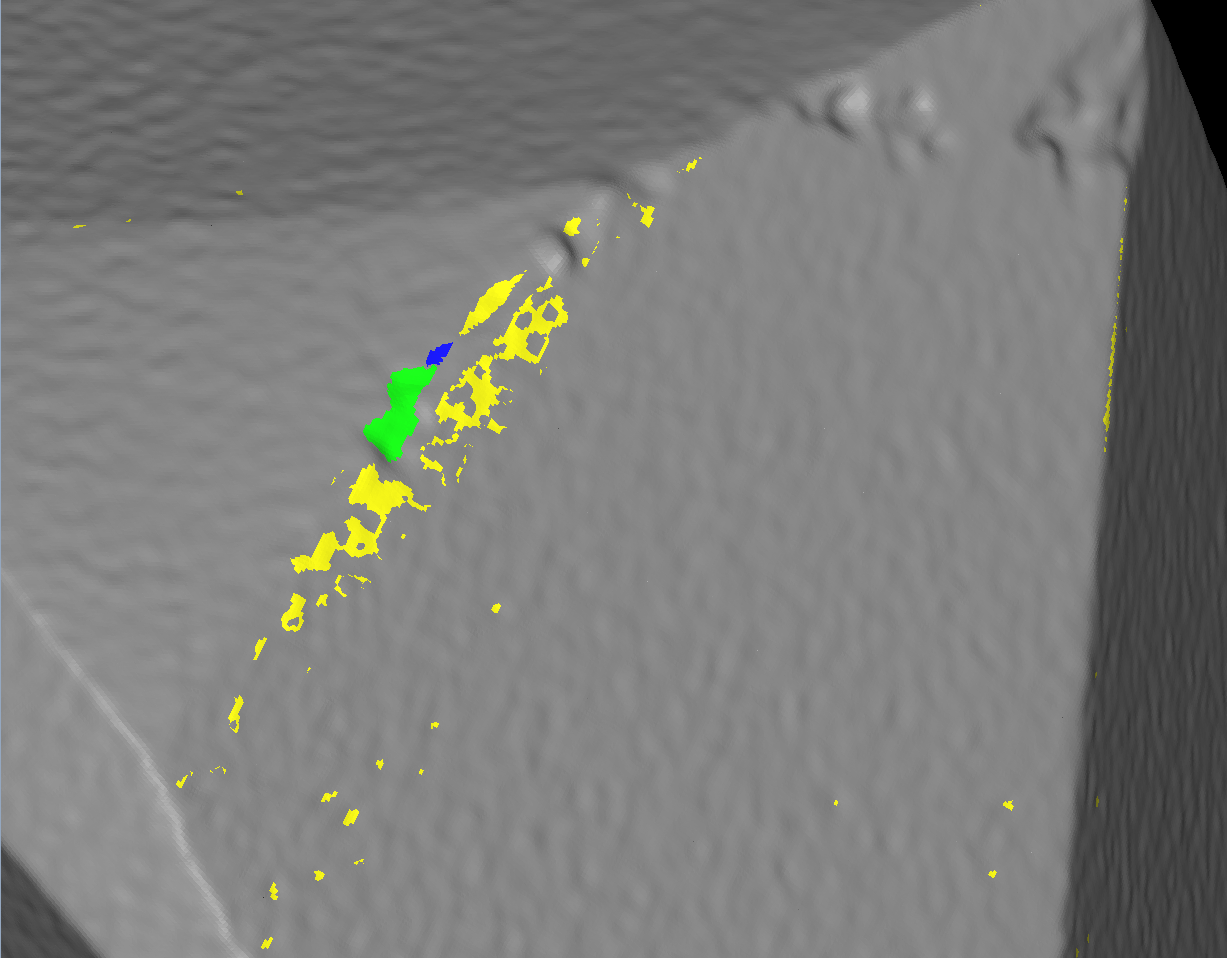
Selected cavities will be highlighted by red colour: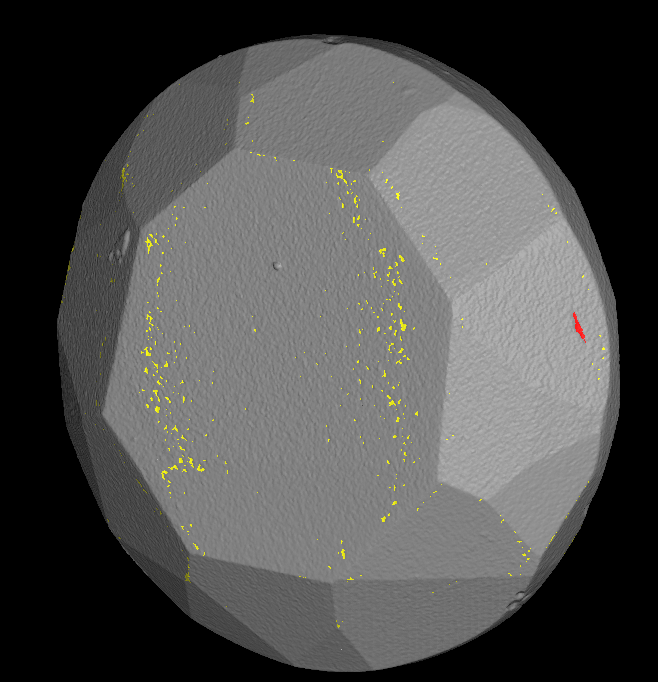
- To move selected cavity to approved class click on button to approve

Here you can see how approved cavity looks like: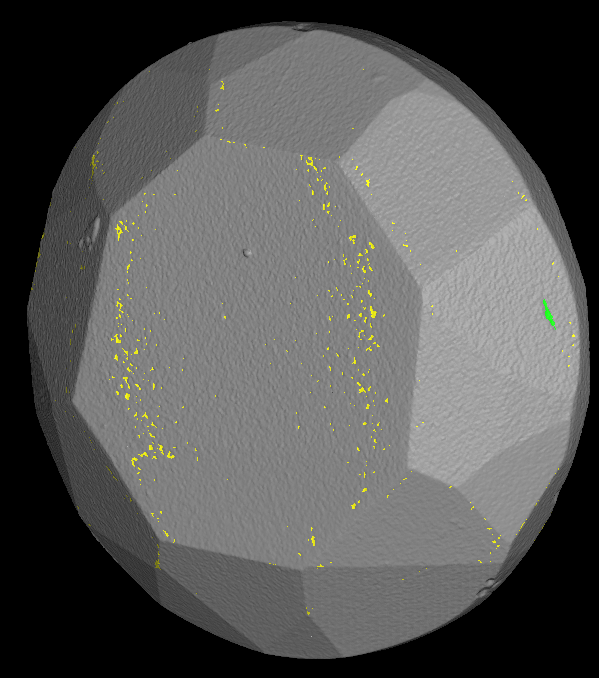
- To move selected cavity to rejected class click on button to reject

Blue zones are rejected cavities, green - approved, yellow - undefined status: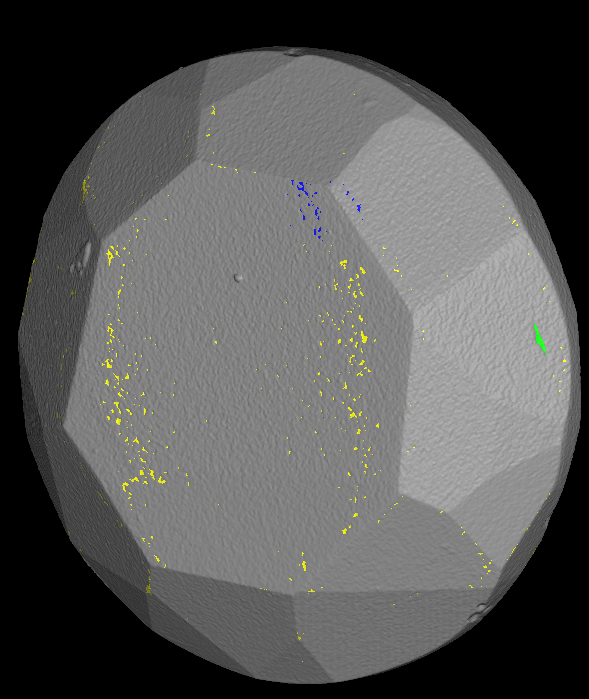
- Sometimes it is useful to select all zones by button
 (or Ctrl+A) and move them to some class (for example, reject all zones)
 - To drop selection press 'Esc'
- Also there is a special mode (so-called scissors mode) of selection instrument. By activating it with button
 , you may select only the part of the zone and move to the appropriate class
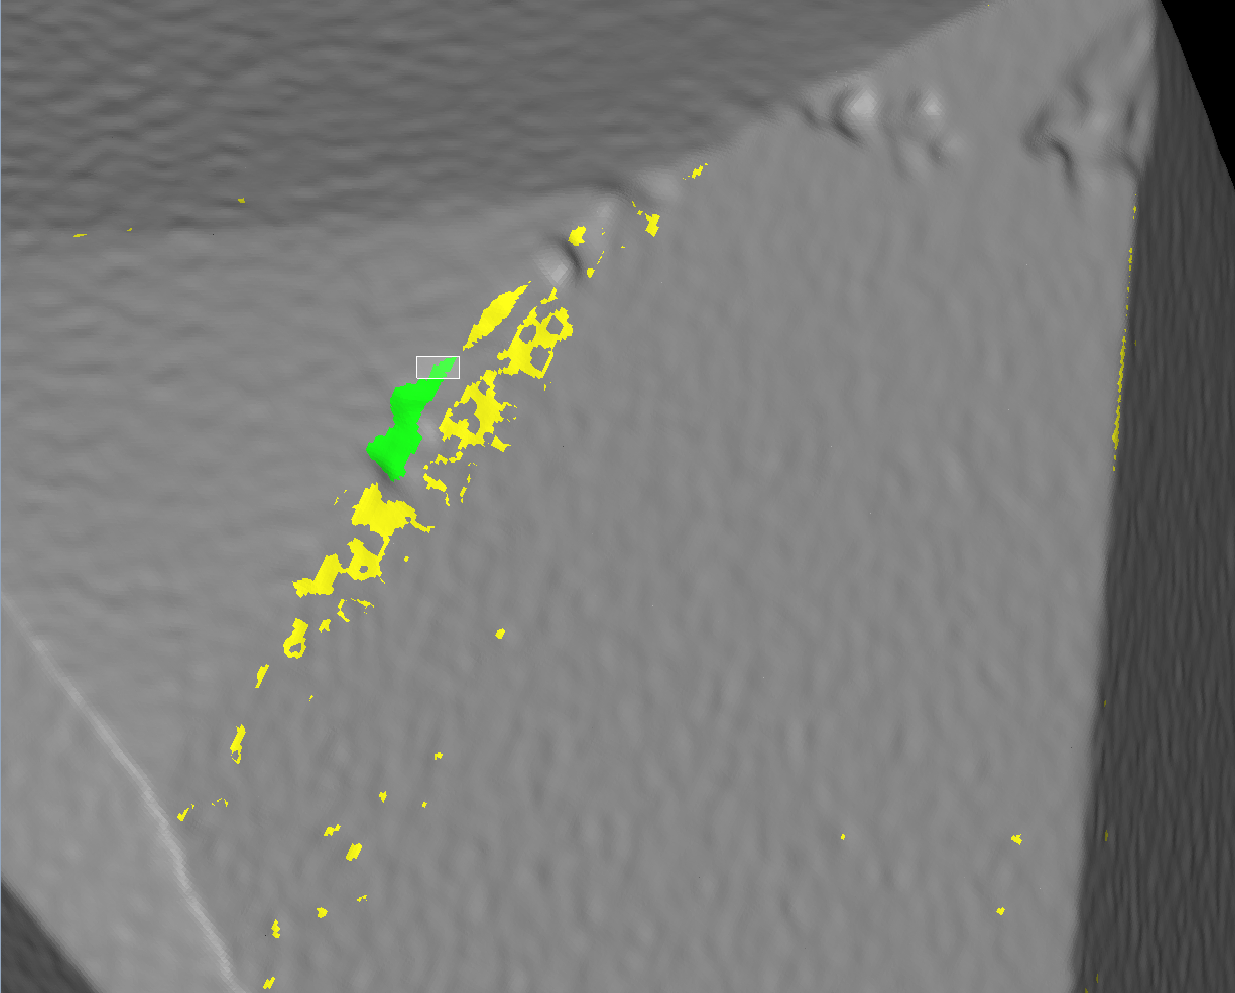
Here is a short video demonstration of working with the instrument:
Futher stages
If you finished sorting possible cavities, press on 'Proceed' button  .
.
If there were some yellow zones remaining you will see such message:
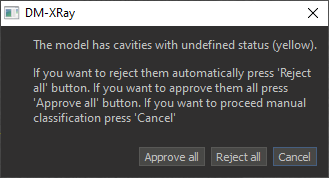
By clicking on 'Approve all' all remaining yellow zones are moved to 'approved' class and we proceed to the next stages.
By clicking on 'Reject all' all remaining yellow zones are moved to 'rejected' class and we proceed to the next stages.
To cancel moving to the next stage, press 'Cancel'.
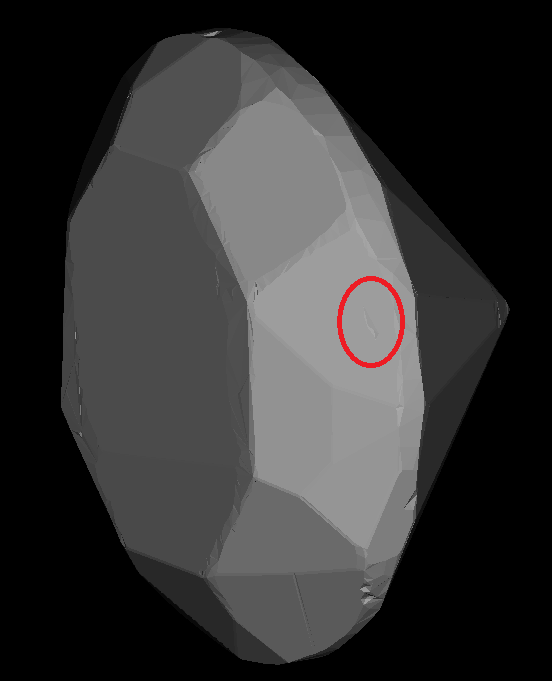
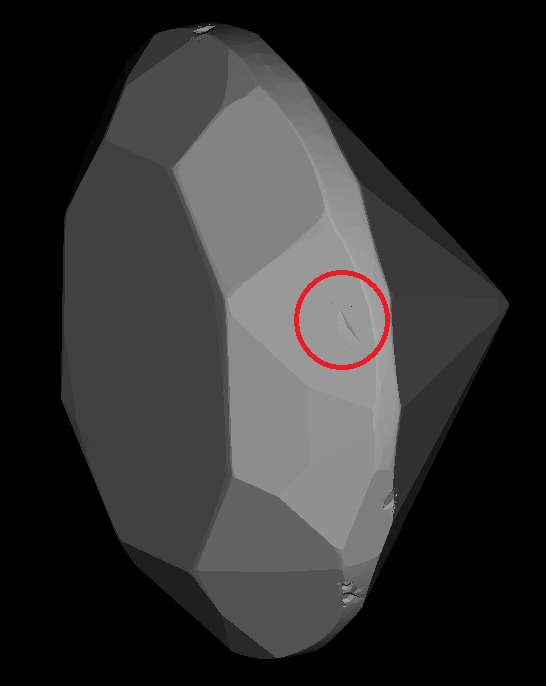
Futher stages are similar to alpha 38. As the result you can build small cavities, here you can see the cavity that could not be built in alpha 38 for general and convex simplification:
| General | Convex (alpha 39) |
|---|---|
|
|