Introduction
June release contains a new HIG automatic algorithm and tools for semi-auto post-processing of resulting inclusions. New algorithms offer improved allocation accuracy, higher sensitivity to poorly visible inclusions, and solve the problem of bad allocation of some big non-transparent inclusions and cracks. Also a simple background image control added.
Using allocation algorithm
To allocate inclusions automatically you are going to have to make a scan of a stone in IG + photos of visible background without IG cube BEFORE and AFTER the scan. Before usage check manually that BEFORE and AFTER background are the same and both backgrounds are not overexposed (the average brightness must be approximately 200-220). For more information about background images and their control in June release program see section Simple background control. This data has to be scanned and saved on disc in the following format:
Set 1
Photo000.jpg
Photo001.jpg - photos of stone in IG
……..
PhotoNNN.jpg
Set 2
Photo000.jpg - background BEFORE scan
Photo001.jpg - background AFTER scan
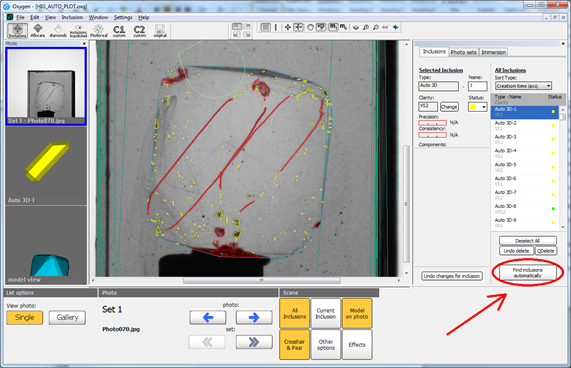
Fig 1. How to start allocation algorithm + reprojections.
After you have loaded the data please press “Allocate inclusions automatically” and wait until the algorithm completes.
Inclusion allocation can take from 10 (using all 400 photos) minutes up to 30-40 minutes depending on your computer configuration. We also provide several opportunities to enhance the results using various post-processing tools. Using these tools you can manually adjust the sensitivity of the algorithm to input data without full reallocation of inclusions.
Post-processing adjusting sensitivity of HIG algorithm
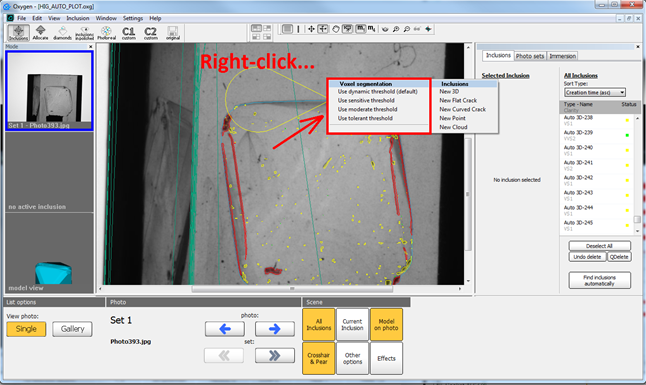
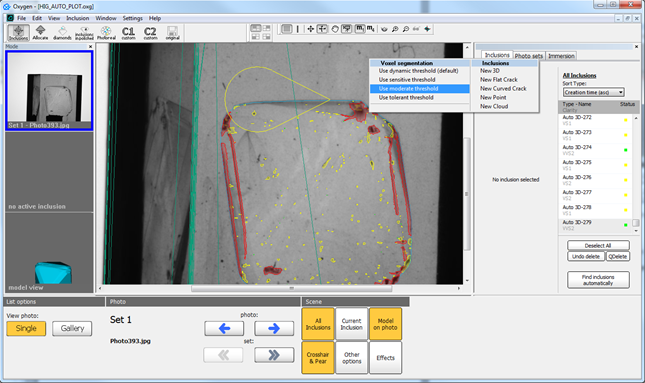
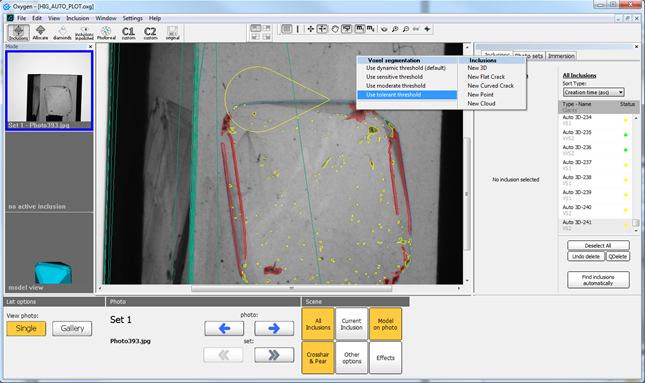
After the default allocation process you can try the following options to enhance the resulting inclusions adjusting the sensitivity of the algorithm. Right click on the main Oxygen window and choose one of the options from Voxel segmentation section:
- Use sensitive threshold
- Use moderate threshold
- Use tolerant threshold
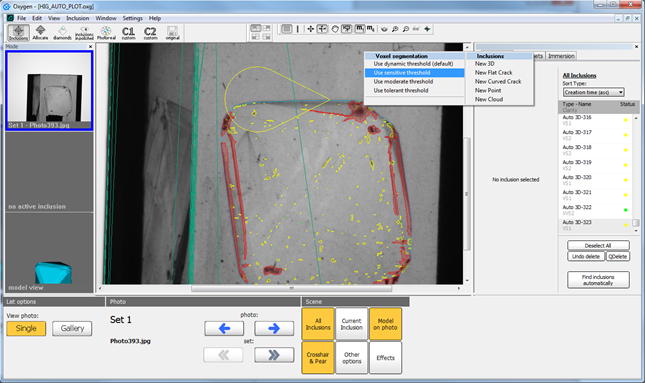
Sensitive threshold produces more inclusions and enlarges their stick-out. Tolerant threshold produces inclusions with the smallest stick-out. Moderate threshold sets the intermediate sensitivity of the algorithm between sensitive and tolerant thresholds.
Fig 2. How to choose adjust sensitivity of the algorithm. NOTE: you can adjust algorithm sensitivity only after first allocation on the set!
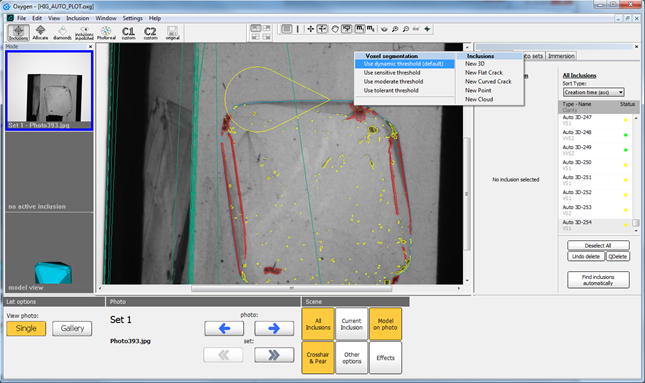
By default the Use dynamic threshold option is used. And it is already applied during the first allocation on the set. It is assumed that this option is suitable best for most of the sets. We recommend to use other options (sensitive, moderate and tolerant thresholds) in the following cases:
- The algorithm has not plotted some of poorly visible inclusions (or markings on stone surface) at all
- Some of resulting inclusions have visible holes
- Inclusion projections do not suit photos well (for example, the stick-out of inclusions is too big)
NOTE: In this version of the program you can adjust sensitivity for ALL allocated inclusions. Do not waste time on enhancement of one or two inclusions using this tool, if other inclusions are well plotted.
After choosing the option the algorithm reallocates inclusions with new sensitivity settings. It takes no more than 2-3 minutes. To roll back to initially allocated inclusions choose the option Use dynamic threshold (default) from Voxel segmentation section.
Fig 3. The process of adjusting sensitivity of the algorithm after the first launch.
Simple background control
This release has a simple background image control. Two background photos (before and after the scan) should meet the following criteria:
- Not overexposed. The average brightness must be approximately 240.
- Before and After background images should be practically the same.
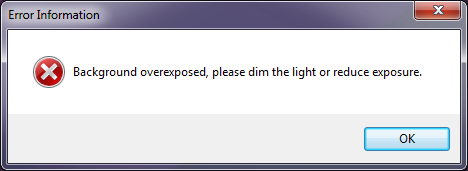
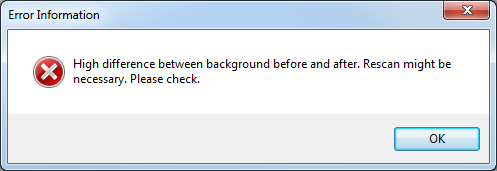
If the background does not pass this test, you will see the error message. Then the stone must be rescanned, and a valid background obtained.
Fig 4. The error message about the overexposed background.
Fig 5. The error message about the not matching background.
Hardware recommendations
Please, use the following recommendations on hardware:
https://octonus-teams.atlassian.net/wiki/pages/viewpage.action?pageId=23560331
