Release contains:
| File | Version | Release date |
|---|---|---|
| InstallHPOxygenServerBeta3.20.7.exe | Server Beta 3.20.7 | 11.08.2016 |
Shadow Scan
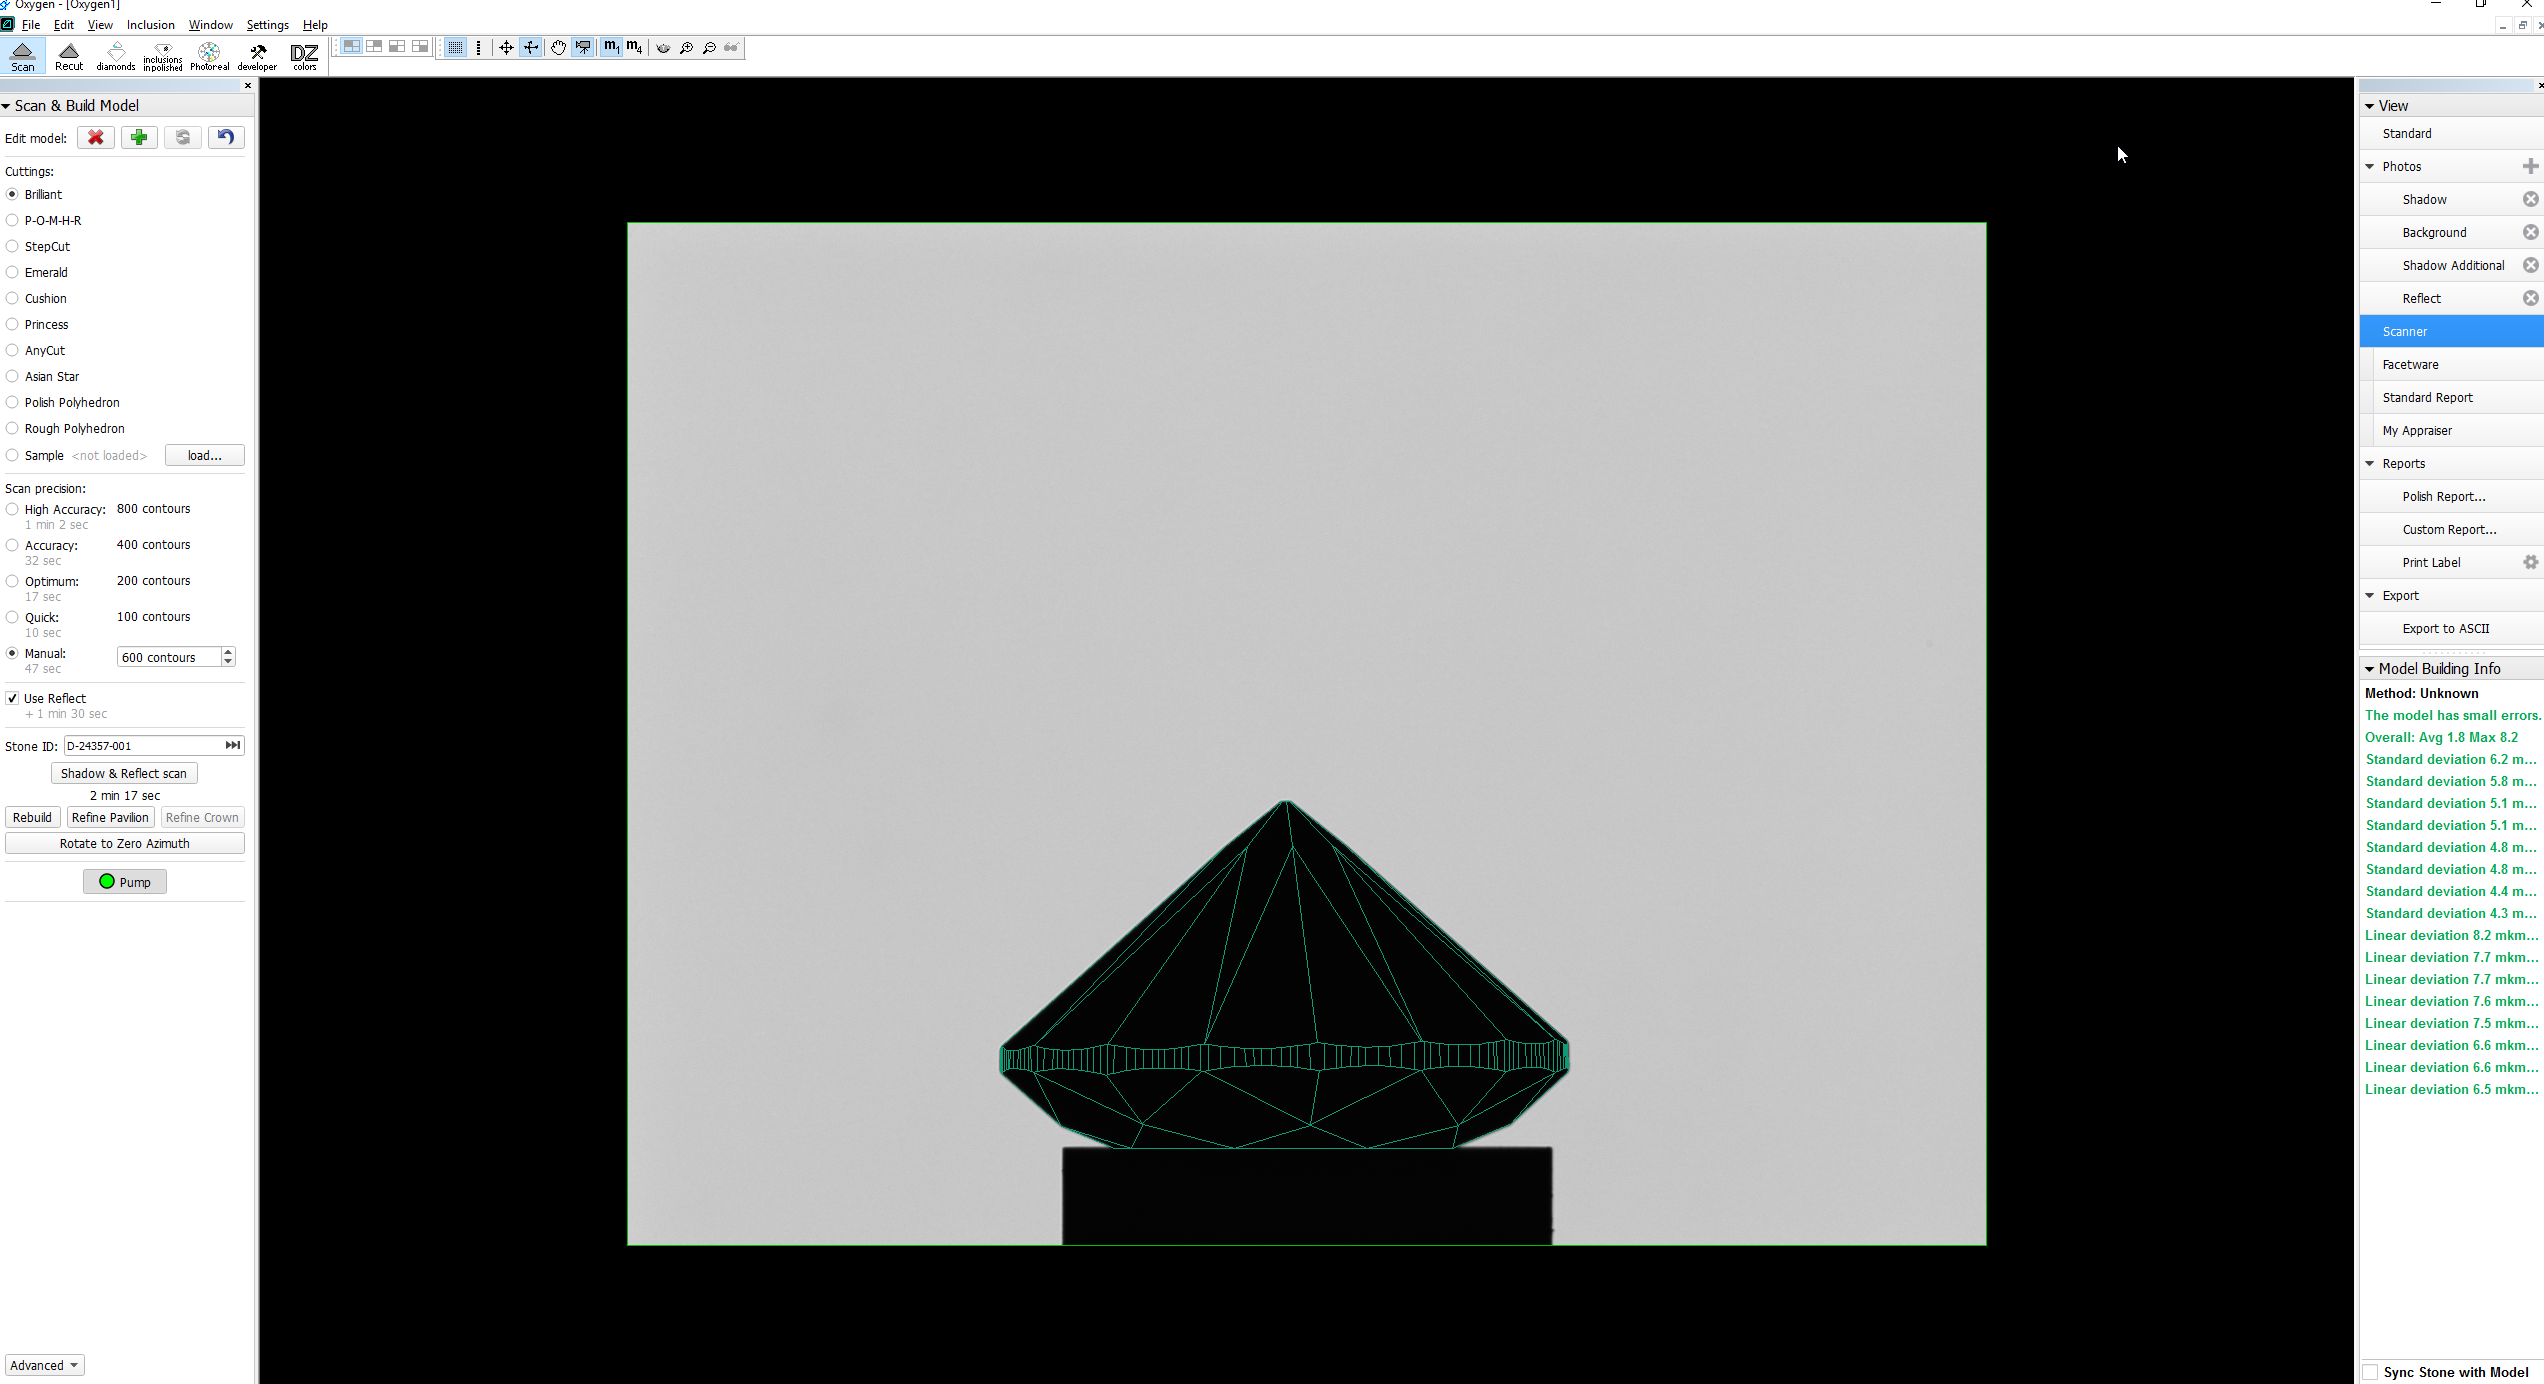
Model Building Info
Introduction
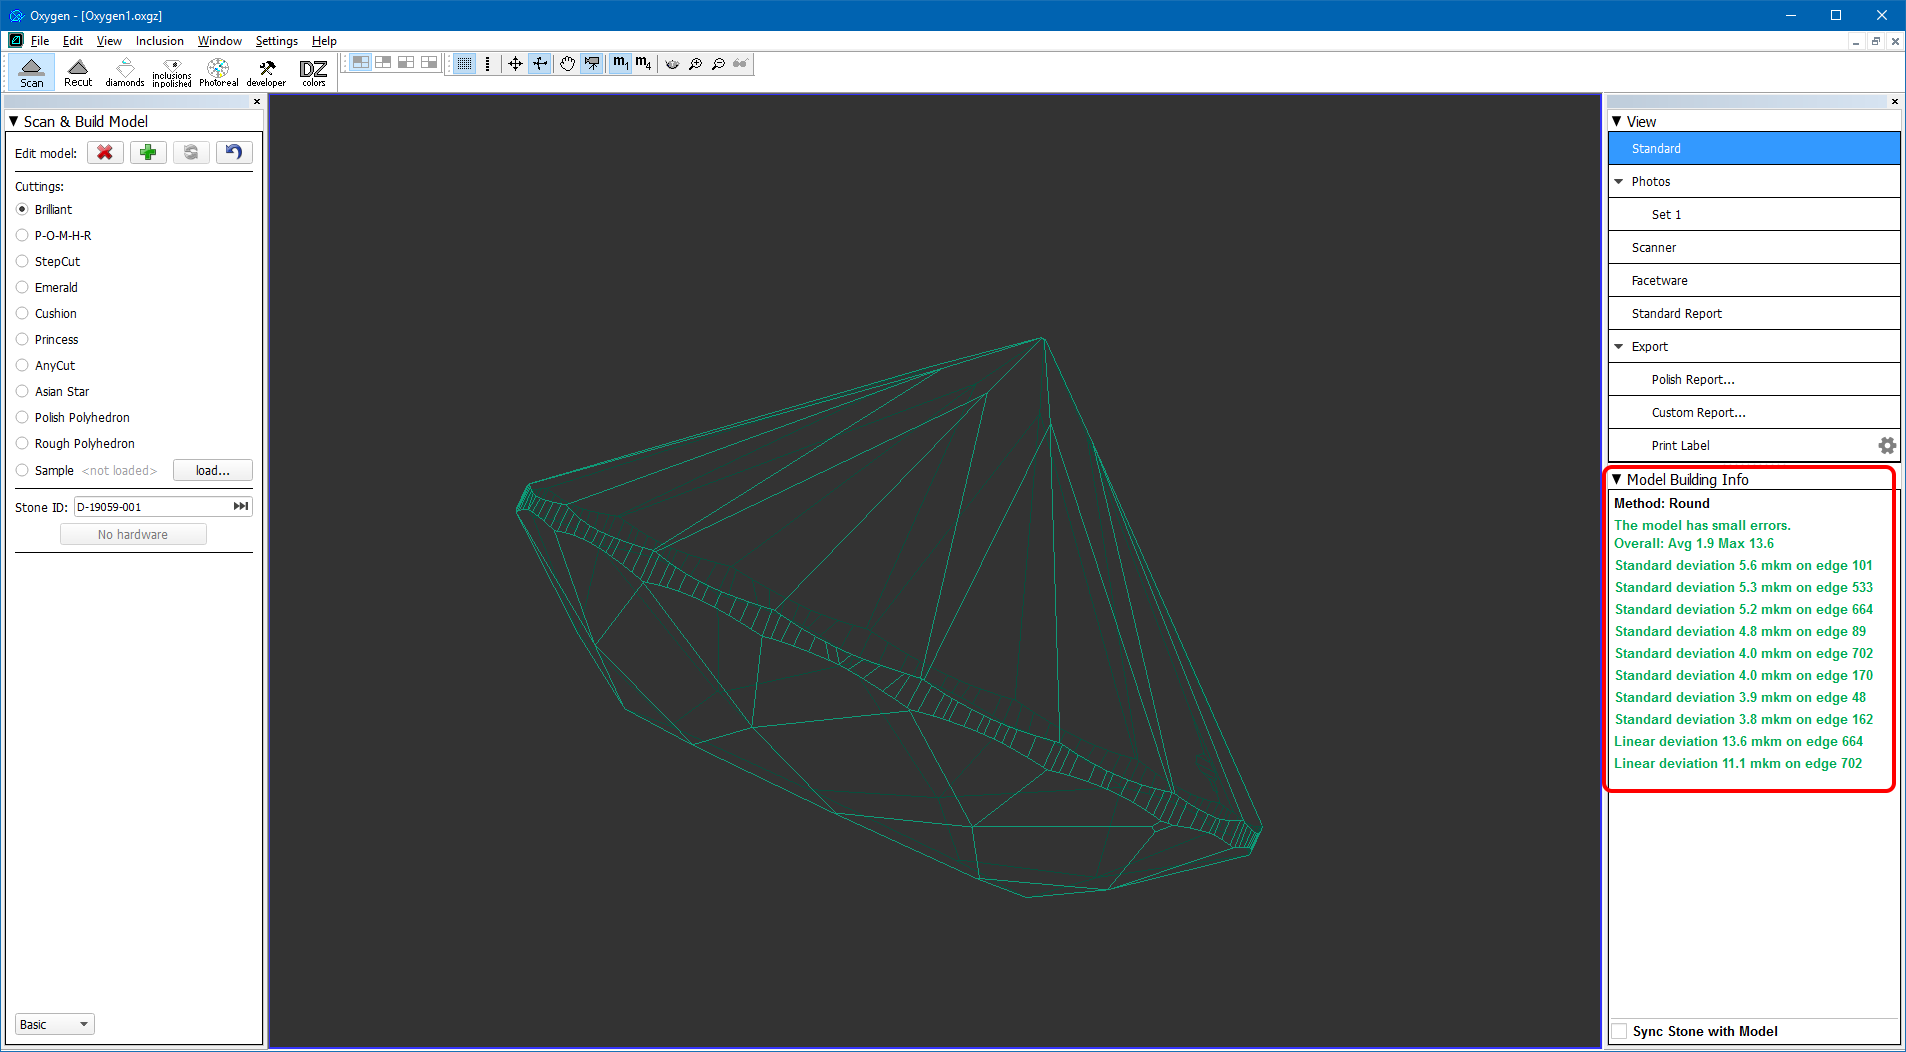
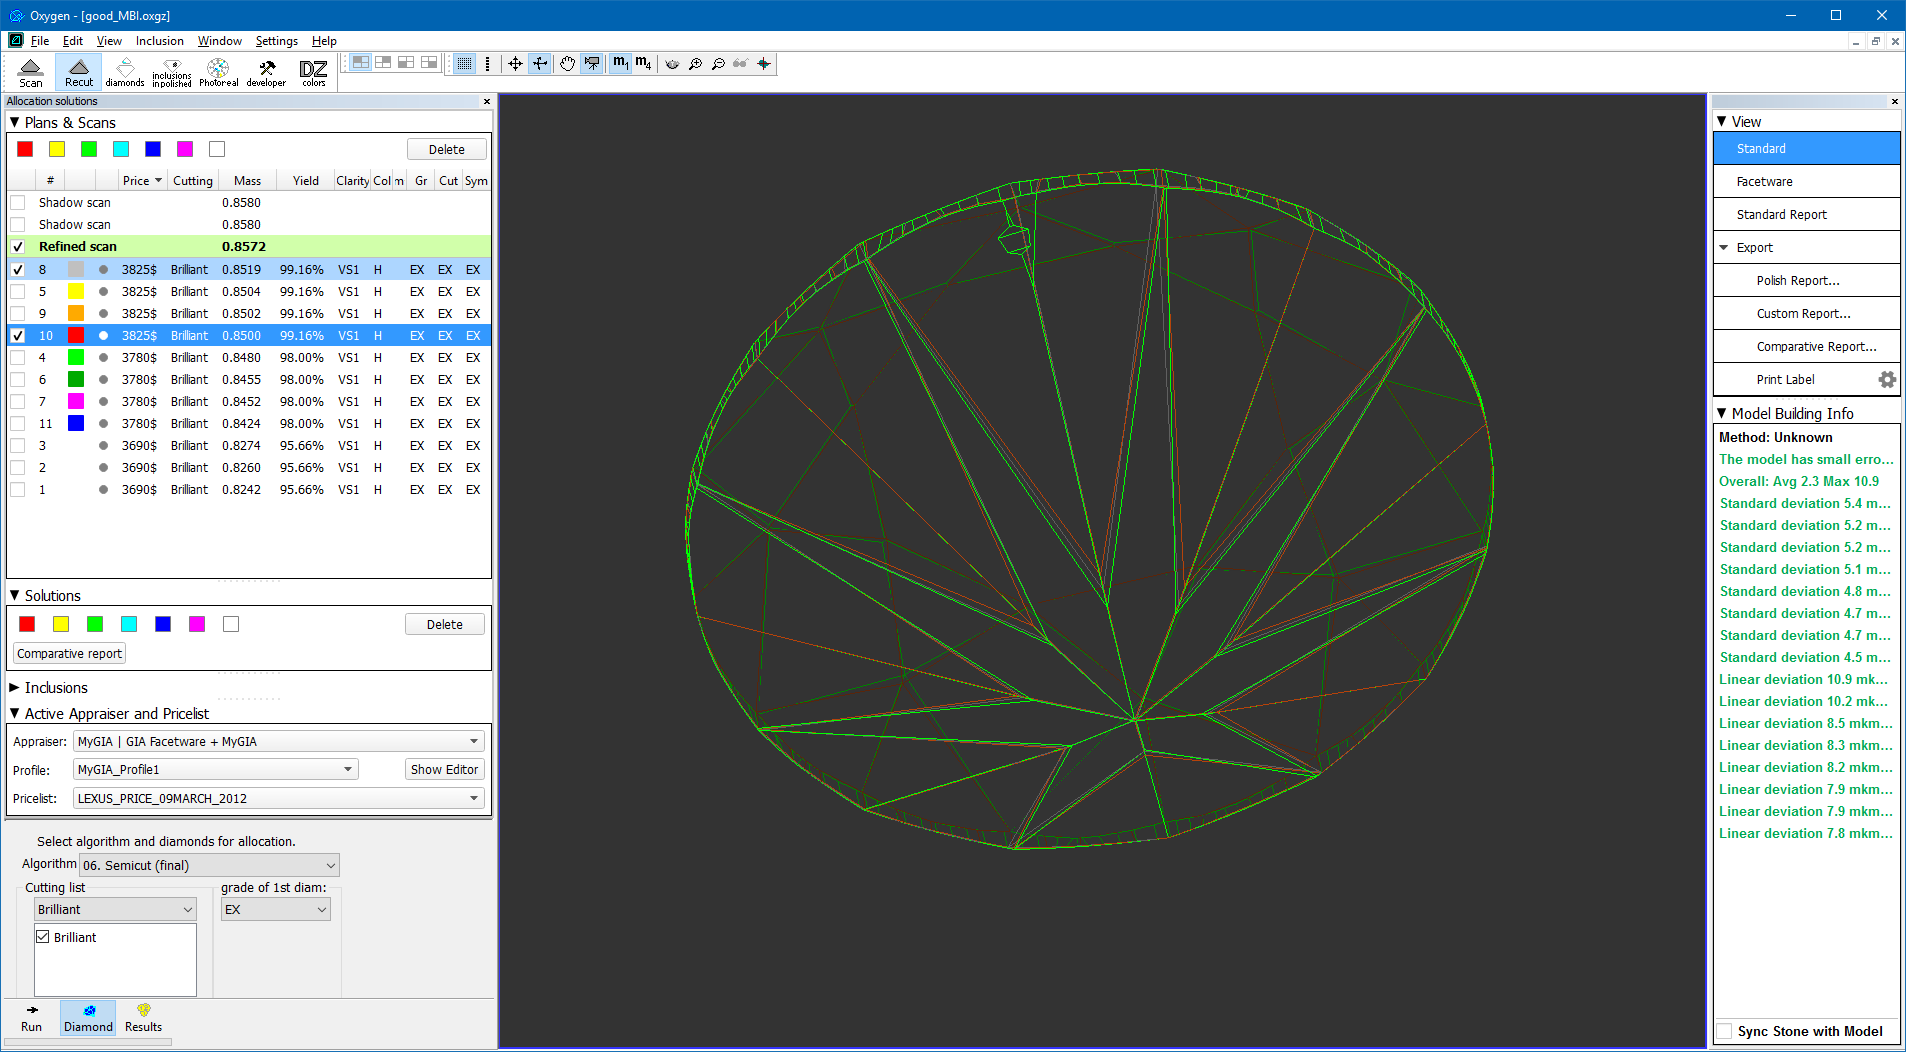
Model Building Info panel displays the building info, which describes the precision of the built model based on calculated difference between the model and the scanned contours.
Normally, any scan would contain its own building info attached, and the information on the Model Building Info panel would update as soon as the scan in is selected in Plans & Scans.
Model building details
Model Building Info panel contains the header referring to the overall model quality, followed by the lines that describe individual problem spots. Lines are color-coded according to the severity of the errors they signify (red-yellow-green, from highest to lowest). Errors in the girdle area are listed separately and colored in gray.
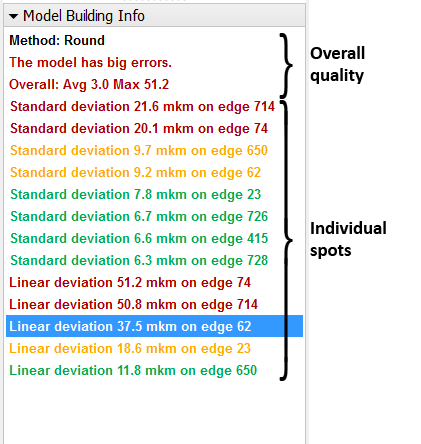
Linear deviation is the maximum deviation of an edge from the corresponding contour.
Standard deviation is the averaged (root-mean-square) deviation of an edge from the corresponding contour.
Visualization features
Each of the lines related to the individual spots in the Model Building Info panel is a link. Pressing such a link while viewing the model in the photo mode would orient the model so as to display the corresponding contour. The matching photo is also shown. The problem edge is highlighted in the same color as the corresponding line in the Model Building Info panel.
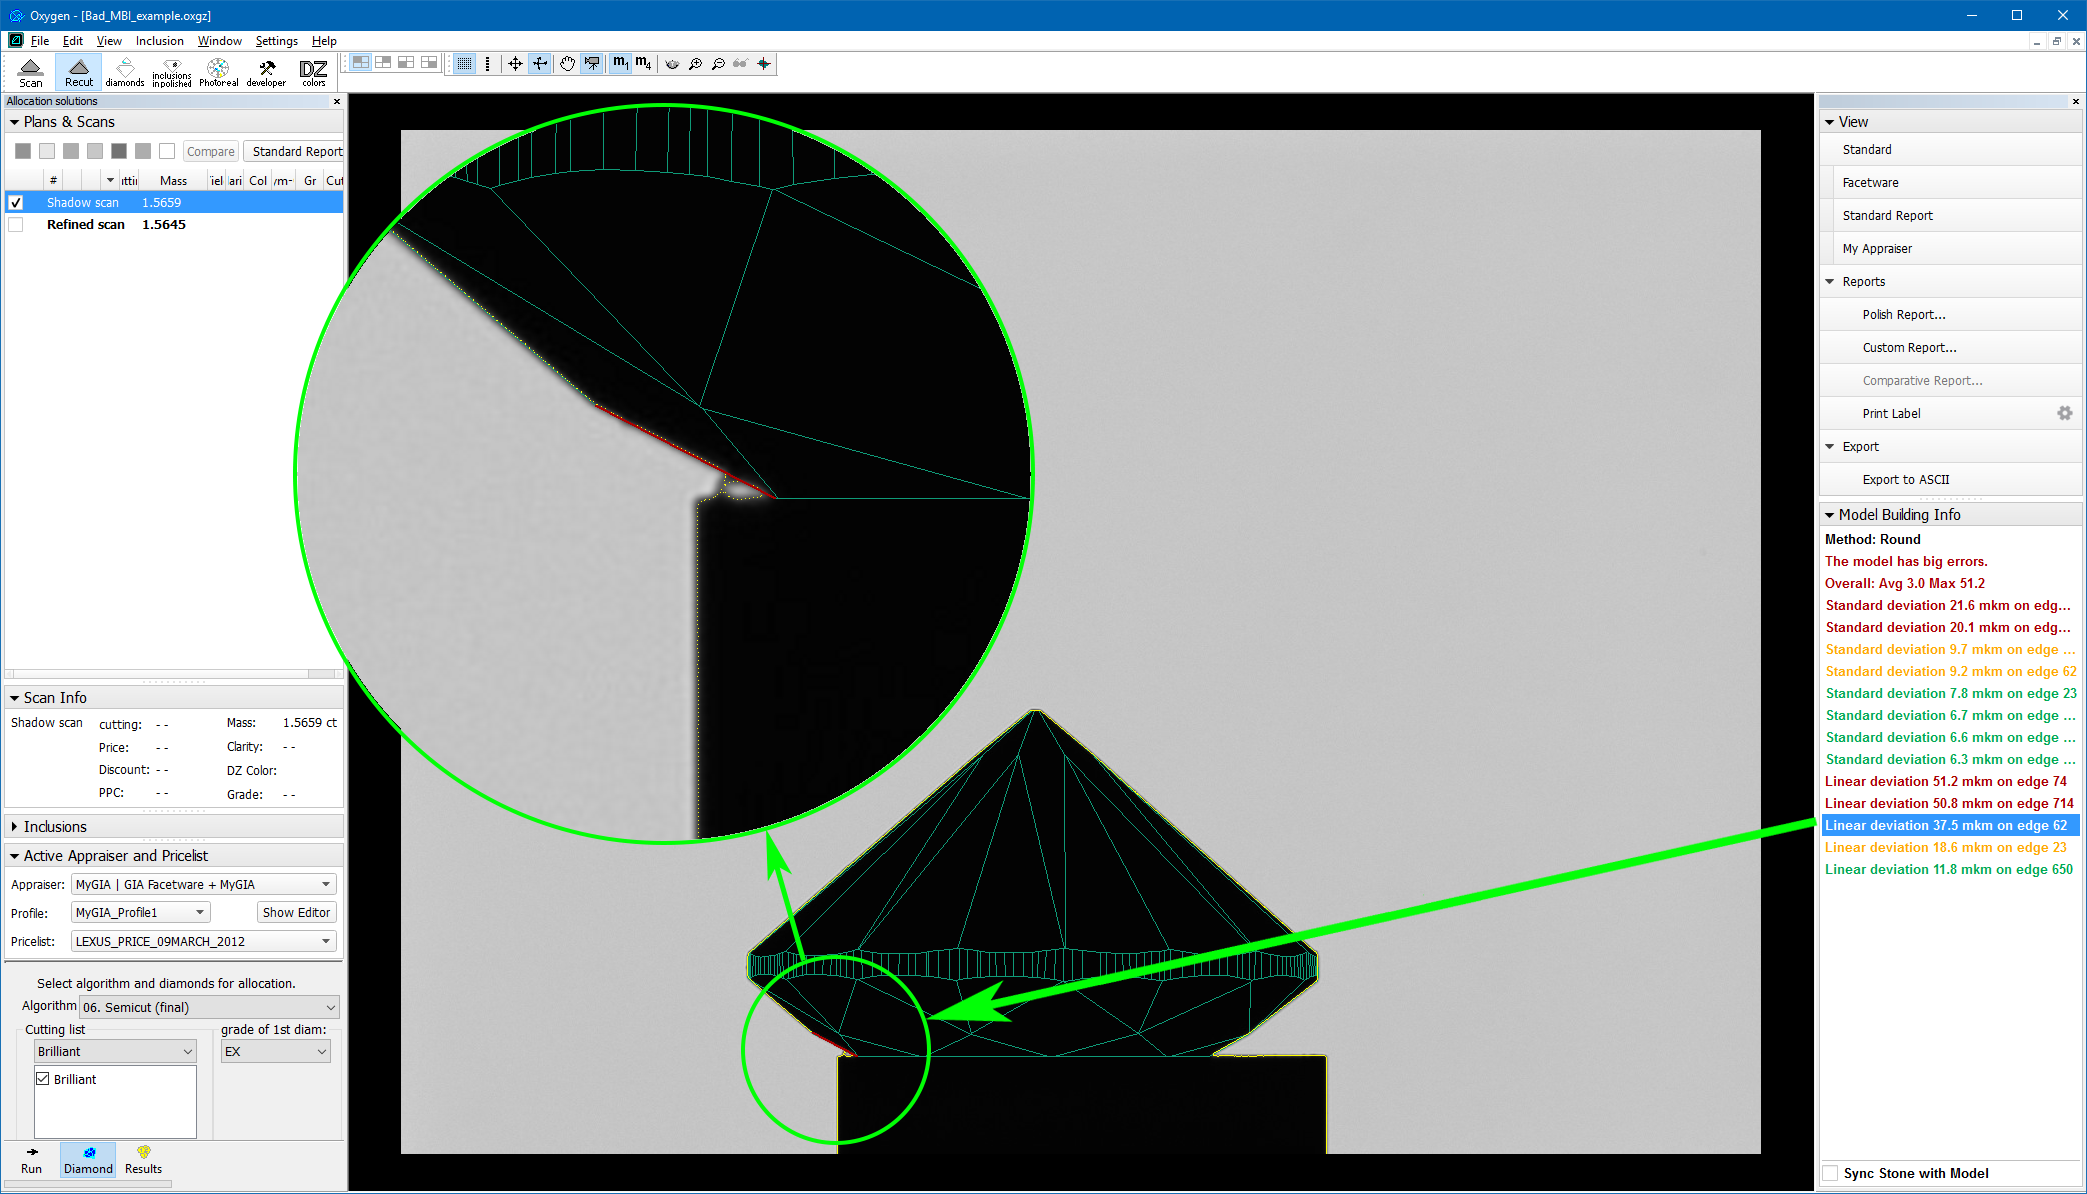
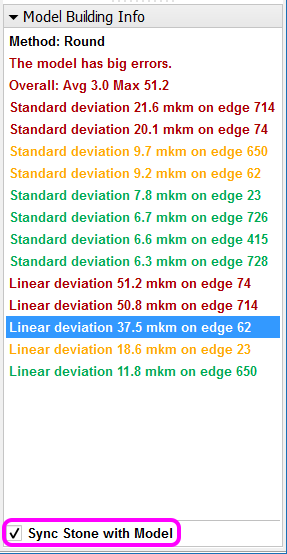
If the photo shows evident signs of dirt, the user is advised to clean the stone and run the scan again. To facilitate this, enable the Sync Stone with Model check box, which makes the stone on the scanner to be oriented simultaneously with the model.
Color encoding
Color encoding of the errors implies the following recommendations:
| Message color | Error rate | Description and recommendation |
|---|---|---|
The model has small errors Standard deviation Linear deviation | Small error | Edge is most probably built properly and there is no need to re-check in a routine study. In case of a high-precision investigation, further analysis may be required. |
The model has medium errors Standard deviation Linear deviation | Medium error | Edge may or may not be built properly. It is recommended to check for the error reason. |
The model has big errors Standard deviation Linear deviation | Big error | Edge is probably built incorrectly because of dust or another reason. Must be checked. |
| Girdle deviation | - | Girdle edge could contain dust. It is strongly recommended to check. Dust on girdle can result in wrong diameter value. |
Each error line is colored according the magnitude of the error it describes. The thresholds of various colors depend on the hardware model, as shown below.
Average model error (Avg) | Standard deviations of edges (Standard deviation) | Maximal deviations of edges (Linear deviation) | |||||||
Scanner\Status | small, mkm | medium, mkm | big, mkm | small, mkm | medium, mkm | big, mkm | small, mkm | medium, mkm | big, mkm |
HP4.4D(1:1) pixel ~ 3.2 mkm | < 3.3 | 3.3 - 6.6 | > 6.6 | < 4.95 | 4.95 - 9.9 | > 9.9 | < 9.9 | 9.9 - 19.8 | > 19.8 |
HP8.5D(1:1) pixel ~ 6.4 mkm | < 4.1 | 4.1 - 8.2 | > 8.2 | < 6.15 | 6.15 - 12.3 | > 12.3 | < 12.3 | 12.3 -24.6 | > 24.6 |
HP17D(1:2) pixel ~ 12.7 mkm | < 5.675 | 5.675 - 11.35 | > 11.35 | < 8.51 | 8.51 - 17.03 | > 17.03 | < 17.025 | 17.025 - 34.05 | > 34.05 |
HP23ProD(1:2) pixel ~ 14.8 mkm | < 6.2 | 6.2 - 12.4 | > 12.4 | < 9.3 | 9.3 - 18.6 | > 18.6 | < 18.6 | 18.6 - 37.2 | > 37.2 |
HP34D(1:4) pixel ~ 25.4 mkm | < 8.85 | 8.85 - 17.7 | > 17.7 | < 13.28 | 13.28 - 26.55 | > 26.55 | < 26.55 | 26.55 - 53.1 | > 53.1 |
HP47ProD(1:4) pixel ~ 29.8 mkm | < 9.95 | 9.95 - 19.9 | > 19.9 | < 14.93 | 14.93 - 29.85 | > 29.85 | < 29.85 | 29.85 - 59.7 | > 59.7 |
Models management
Management of models on the Plans & Scans panel has changed significantly. The concept of "Active Scan" is made obsolete.
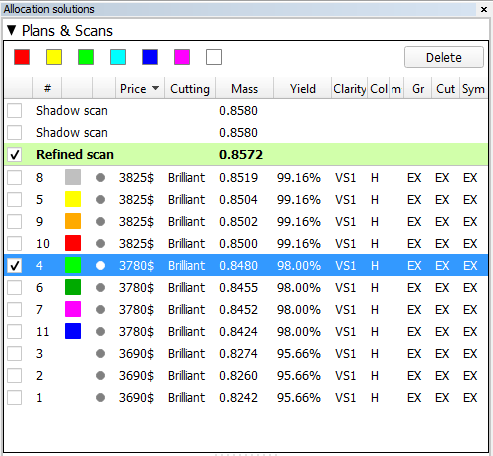
It is possible to have multiple Shadow and Refined scans simultaneously. They stay in the list on equal terms with the other models.
Main Scan
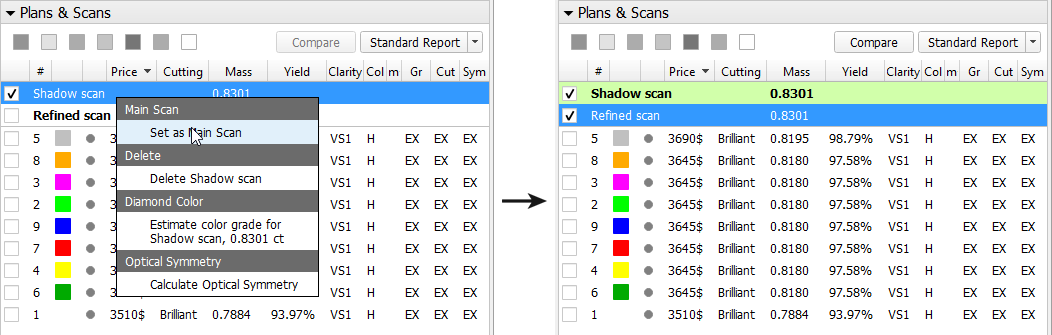
One of the scans is considered the Main Scan. Its name in the list is emphasized with bold font and (only when selected together with another model) green background.
All manual edits scans take the current Main Scan model as the initial approximation and produce new Refined scans.
Recut solutions search uses the current Main Scan model as the original.
Any scan can be made the Main Scan by right-clicking it in the list and selecting Set as Main Scan:
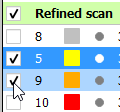
Selecting models
Any model can be selected for viewing. Moreover, any combination of models may be selected simultaneously and viewed together in different colors (assigned automatically). For more details on selection interface, see below.
When a recut solution is selected, the Main Scan is selected too (unless the user deselects it explicitly by unchecking its check box).
The last selected model is designated current model and marked with dark blue background.
The selection behavior is summarized in the table below:
| Scan (including the Main Scan) | Solution | |
|---|---|---|
| Click | If this is the current model: does nothing. Otherwise: selects it, makes it current, and deselects the rest. | If this is the current model: does nothing. Otherwise: selects it, makes it current, selects also the Main Scan, and deselects the rest. |
Ctrl + Click |
If this is the current model: does nothing. Otherwise: toggles selection of this model, not resetting the current and not affecting the rest. | |
| Shift + Click | If this is the current model: does nothing. Otherwise: selects all models in the list between this and the current model (inclusive), and makes this model current. | |
| Arrow keys (Up / Down) | Selects the model one step up or down in the list from the current one, makes it current, and deselects the rest. | Selects the model one step up or down in the list from the current one, makes it current, selects also the Main Scan, and deselects the rest. |
Any model except the Main Scan (see above) can be deleted from the list by pressing Delete on the keyboard or selecting Delete model in the context menu.
Default Precision
Now HPOxygen stores the most recent precision setting for each particular cutting type. The stored precision setting is applied automatically whenever the cutting type selection is changed. In a typical workflow it is recommended to scan round brilliants at 400 contours and Princess cuts with 800 contours, since the latter cutting contains more facets with nearly similar orientation which require higher precision to resolve.
 | 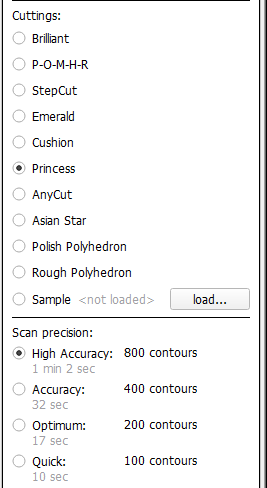 |
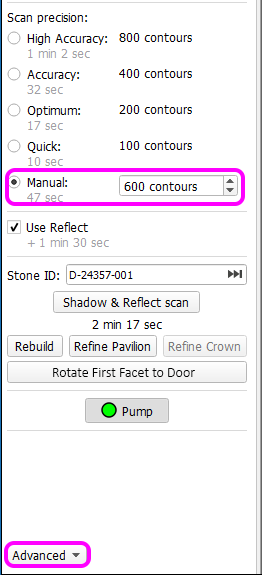
Note that you may also enter custom number of contours. This requires switching the panel to Advanced mode with the dropdown switch down below:
Rotate first facet to the door
In the HPOxygen Shadow Scanner hardware configuration, the Scan & Build panel contains a button Rotate First Facet to Door. When pressed, it would orient the stone in the scanner so as to face the operator with the first facet, i.e. the one which is set to zero azimuth in the Polish report, thus facilitating further operations (marking the facet, etc).
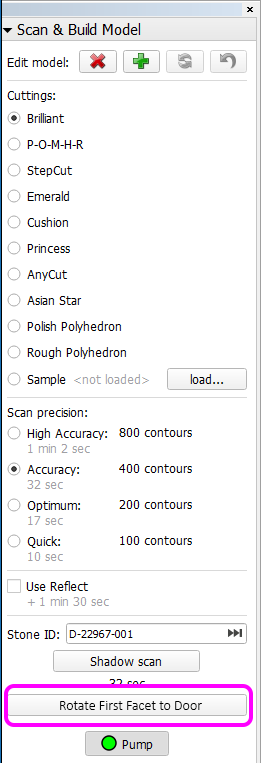
The button is initially inactive and becomes enabled after scanning.
ASCII export
To export a model in ASCII format, select the model in Plans & Scans and press the Export to ASCII button on the right panel.
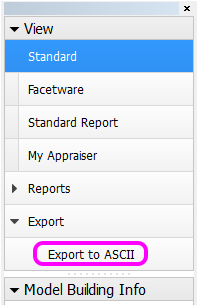
After you specify the location, a file with the model will be saved:
Green Frame
In Scanner mode a green frame is shown which denotes the viewing field limits of the scanner.
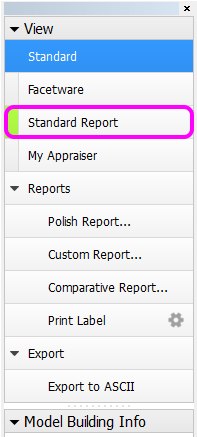
Reports
Standard Report
Standard report is a new kind of report. Unlike other reports, it does not rely on external programs for viewing, and opens up in a special panel within HPOxygen.
To display the Standard report, press Standard report on the right pane.
Standard report contains the GIA grades and parameter values rounded by common rules. The values rounded according to GIA rules will be added in the future versions.
Groups of parameters are color-coded for easier reading.
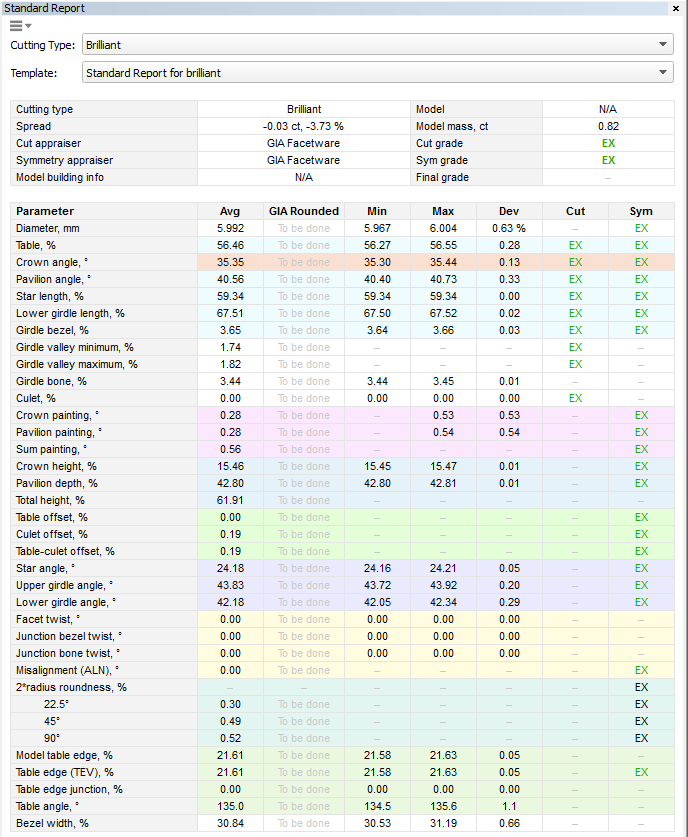
Cutting type and template for the report may be selected (press  near the top of page if the selectors are hidden). The templates are HTML files stored at
 %Documents%\All Users\OctoNus Software\StandardReportTemplates\. By copying and editing the existing files, you may create custom templates, containing the parameters of your choice, with any formatting and even interactive elements.
Export Report Data (INI Export)
It is possible to export report values and pictures by selecting the INI Export report type in the Polish report window and pressing Make report.
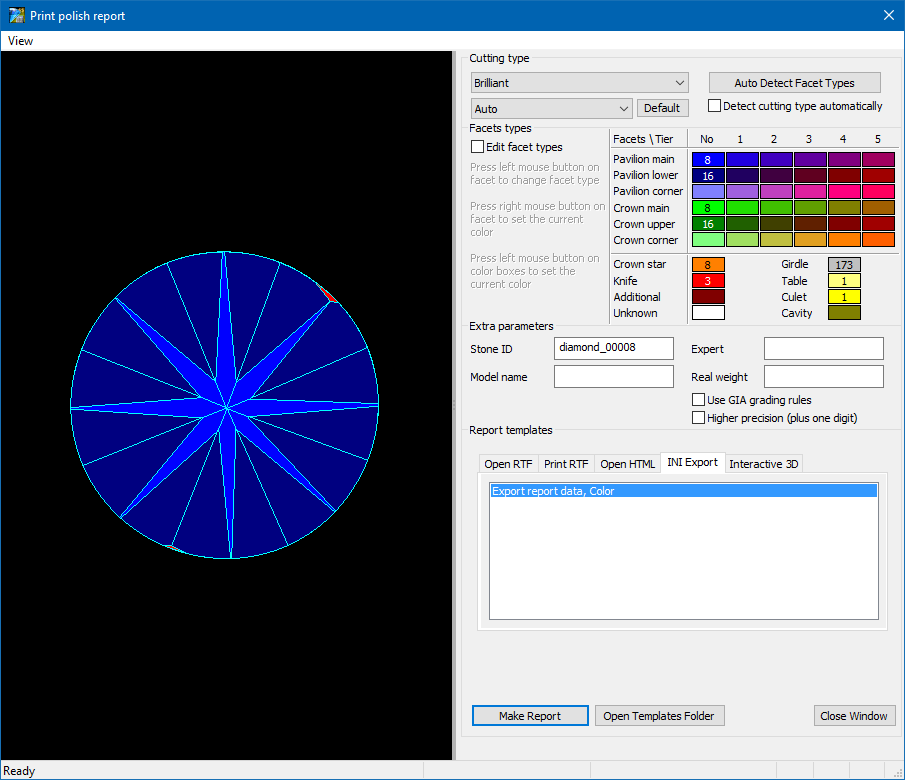
Details of the report are specified in a template. Initially, there is only one template. You may create more templates with custom versions of plain text reports by manually editing the *.ini files. For your convenience, the *.ini file that has been just used opens up in the editor after report creation:
The meaning of the most essential parameters in the *.ini file is explained below.
| Parameter | Example value | Meaning |
|---|---|---|
VisibleName | Export report data, Color | Name of the report template as it appears in the Polish report window |
CuttingType | ALL | Cuts for which the report should be applicable |
Executable | %WinDir%\Notepad.exe | Path to the editor used to open the *.ini file after report creation |
ParameterValues | %MyDocuments%\OctoNus Software\Export Reports\report.txt | Path for saving the report |
The remaining lines in the *.ini file refer mostly to pictures. Each picture comes in two formats, WMF and PNG. They are saved to the same location as the report itself.
The report is a plain text file and can be opened in any text editor:
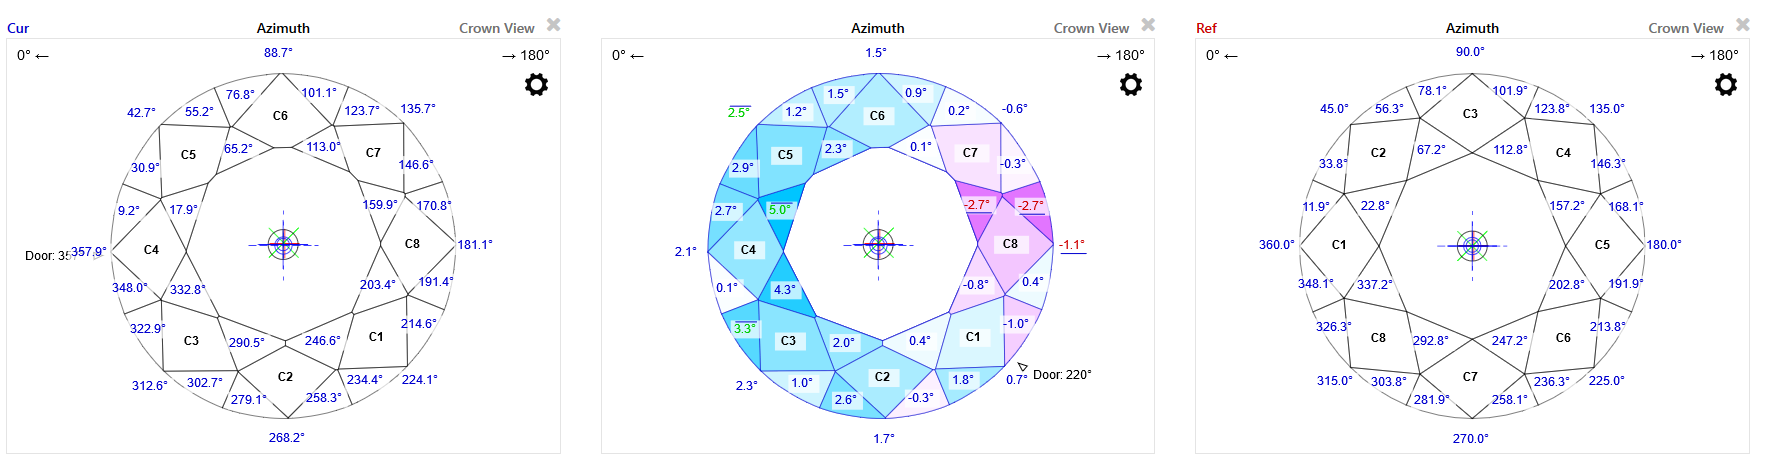
Comparative reports
Facet matching algorithm in the Comparative reports has been significantly improved.
For the ease of comparison, the numbering of facets of the both reference and current models in the comparative report is retained the same as in their corresponding individual polish reports.
Compare and Report buttons
Plans & Scans panel is equipped with new functionality:
- Compare button initiates the comparative report.
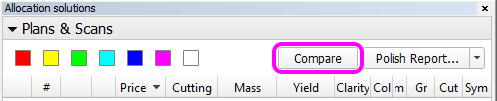
- Polish report button initiates the polish report dialog.
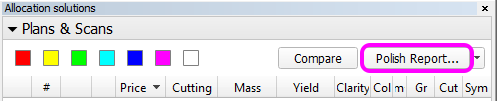
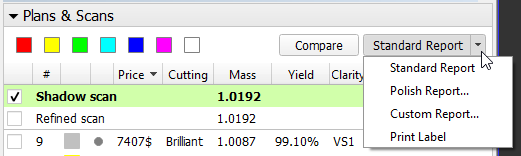
Note that the latter button is multi-optional. The dropdown list to the right provides a selection of options: Standard Report, Polish Report, Custom Report, and Print Label. Once selected, the option persists until the program is closed or a new model is opened.
Brilliant 10x
A ten-fold analog of round brilliant is added as a sub-type of cutting. You may find it in the Polish Report window, once the cutting is set to Brilliant.
Culet center for step cuts
Culet center calculation algorithm for steps cuts was changed so as not to get affected by possible extra facets on the culet.
Girdle center for Cushions
Girdle center calculation for Cushions was changed to make it consistent with that for Oval.
Smart Recut
Presets
Smart Recut presets are now ordered by symmetry.
A preset is a collection of geometrical limitations which are imposed on the solution. Each recut solution seeks a balance between retaining the most mass of the stone and achieving the highest possible symmetry. The presets, in effect, assign different weights to the geometrical requirements, thus shifting that balance to a varying extent. Below is the list of all presets, ordered from the most relaxed to the strictest:
 MaxMass
 LowOpticalSymmetry
 ExtendedLimits
 Standard
 NormalOpticalSymmetry
 MediumOpticalSymmetry
 HighOpticalSymmetry
 UltraSymmetry
The preset with the most relaxed limitations is called MaxMass, for it should be expected to produce the solution of maximal mass (but probably lacking in symmetry and other qualities).
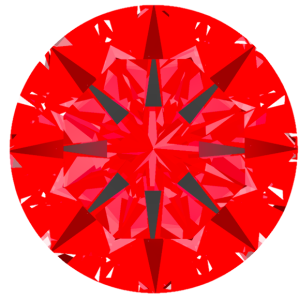
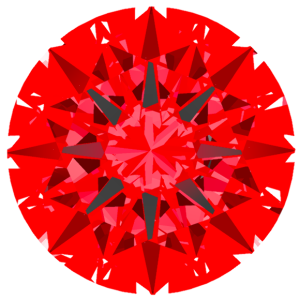
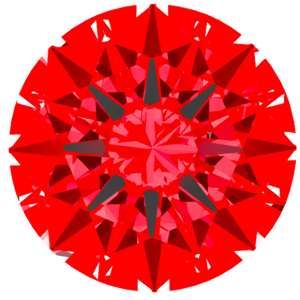
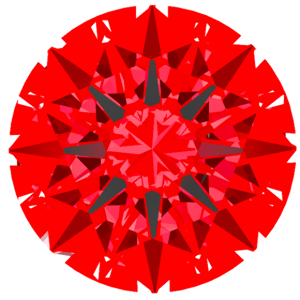
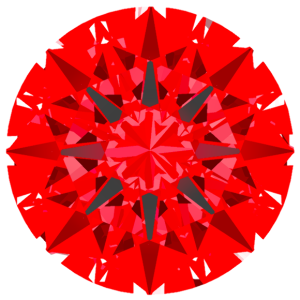
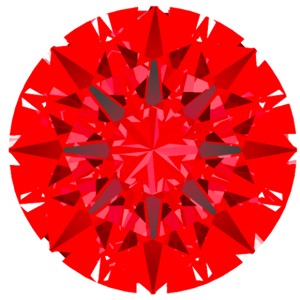
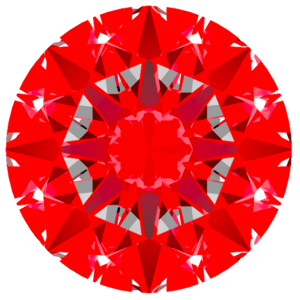
Consider these two sets of Smart Recut solutions together with their photorealistic images. Each set is obtained from one stone and ordered by decreasing mass.
First set (Smart_Recut_example_1.oxgz):

Solution # | - | 7 | 6 | 9 | 8 | 4 | 5 | 2 | 3 | 1 |
|---|---|---|---|---|---|---|---|---|---|---|
| Preset | - | MaxMass | LowOpticalSymmetry | ExtendedLimits | Standard | NormalOpticalSymmetry | MediumOpticalSymmetry | HighOpticalSymmetry | UltraSymmetry | - (13. Single-M) |
| Mass | 4.3900 | 4.2596 | 4.2540 | 4.2493 | 4.2373 | 4.2339 | 4.2298 | 4.2274 | 4.2089 | 4.1069 |
| Optical symmetry | - | 2.47 | 4.66 | 5.29 | 6.66 | 7.76 | 7.47 | 6.67 | 8.93 | 8.22 |
| Picture |
|
|
|
|
|
|
|
|
|
|


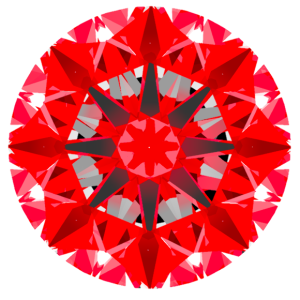

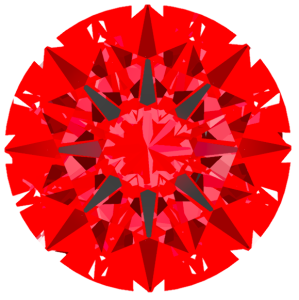
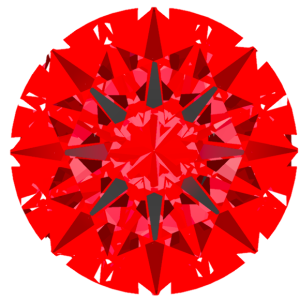
Second set (Smart_Recut_example_2.oxg):
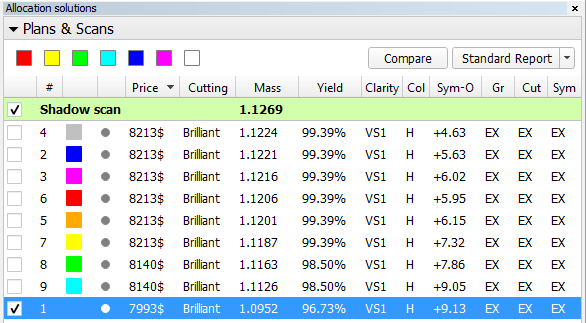
| Solution # | - | 7 | 6 | 9 | 8 | 4 | 5 | 2 | 3 | 1 |
|---|---|---|---|---|---|---|---|---|---|---|
| Preset | - | MaxMass | LowOpticalSymmetry | ExtendedLimits | Standard | NormalOpticalSymmetry | MediumOpticalSymmetry | HighOpticalSymmetry | UltraSymmetry | - (13. Single-M) |
| Mass | 1.1269 | 1.1224 | 1.1221 | 1.1216 | 1.1206 | 1.1201 | 1.1187 | 1.1163 | 1.1126 | 1.0952 |
| Optical symmetry | - | 4.63 | 5.63 | 6.02 | 5.95 | 6.15 | 7.32 | 7.86 | 9.05 | 9.13 |
| Picture |
|
|
|
|
|
|
|
|
|
|

Fixed table
Smart Recut algorithm seeks to keep the table plane of the model unchanged, unless the solution found deviates from the original by a considerably wide margin.
Speed up
Smart Recut algorithm is reworked and its speed improved by a factor of 1.3 - 1.7.
Sample Base 1 (no cavities):
| SmartRecut Version | Avg. Time, sec |
|---|---|
| 1.10.1.10 | 49.36 |
| 1.10.3.2 | 37.96 |
Sample Base 2 (with cavities):
| SmartRecut Version | Avg. Time, sec |
|---|---|
| 1.10.1.10 | 106.69 |
| 1.10.3.2 | 61.71 |
Computer configuration:
| Processor | Intel( R ) Core(TM) i7-4770K CPU @ 3.50GHz, Frequency: ~3497 MHz. |
|---|---|
| Logical processors | 8 |
| Operating system | Microsoft Windows 10 Pro Version 10.0.10586 Build 10586 |
| Total Visible Memory Size | 32710 MB |
| Free Physical Memory | 28698 MB |
Interface
Panels management
Right panel is reorganized to contain the following groups of elements:
|
|
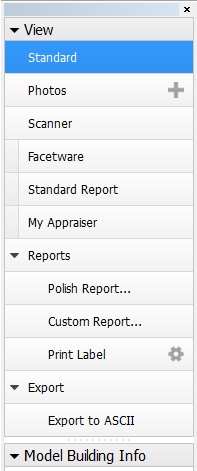
Buttons that control additional panels (Facetware, Standard report, My Appraiser) have an indicator to the left which turns green when the corresponding panel is shown.
General Settings
Settings GUI dialog is added. It is accessible by clicking Settings in the main menu and then selecting General settings.
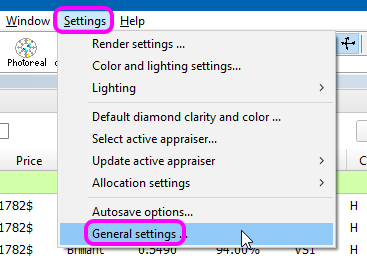
Currently the menu contains only one tab (Stone Properties). It affects the details of entering the auxiliary data when scanning stones.
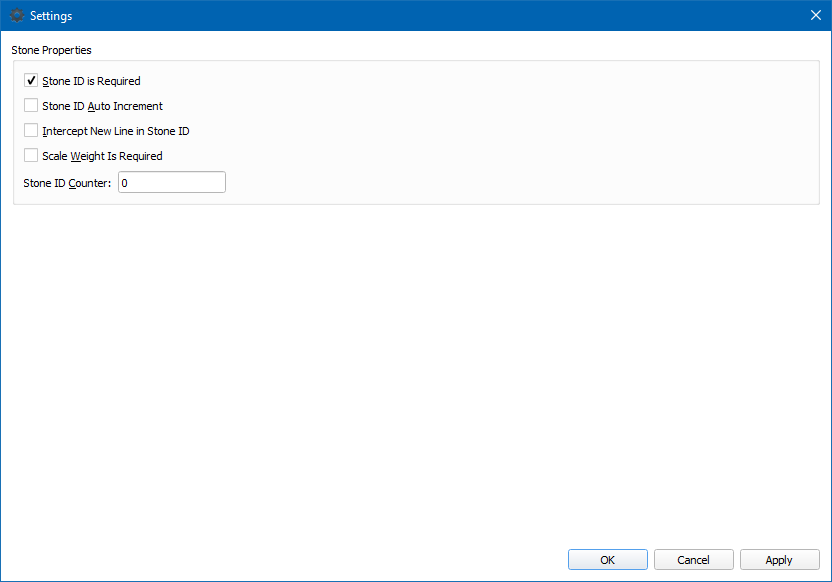
The following options are available:
| Option | Meaning | Default state |
|---|---|---|
| Stone ID is required | Enables the Stone ID input field. | On |
| Stone ID Auto Increment | Makes the Stone ID field auto-increment upon scanning a new stone. | Off |
| Intercept New Line in Stone ID | Strips the new line characters from the Stone ID field (useful if it is filled in with the help of a bar code scanner). | Off |
| Scale Weight is Required | Enables the Scale Weight input field. | Off |
0 Comments