Interface
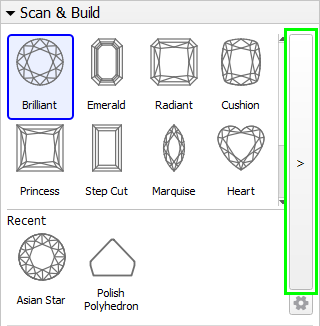
There's a whole new GUI for scanning cut shape selection:
Cut Shape selection dialog Favorite cuts Recently selected cuts 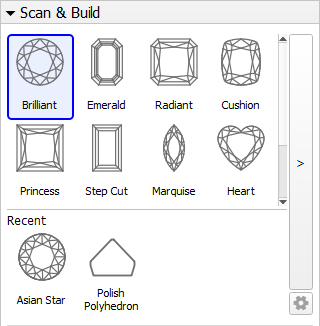
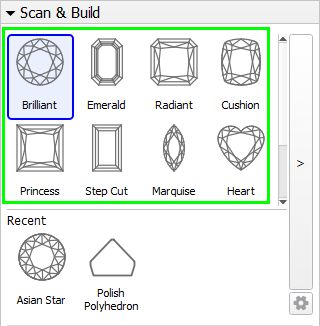
There are two groups of cuts in the main dialog:
Favorites that contain a user-configured set of cuttings in a specific order.
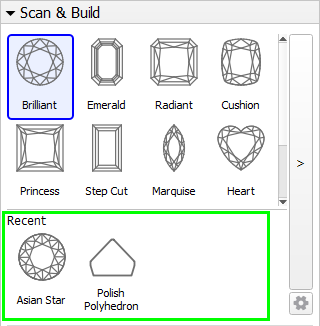
Recent cuttings that were used by the operator, and are not present on the Favorites group.
There are also two buttons that open additional configuration dialogs:
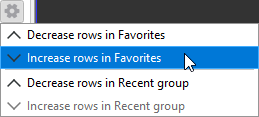
The Gear button allows to select the number of icon rows in the dialog using a pop-up menu.
The '>' button opens a configuration dialog that allows the user to configure and arrange cutting in the Favorites group, load custom Sample files (.dmc, .mme, .gem) for scanning with a sample, and add those sample to the Favorites group. This dialog can also be used to quickly select a cutting or a sample that is not currently present in either Favorites or Recent groups.Button Configuration dialog 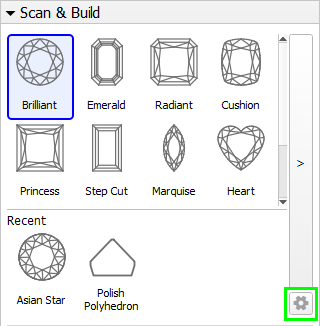
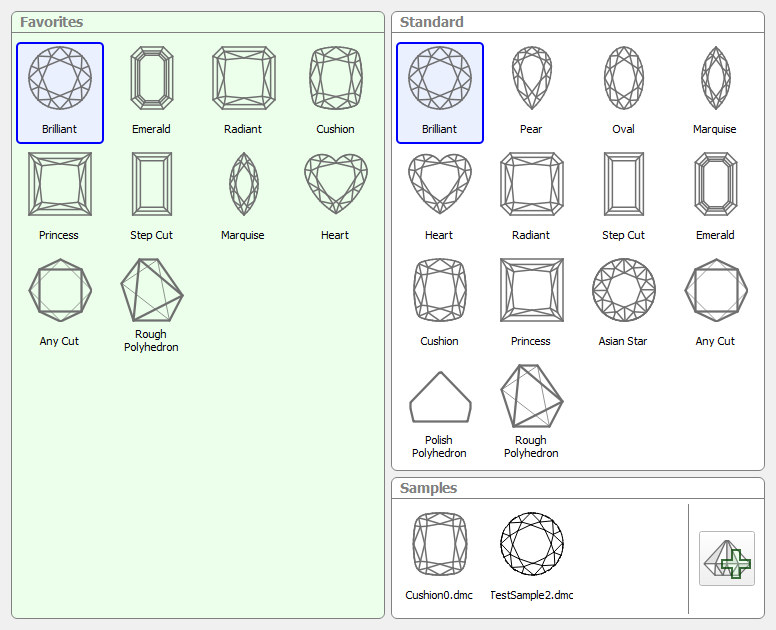
In the main configuration dialog you can add items to the Favorites group or rearrange items within the group simply by dragging & dropping items in the dialog.
To add samples, first load them using the 'Add Sample' button.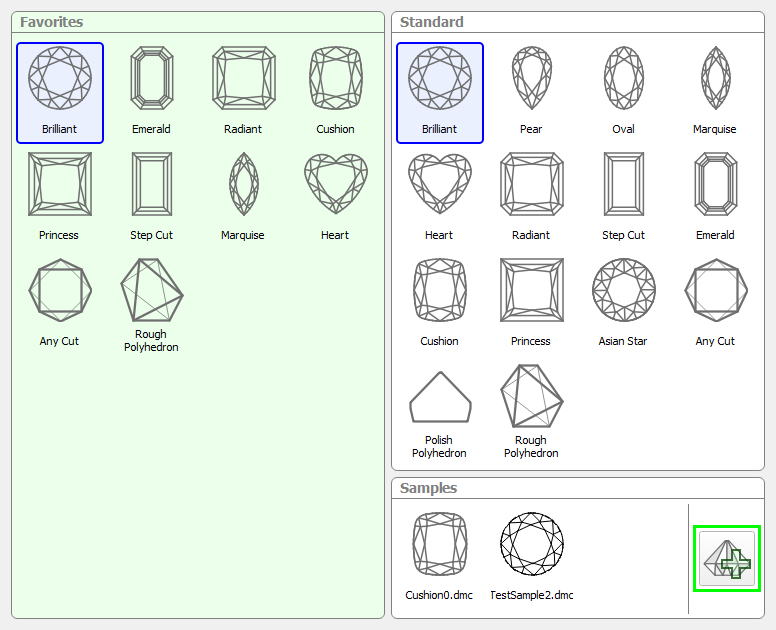
After the samples are loaded, you can drag & drop them one by one to the Favorites group: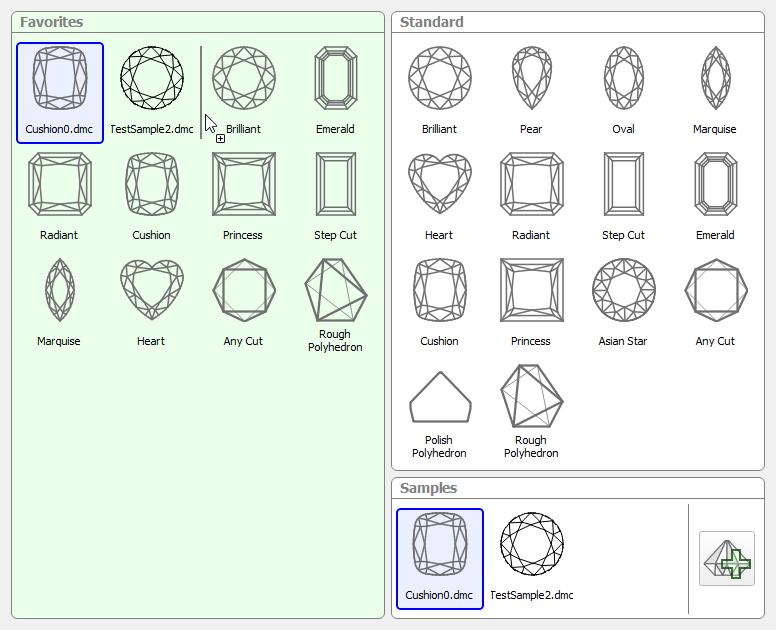
To remove unnecessary items from the Favorites group or to remove unused samples form the Samples group, hover the mouse cursor over the item you want to remove and press the 'X' button in the top right corner of the item: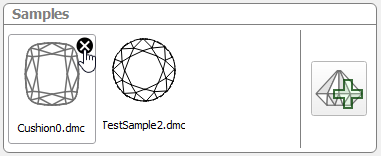
If you want to select a cutting without adding it to the Favorites group, simply open the configuration dialog using the '>' button as decribed above, and select the cutting directly in the dialog. The cutting will then appear in the Recent group on first place (if it was not present in Favorites group).
Undo (Ctrl + Z shortcut) and Redo (Ctrl + Y shortcut) buttons are available at the bottom of the dialog to restore accidentally deleted cuttings: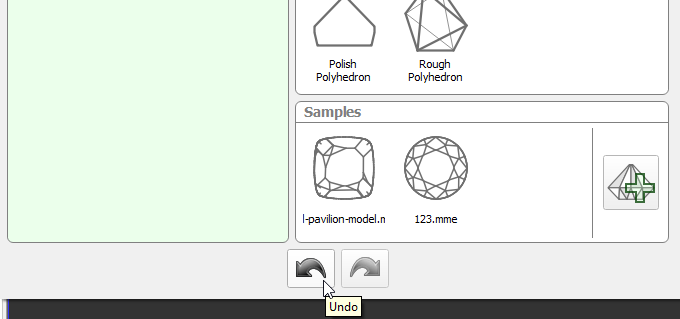
- It is now possible to restore previously saved application window position on application launch:
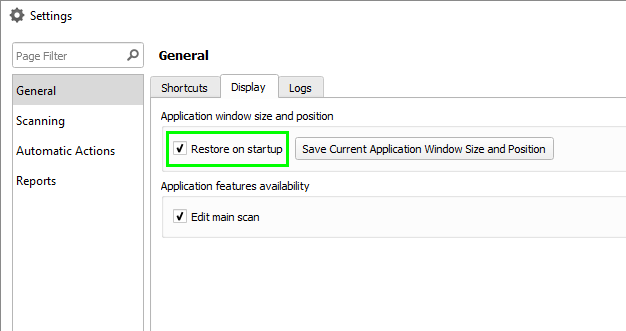
Simply arrange window size and position, go to Settings → General Settings menu, select General section and Display tab and click on Save Current Application Windows Size and Position button.
With Restore on startup check-box enabled program will start with remembered size and position: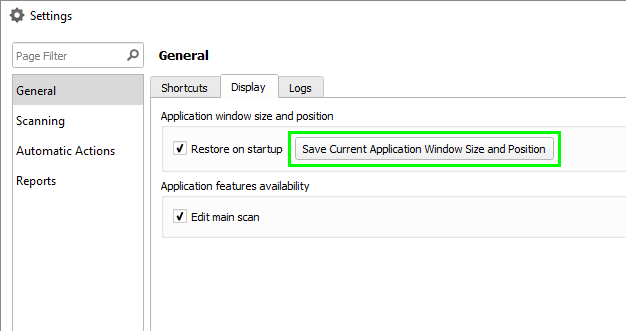
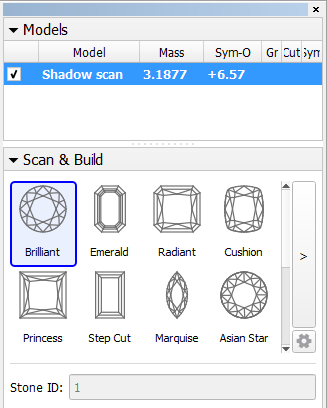
Model Editing controls can now be hidden (disabled) in the Settings dialog:
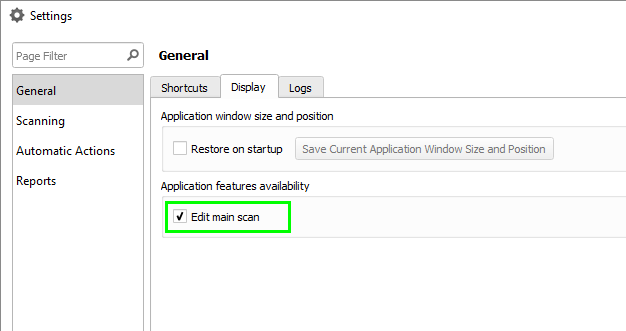
Edit main scan: enabled Edit main scan: disabled 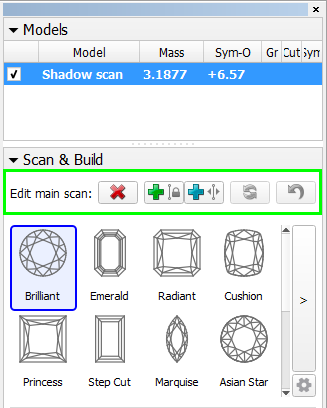
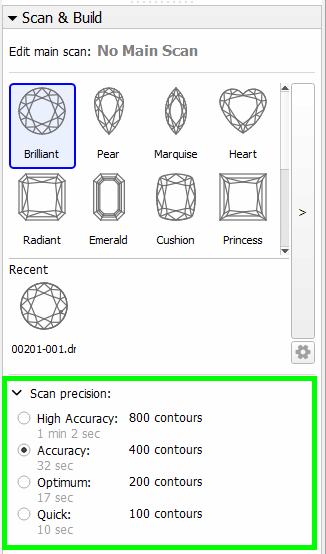
Scanning precision settings are moved to a collapsible element and are hidden by default. Press the 'San precision' title to expand the precision settings group:
Collapsed, click title to expand Expanded 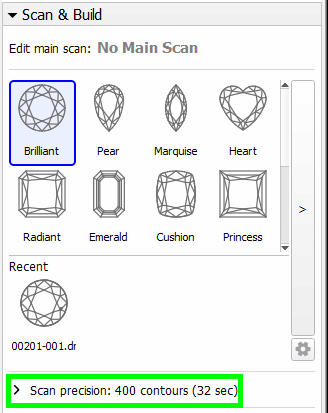
Import
We made it possible to import scanned models (Main Scan) for other files along woth solutions and inclusions (if present and supported by the file format).
Please not that only one scanned model can be imported from files containing multiple scanned models, and that is the Main Scan.
To import data from another project, select File → Import...: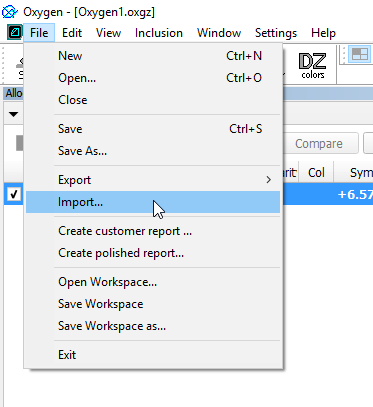
In the Import dialog, select the Recognition option if you want to align the basis of the imported model. This is useful for importing models of the previous gemstone polishing stages:
Then, select which items you wold like to import. Please note that depending on the format and contents of the file being imported, some of the options may not be available. For instance, in this case the file being imported has no Inclusions or Cavities.
Press OK to proceed with importing the models or Cancel to reject the operation.
Bugfixes
- Fixed report symmetry axes calculation for Round cut with symmetry other than 8x
- Fixed calculation of deviation from ideal azimuth for 10x symmetry Round cut
- Improved automatic Oval facet types detection
- Model basis Recognition on data import was significantly imporoved
- Autosave timer is now reset when a new scan is performed
- Fixed a visibility bug in inclusions reporojection over photos
Add Comment