...
- Set the object to be scanned
- Set the Scanning zoom or Factor
- Select Cameras for scanning
- Push the Start selection button
- Select the scanning region via joystick or others tools. The selected area is represented by a green frame in the view area
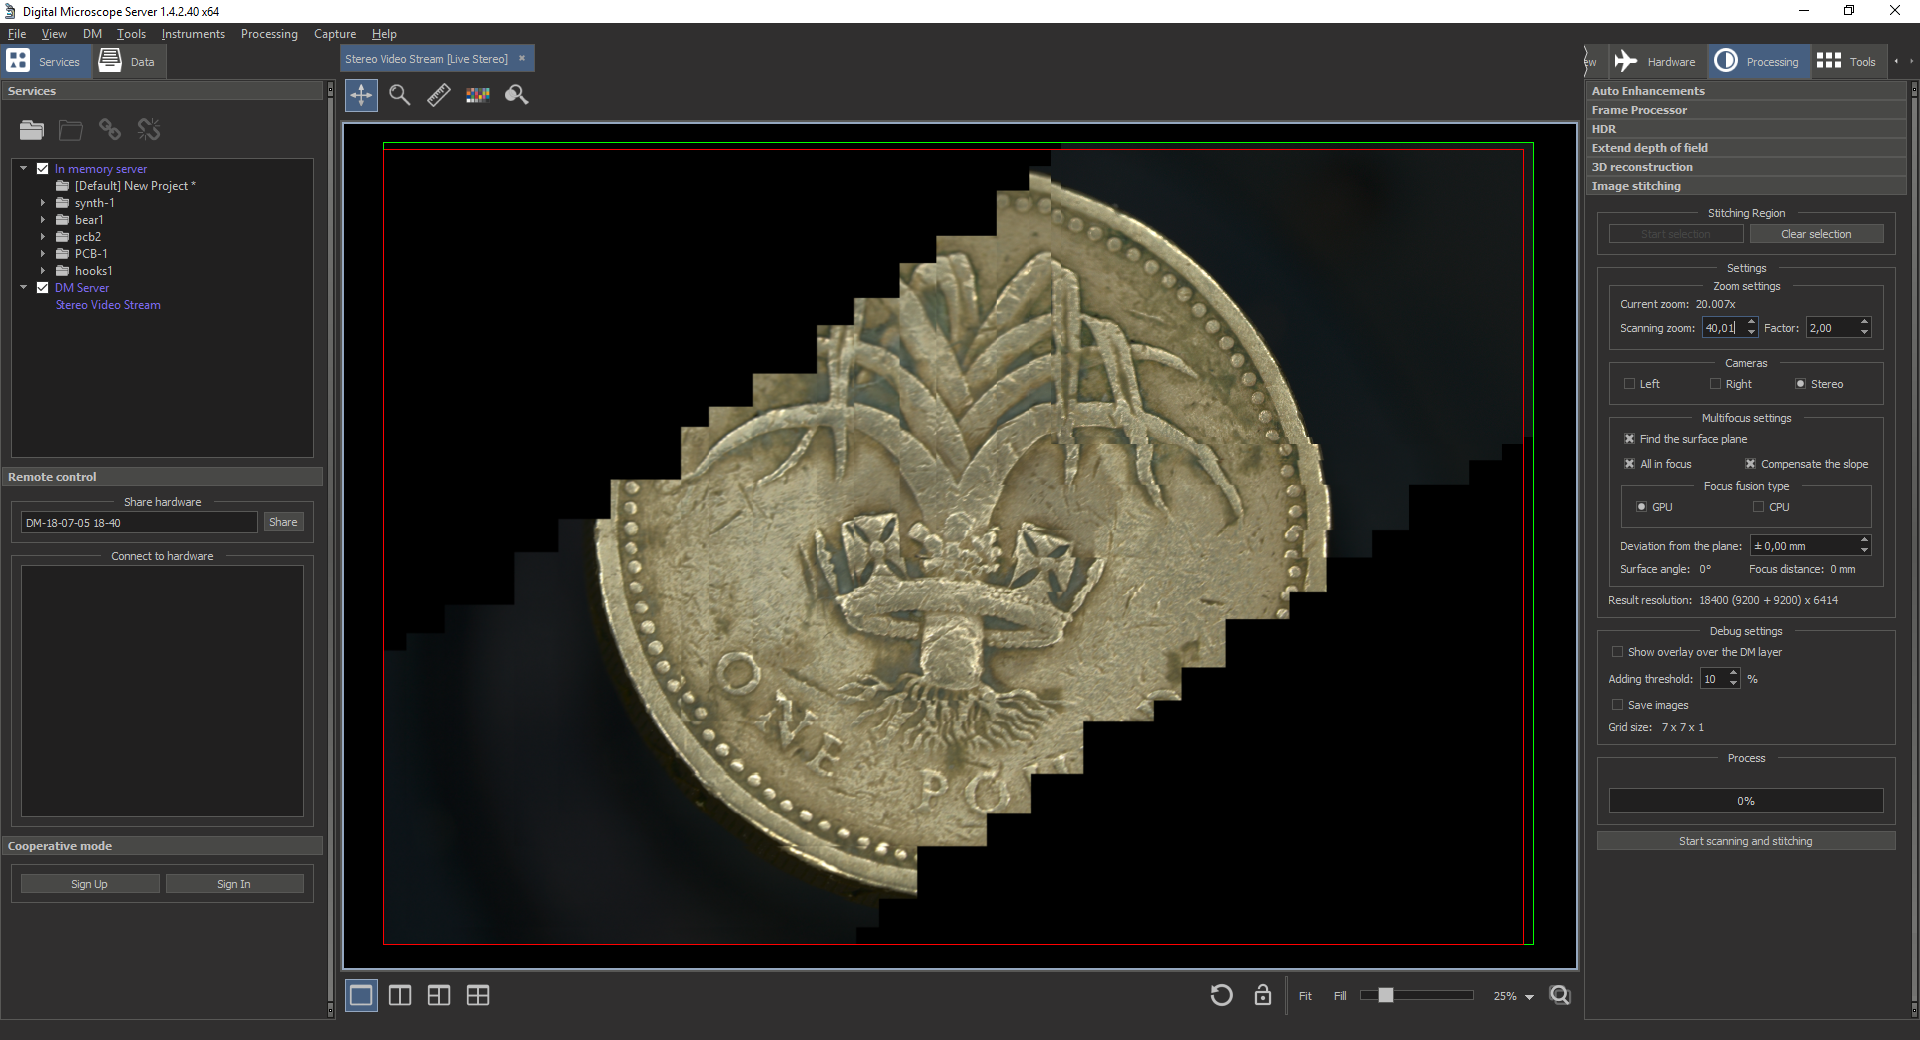
- Set the scanning zoom and focus to the object surface plane in the center of selected area. Change zoom back
- Set all the Multifocus settings you need
- If something is wrong, reset the selected area with the Clear selection button. Otherwise, start the scan with the Start scanning and stitching button
- Wait for the process to finish
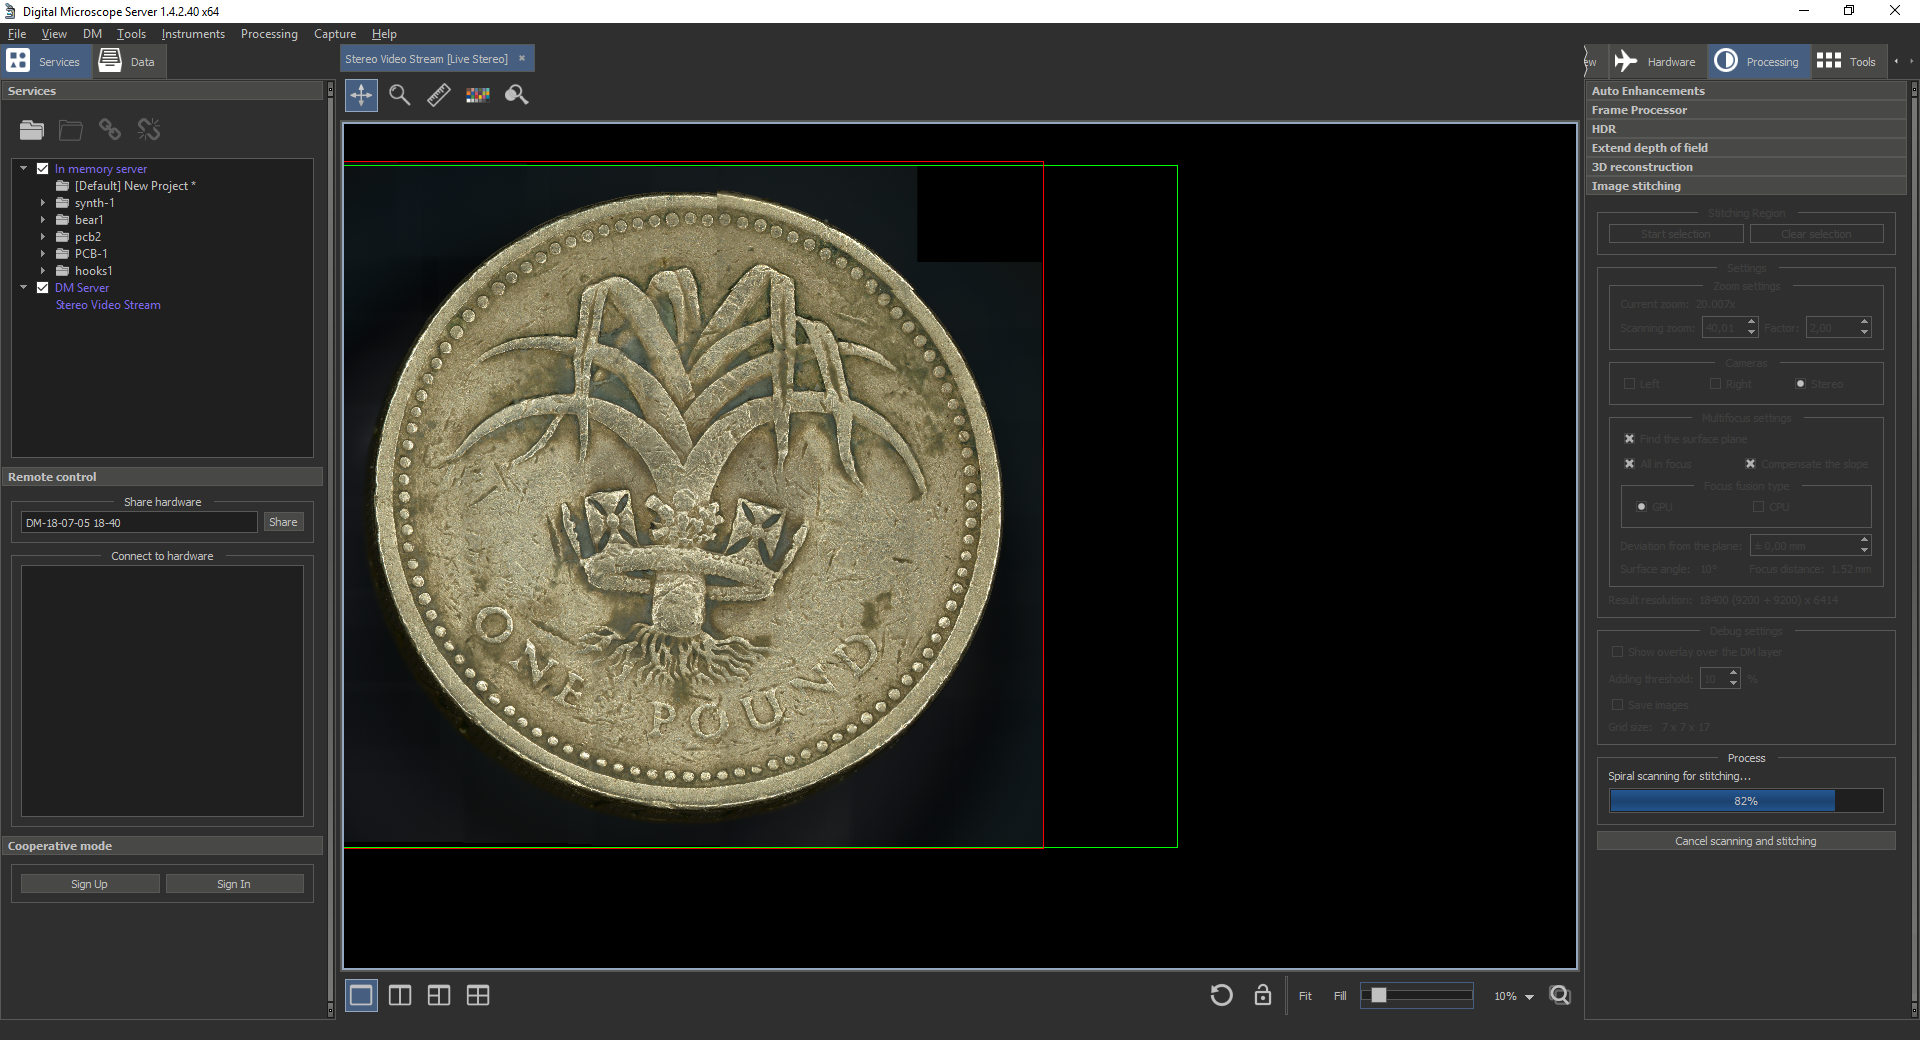
If everything is successful, new stitched image data will appear in the Services list. This data can be opened for viewing or saved to disk
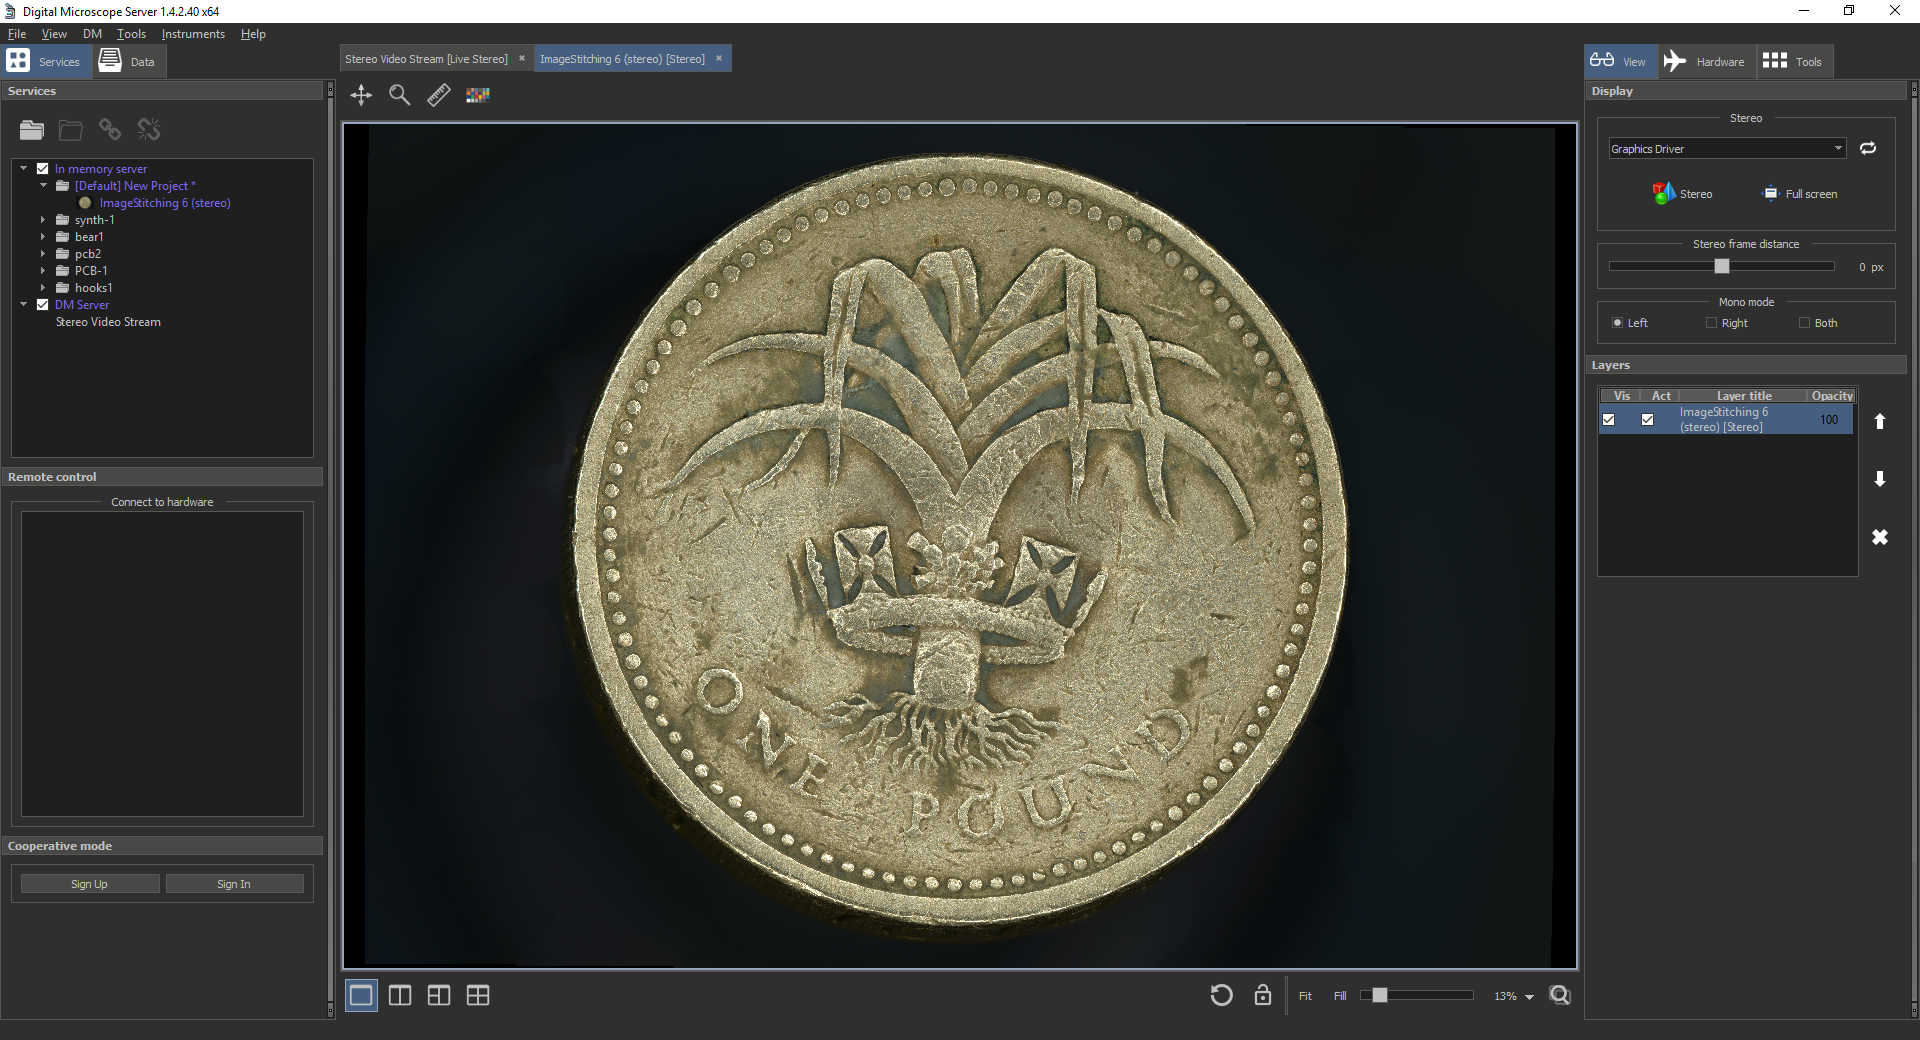
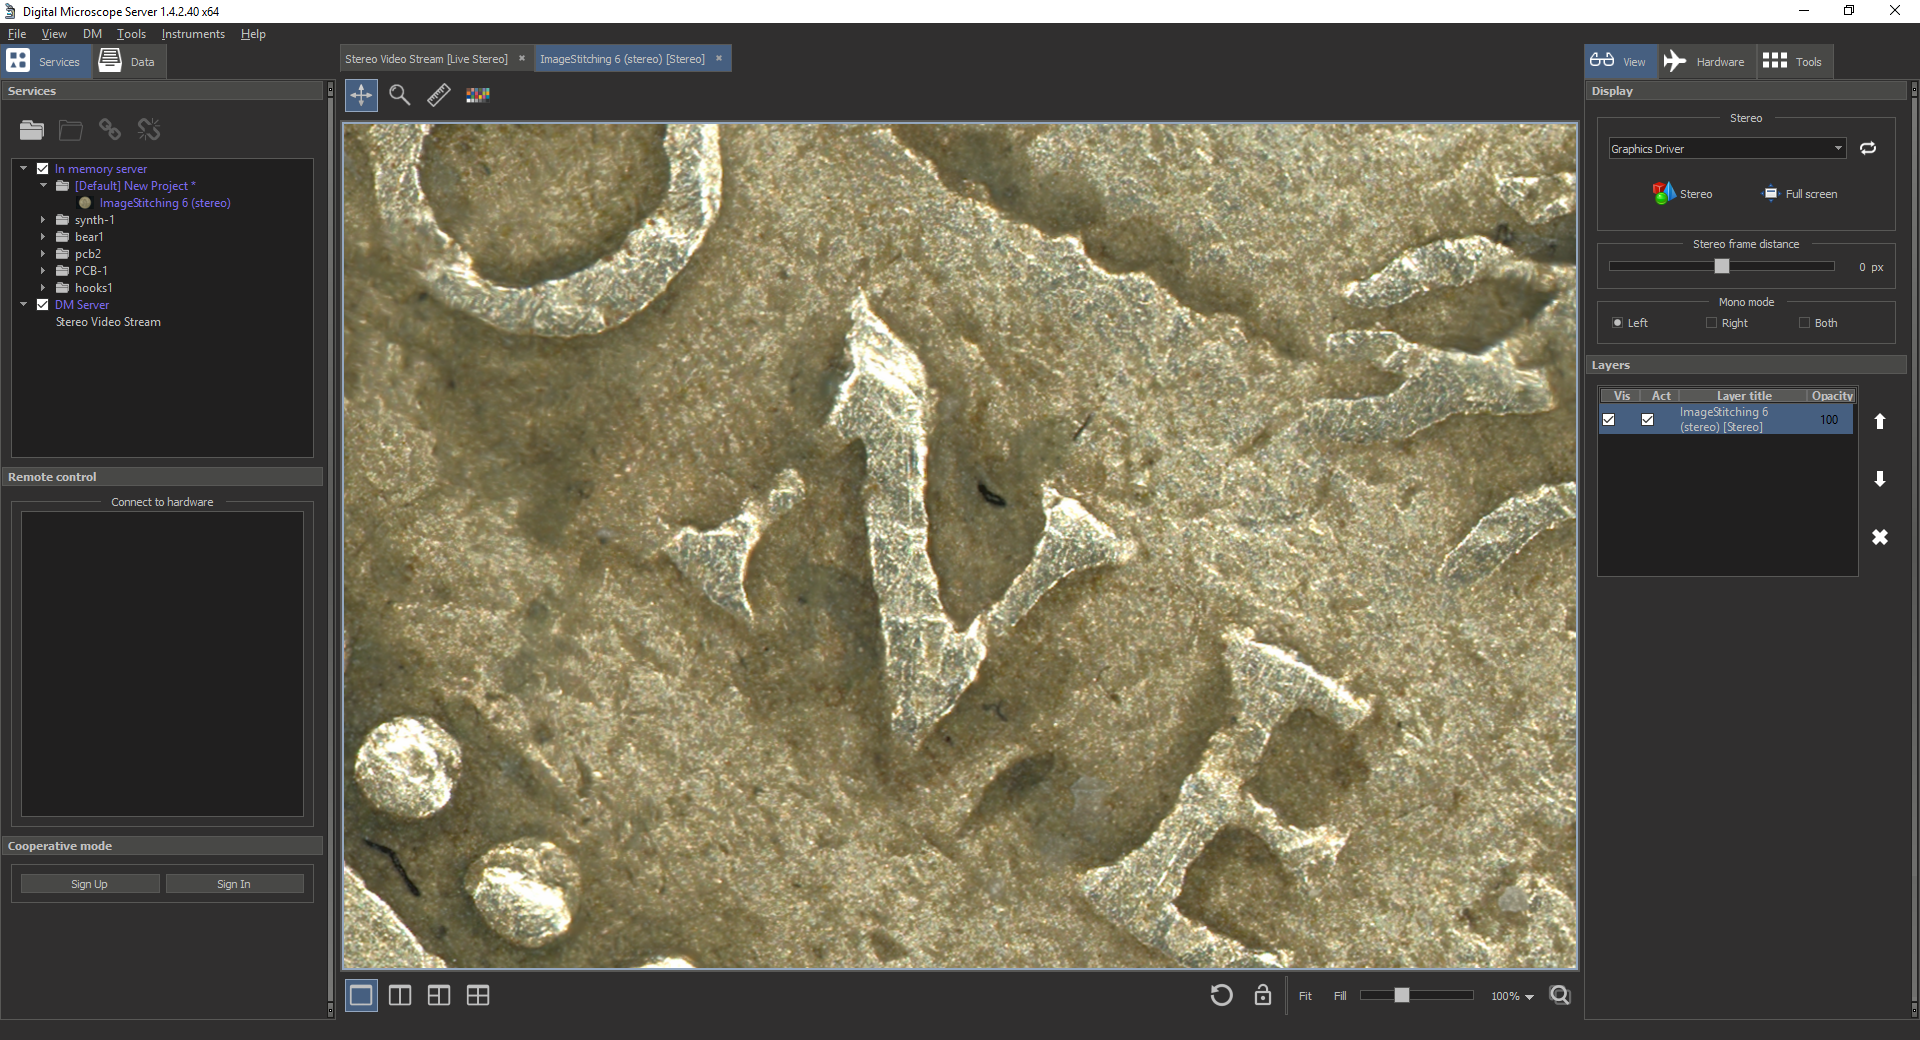
Result stitched image with scale 13% Result stitched image with scale 100%