Table of Contents
Main features
Batch uploading of ViBox videos, DiBox images and 3d dmc models to the Cutwise.
System requirements
Operating system | Microsoft Windows XP or later (x86 or x64) |
Internet connection |
Starting program
Launch the file “Cloud Uploader.exe”. If you run the Cloud Uploader for the first time, please, identify yourself in the appeared form and type your b2b ID and b2b secret key (we will give you the b2b ID and the b2b secret by e-mail).
...
After specifying the folders click “Save changes”.
Uploading data to the Cutwise
Uploading dmc files
After building obtaining dmc 3d model on HPP do the next steps for uploading it to the Cutwise:
...
After these steps CloudUploader will automatically upload dmc model to the Cutwise.
Uploading ViBox videos / DiBox images
There are two ways to upload videos from ViBox and images from DiBox to the Cutwise through using the Cloud Uploader: export files from ViBox/DiBox with checked ‘Upload video to cloud’ or copy exported files from ViBox/DiBox to the folder (1) manually.
Way 1 (preferable). Export files from ViBox/DiBox
Check the ‘Upload to cloud’ checkbox in ViBox/DiBox before exporting:
...
Then export videos from ViBox / images from DiBox to the folder where you usually export media from ViBox/DiBox (please, do not use the folder (1) as the exported data folder). Next, ViBox/DiBox will automatically copy your exported files to the folder (1) and the Cloud Uploader immediately will start analyzing and uploading your files.
Way 2. Copying exported files manually
If you have to upload to the Cloud videos exported from ViBox or images from DiBox created on a computer without Internet connection, you can do it by copying these files to the folder (1) manually.
Uploading status
Successful uploading
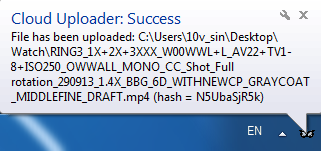
In case of successful uploading of a file or a folder it will be moved from the folder (1) to the folder (2) and you will see a notification from the system tray:
Errors during uploading
Problems with Internet connection
If during the uploading of files there is no Internet connection the Cloud Uploader will show you the message from the system tray:
...
Connect to the Internet and the Cloud Uploader will continue its analyzing and uploading processes automatically.
Unsupported files, Cloud Server errors, internal Uploader errors
In case of these errors the file for uploading will be moved to the folder (3) and you will see a notification:

Log, Settings, Manual
Click left or right mouse button on the Cloud Uploader icon in the system tray and you will see the main menu:
...