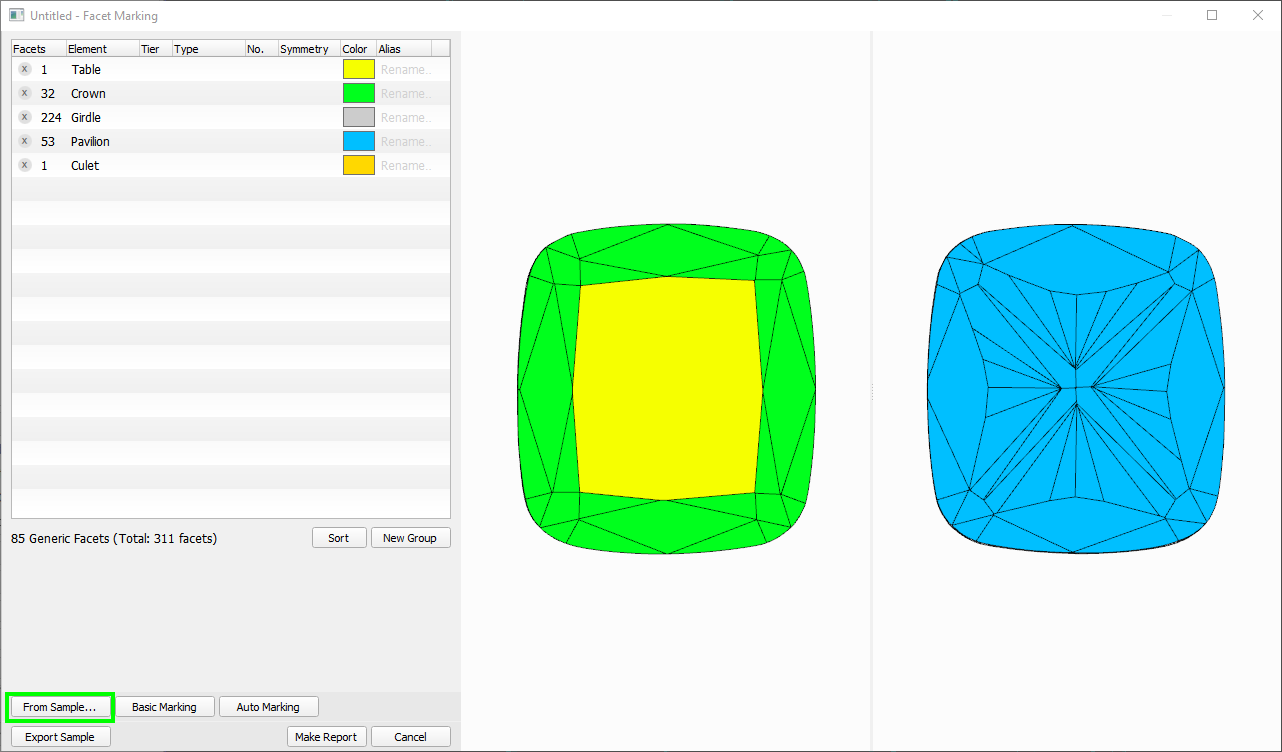
Any model can have its facet types information.
To access it:
- In the solution list, click the model.
- On the right panel, click Facet Types. The Facet Types dialog is displayed.
Here you can overview the facet types of your model or edit it as described in the sections below.
Does my model have facet types?
Short answer: all the models should have facet types:
- plans for standard cuts obtain them from the library (see Facet types for standard cuts)
- plans for in-house cuts obtain them from the cut's allocation forms
- scans made with sample obtain them from this sample
In rare cases, some scans or imported models may have no facet types - opening the Facet Types dialog for them will not show that - instead the Auto Types will be immediately applied to the model and saved with it even if you do not click Apply.
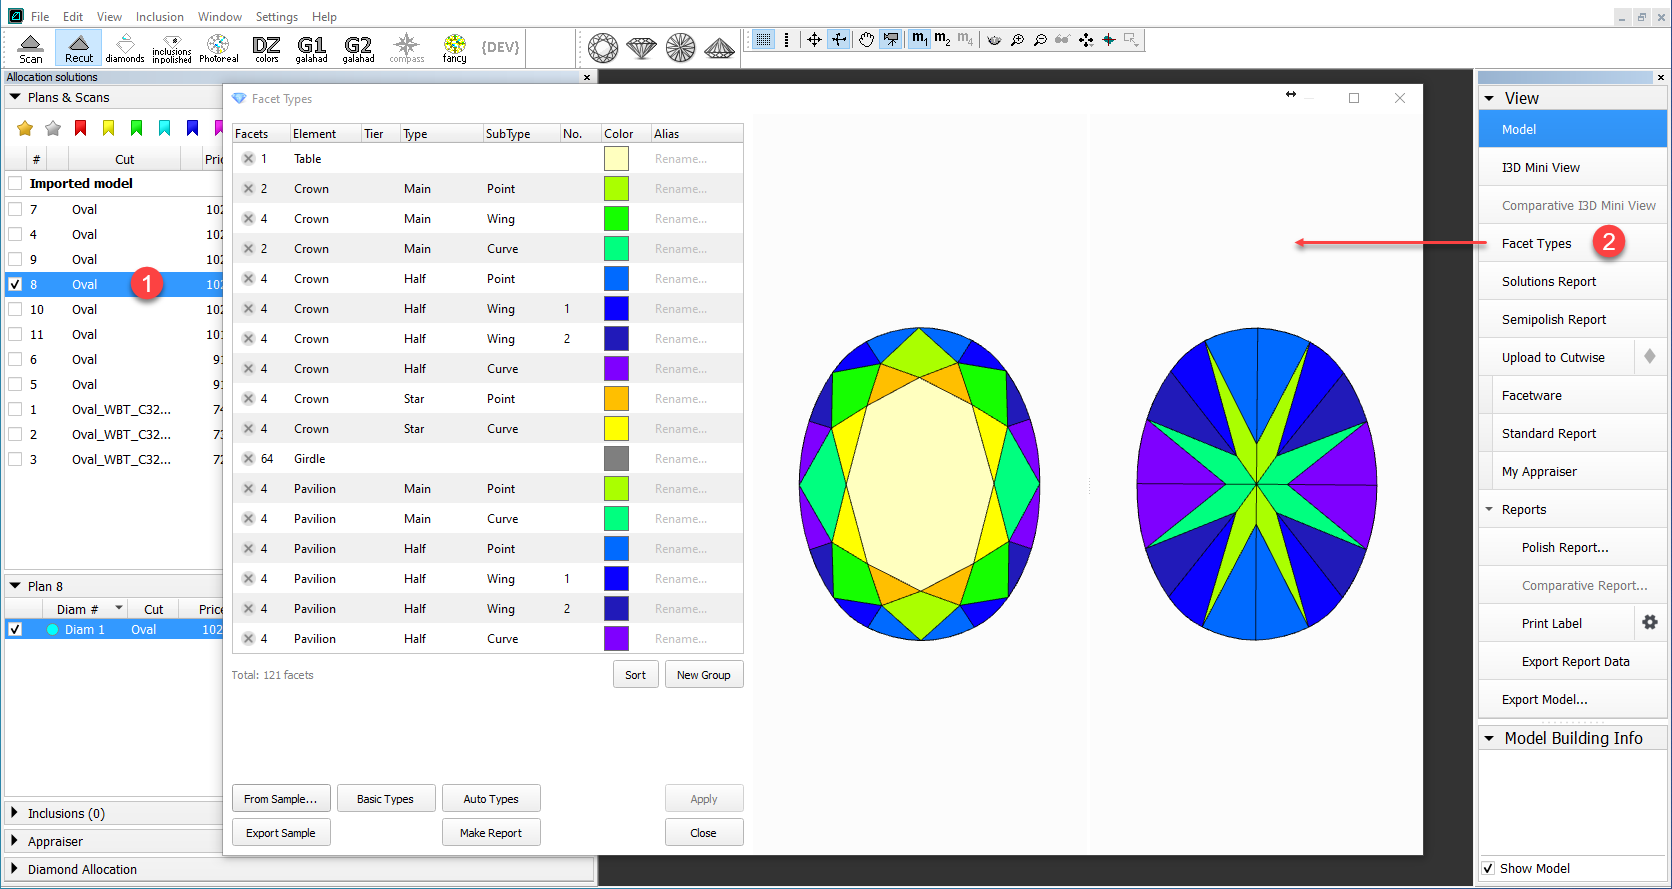
Auto vs. custom
In the Facet Types dialog:
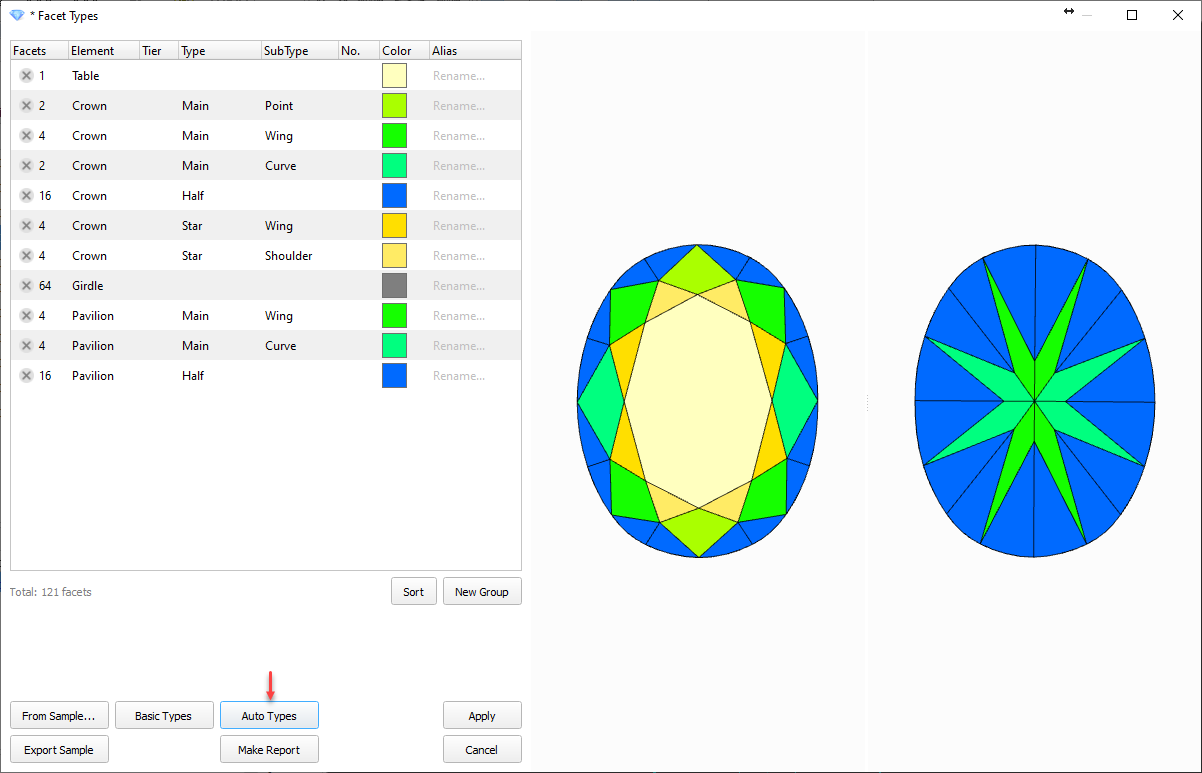
- Click Auto Types to automatically get types specified for this model cut in HP Carbon.
- Or get the custom facet types for your model by:
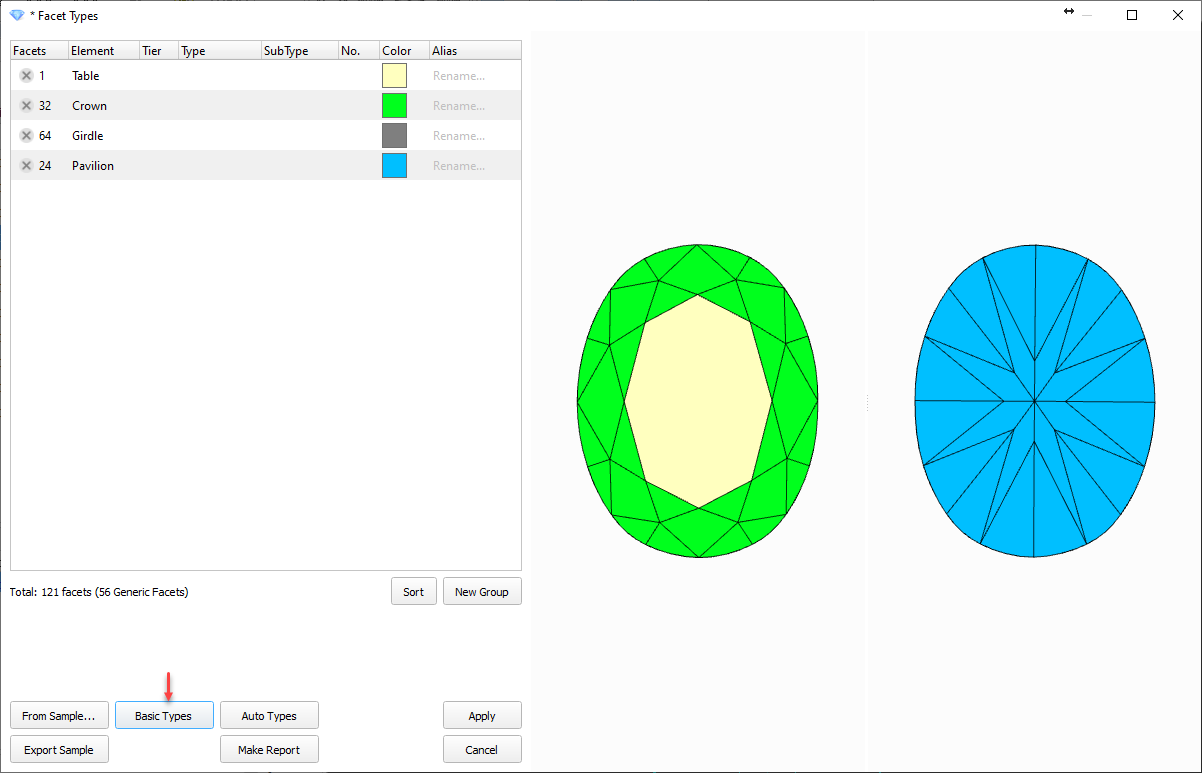
- clicking Basic Types to get grouping by basic cut elements: crown, table, girdle, pavilion.
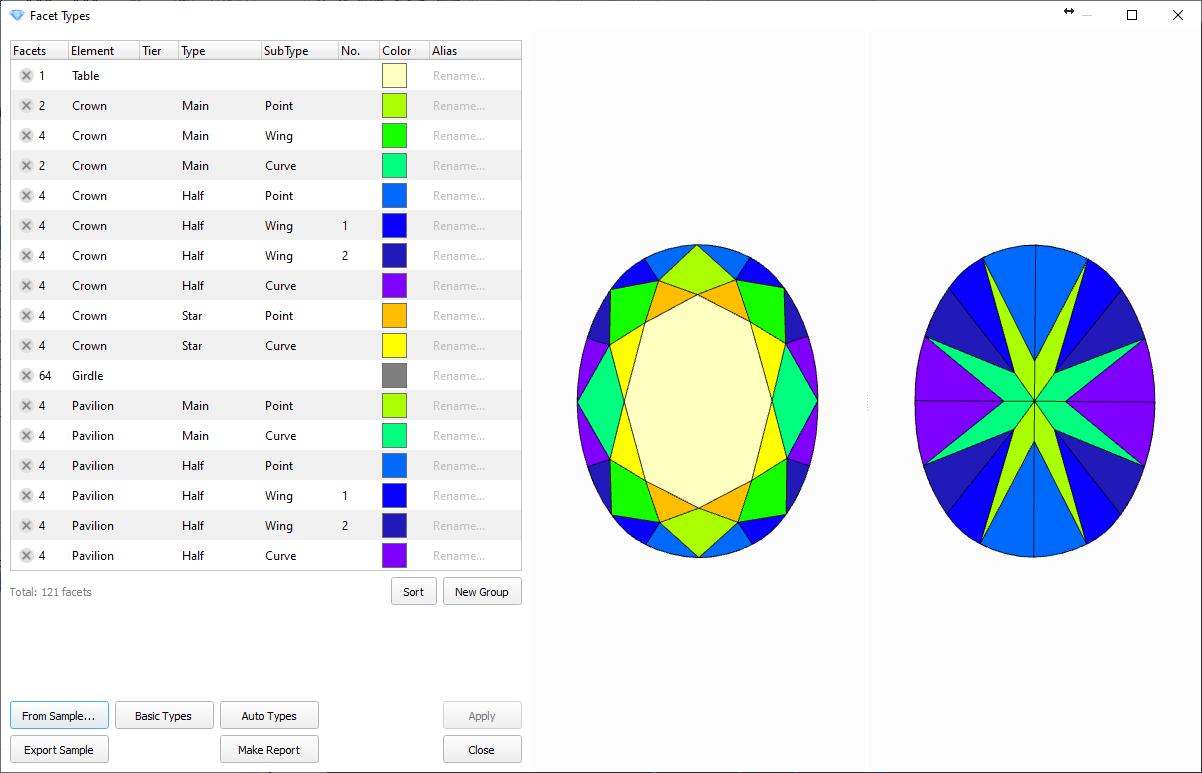
- transferring From Sample...
- manual editing
| Auto | Custom | |
| From sample or manual | Basic | |
|
|
|
Auto vs. custom - what gives better Polish report?
You can compare how Polish report looks better: with auto or custom marking.
What you change or select regarding facet types in the Polish Report dialog, does not change the facet types of the model itself - you only define how to build a report this time - as you close the dialog, this configuration is forgotten. If you want to change the facet types of the model itself, use the Facet Types dialog.
Do the following:
- In the solution list, click the model.
- On the right panel, click Polish Report. The Polish Report dialog is displayed.
Use the Types from section.
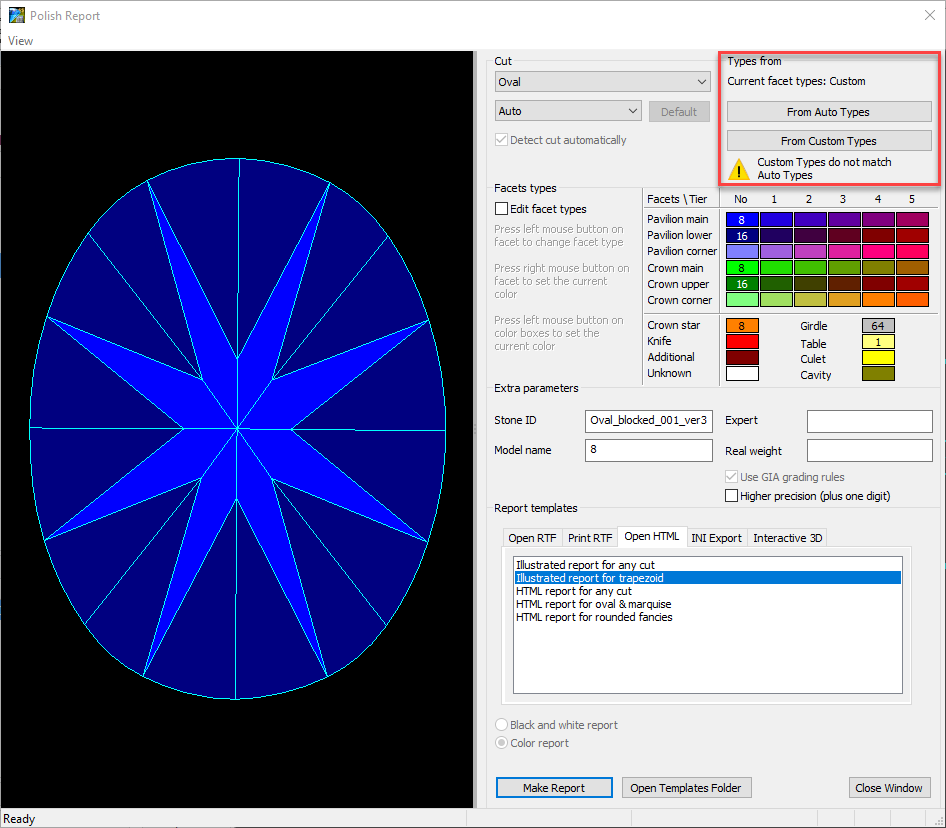
Is there a difference? Which one will be used for the report? 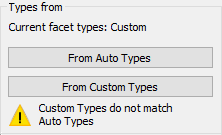
- Click From Auto Types or From Custom Types to select what facet types will be used in the report.
- If necessary, additionally select the Edit facet types checkbox, click a group in the table, then on the model click facet to place in this group.
- Make report.
Facet types for standard cuts
For standard cuts, for allocation results, the facet types are applied immediately after plan creation. The system uses the pre-installed sample types specified for each standard cut.
Using the specific types sample for each cut makes the resulting facet types more accurate and reduces or eliminates the need for manual corrections.
Facet types library
The system includes over 50 cuts you can use as samples to get facet types from. Now the  OctoNus Cuts Library button is added to quickly access them:
- Click Facet Types. The Facet Types dialog is displayed.
- In the Facet Types dialog, click From Sample...
- In this was not done before, click OctoNus Cuts Library
Samples from the library folder are added to the list.
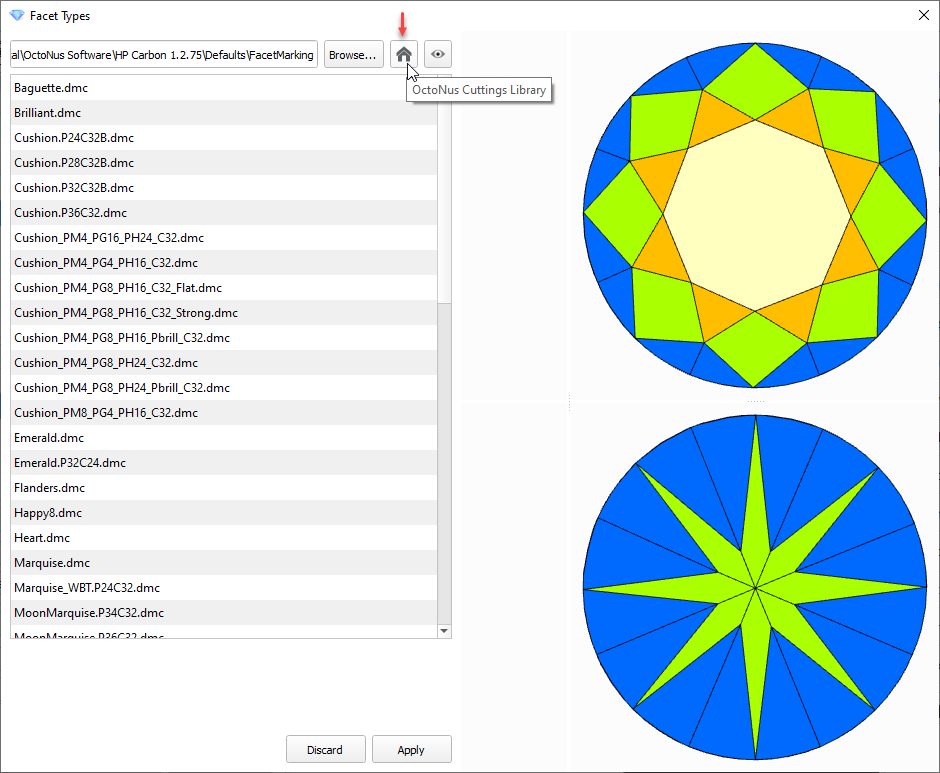
- If you want to access the library folder, click Browse.
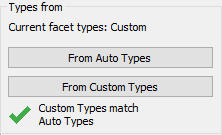
Edit facet types manually
You can edit facet types manually.
It is recommended to use Auto Marking as a start point for manual editing.
Option A: select the incorrectly marked group and edit its properties
To select a facet group, you can simply right-click with your mouse on a facet belonging to this group. Alternatively, you can find the group in the list and select it manually.
To edit group properties, simply click on the property you want to change in the in the Group List in the right panel. A select box will appear with the available options:
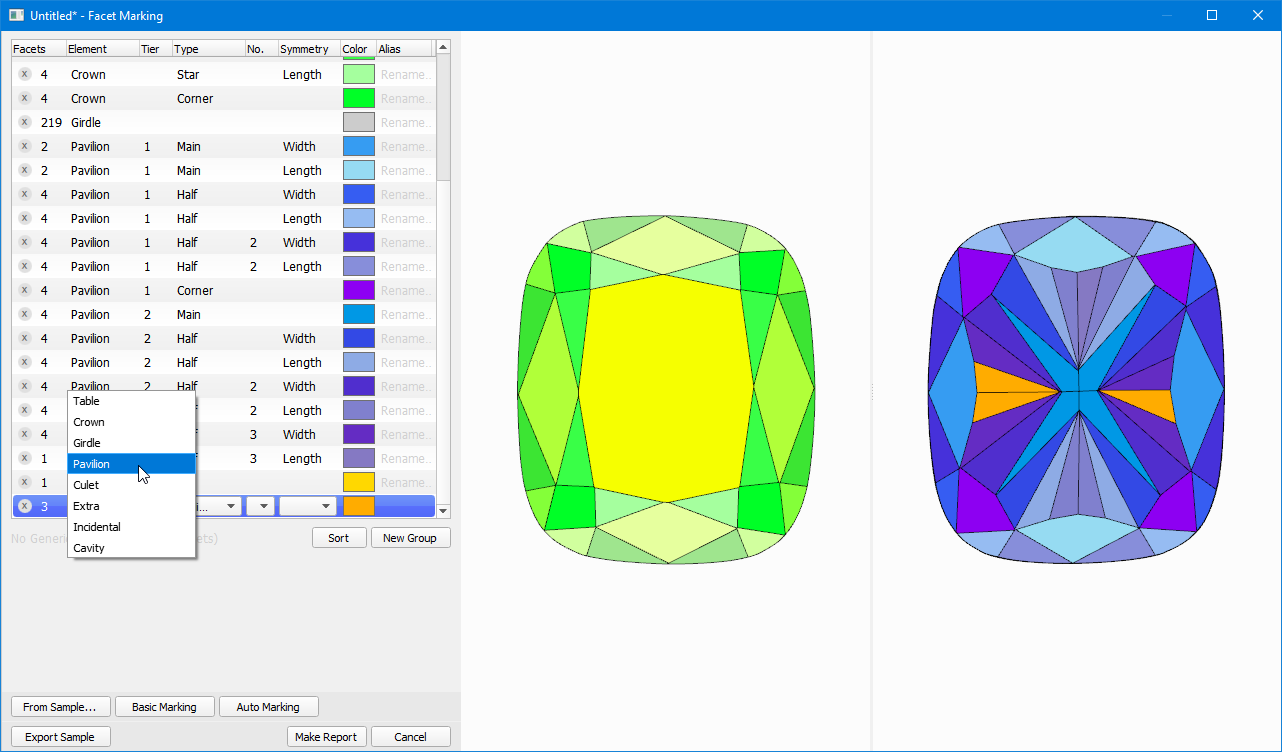
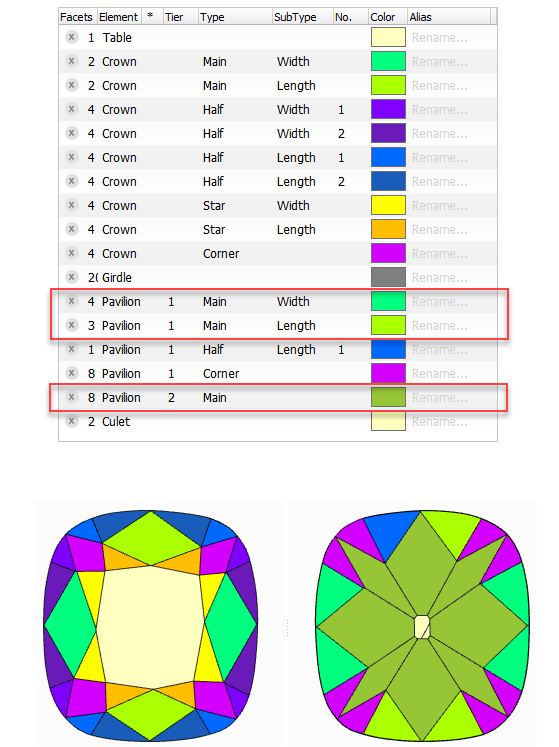
For Cushion 0, we should set this group the following properties: Pavilion 2 Half 4 Width
Using the same method it is possible to set other facets in the correct group:
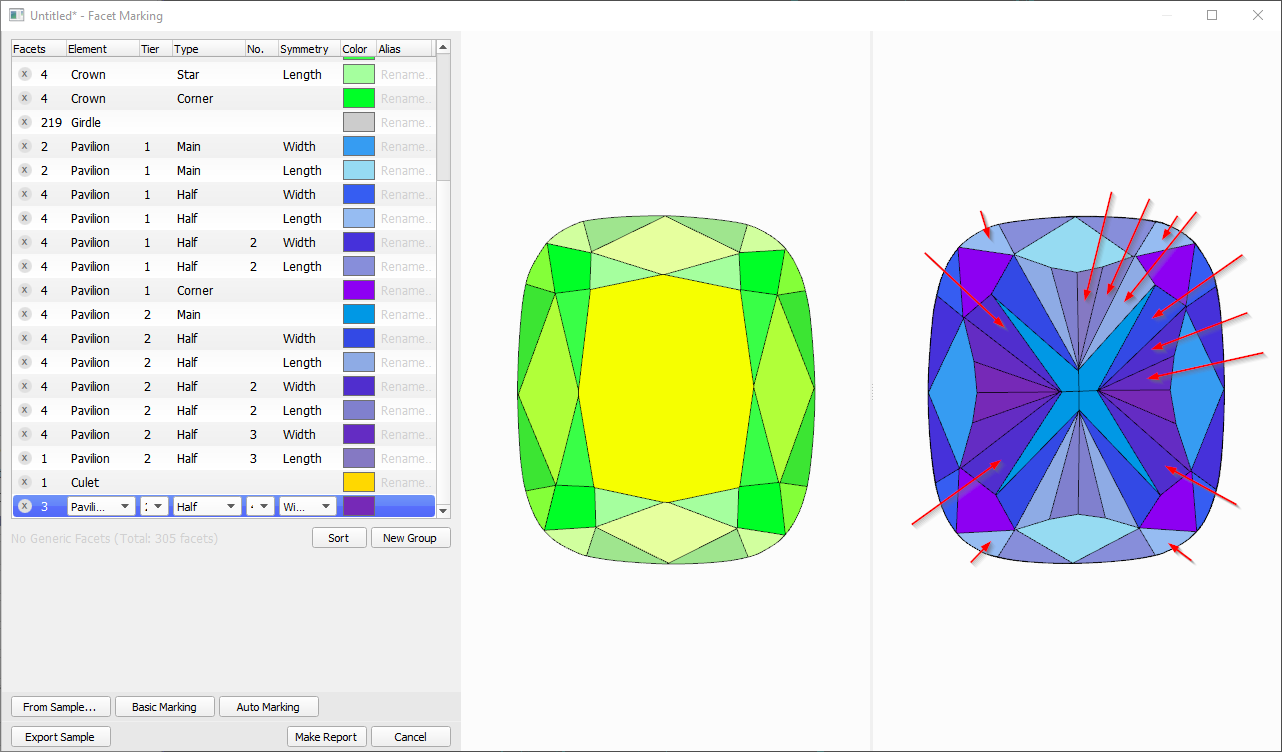
Now we have the correct facet types:
Option B: create new group and edit its options
To create a new group press the New Group button under the groups list.
A new group will be created and placed at the end of the list. Select it to edit its properties.
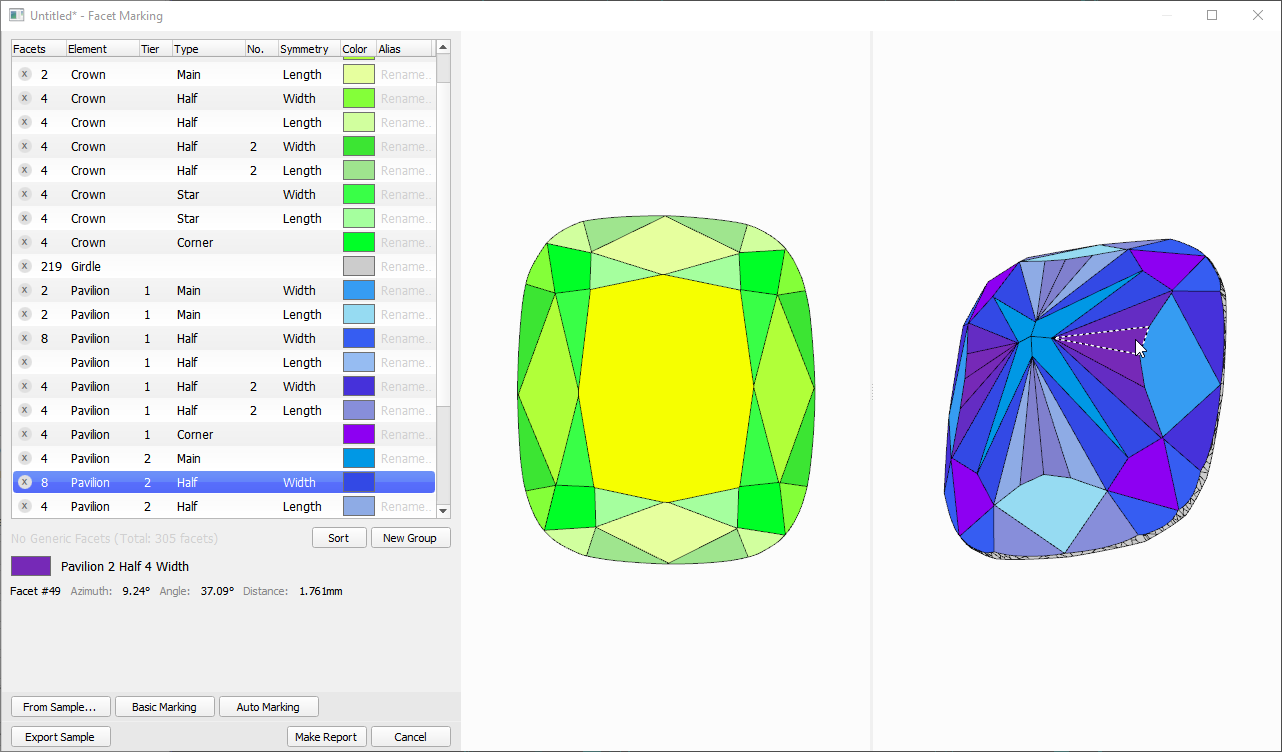
Option C: defining types for specific facets
To mark specific facets as belonging to a specific group, first select the group (in the group list or using the right-click on a facet that belongs to the desired group).
After selecting the group, click on any facet that you want to assign to the selected group.
For quick "painting" of facets, you can hold the Ctrl key, press and hold the left mouse button, and then hover the mouse cursor over the facets you want to paint. Normally, this mode of operation is not required, but it can be helpful if you want to pain (mark) many facets at once, for instance when marking the Girdle.
Save sample with facet types
After you've finished editing the Marking, you can export a DMC sample file with embedded Facet Marking by pressing the Export Sample button at the bottom of the Facet Marking dialog:

Using sample files with facet types
Loading a sample file into a project
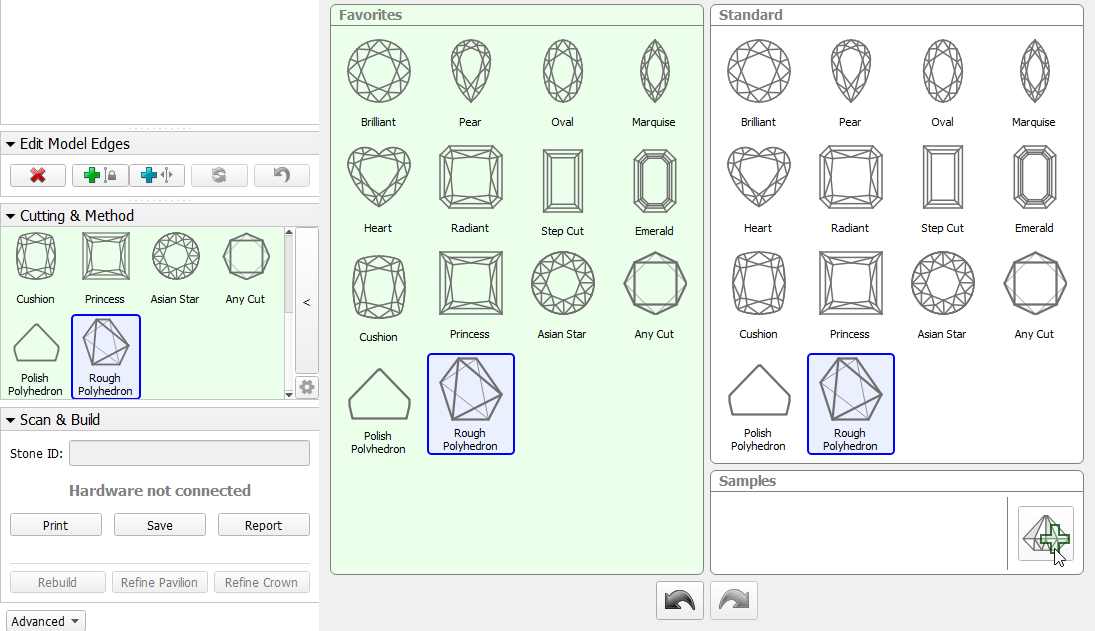
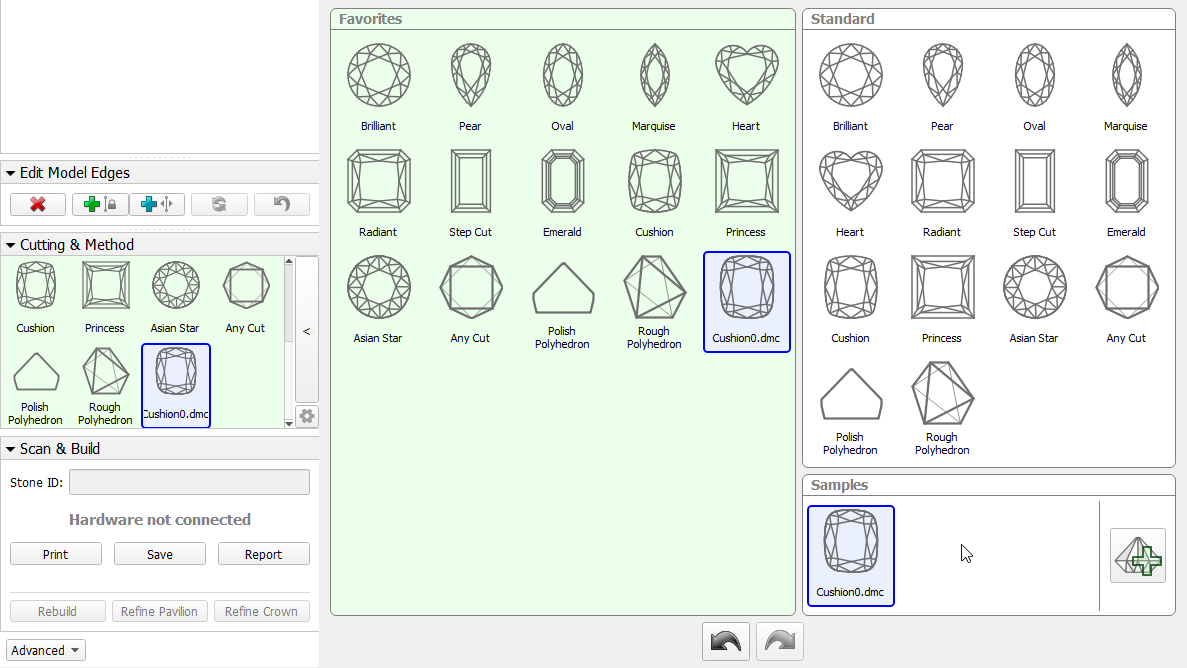
To load the DMC sample file into a project, expand the Cutting & Method panel, then in Samples, click the  button.

Right now there's no indication telling whether a loaded Sample contains Facet Marking information, but the files that you have previously exported as samples from the Facet Types dialog, as described above, will have the facet types data.
Applying sample facet types to scans and solutions
If you're working on a non-trivial cut that requires Custom Report with specific facet types or the stone proportions, it may be difficult for automatic facet detection algorithm to apply correct facet types. In this case, you can apply types from a previously created sample.
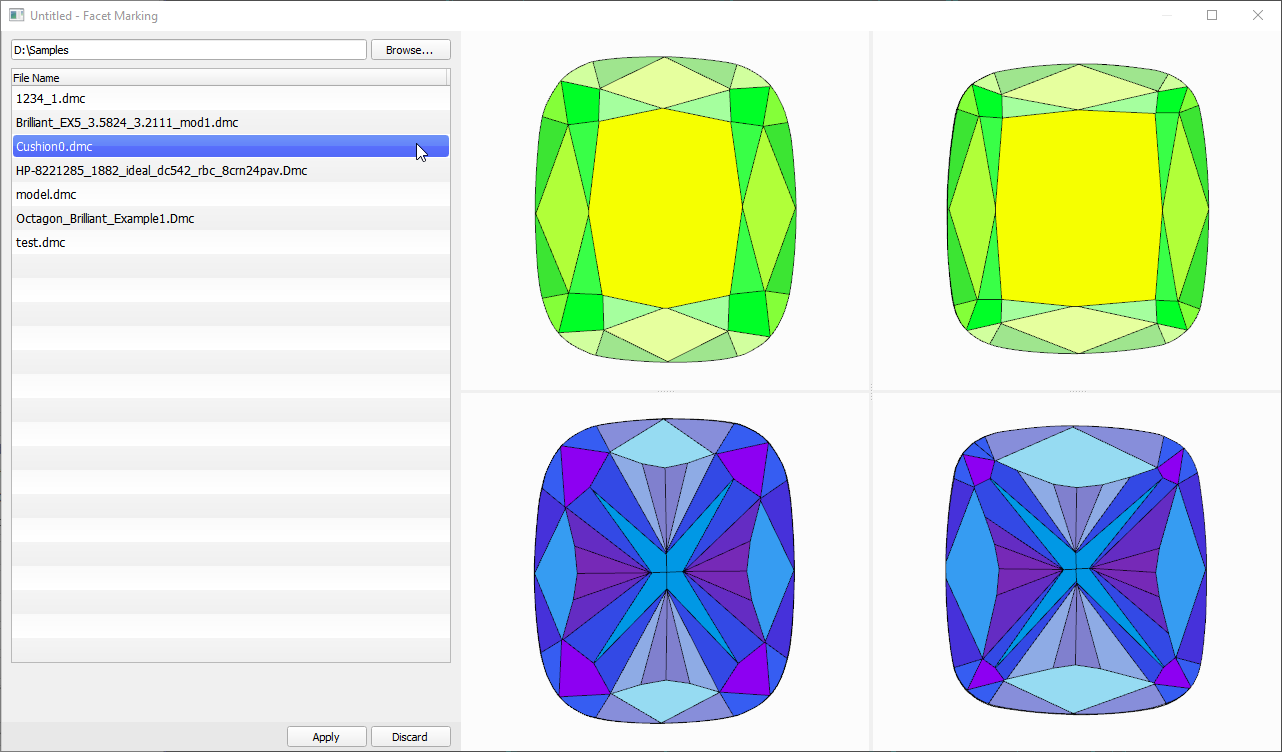
To do so, for the current project with the already loaded model (for this document this is a sample - Cushion0_scan.mmd) in the Facet Types dialog press From Sample...
You will be presented with a sample selection and facet types preview dialog. In the dialog, press Browse... to specify a folder containing your marking Sample.
This folder will be remembered the next time you open the dialog:
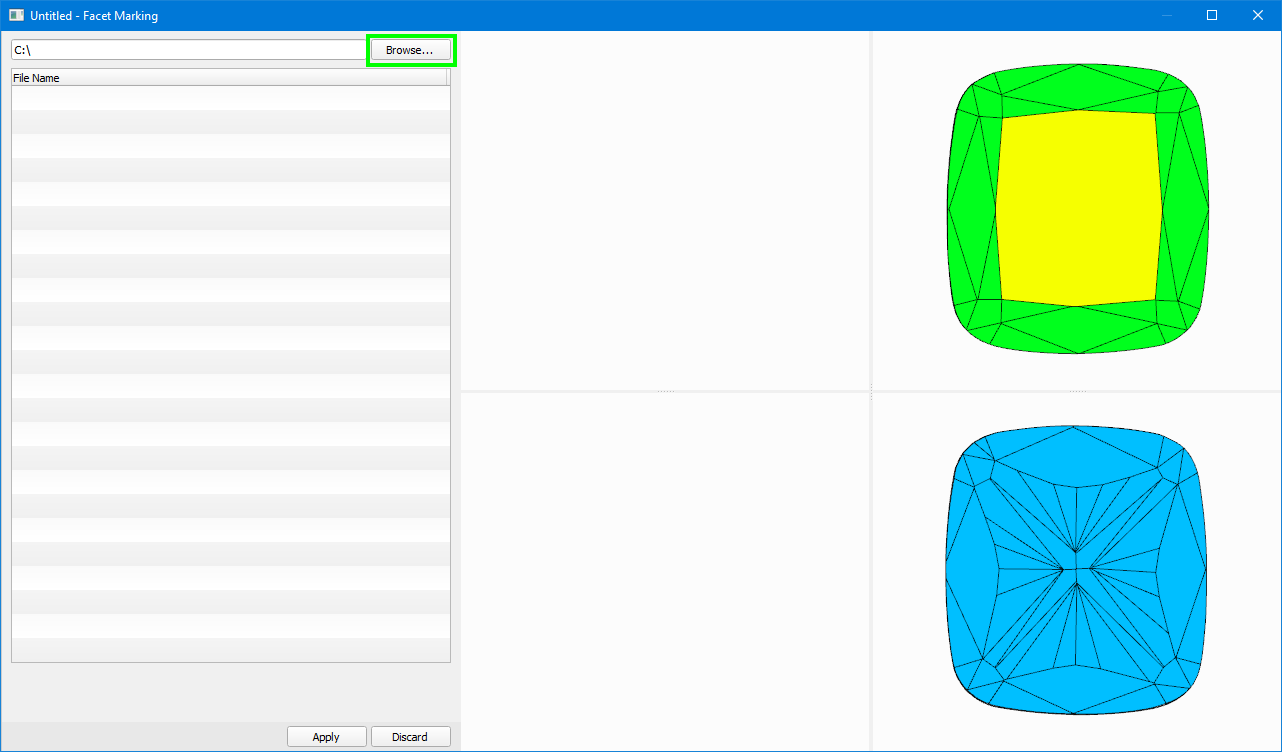
After the folder is selected, you will be presented with a list of DMC sample file names in the folder. Please note that the samples should contain the facet types data, otherwise they can not be applied.
You can select desired samples from the list and preview the sample model and its facet types as well as automatic transfer of types to the current model:
While the input focus is in the sample list, you can use Arrow Up , Arrow Down keyboard buttons to quickly scroll through the list and preview various sample types.
If you want to apply current types and proceed with types editing and Custom Report generation, press Apply .
If the model is significantly different from the sample model, the automatic facet types translation may struggle to identify all of the facets that are introduced in the scanned model, especially if it is a blocking or semi-polished model and not a final polish. In case there are any inconsistencies in facet types, the operator can fix them manually as described above.
Important Note
Sample facet types are transferred to the current model only once — when the Custom Report dialog is first invoked for the current model. Once the Facet Types dialog has been called for this particular model, the facet types for this model are preserved the way the user left it. Whatever modifications are made in the Facet Types dialog, will be preserved and stored in the OXGZ file when it is saved and subsequently loaded.
Automatic apply of facet types from sample
During scanning using a loaded sample cut, the facet types from this sample are automatically transferred to the created model. This provides an effective way of getting the correct facet types for your model and creating the appropriate reports .
For example:
| Auto types | Types of sample and resulting types (identical) |
|
|
Resulting Polish Report (strings for Pav Main Width, Pav Main Length, and Pavilion 2 Main are highlighted with the colors from Facet Marking) | |
|
|
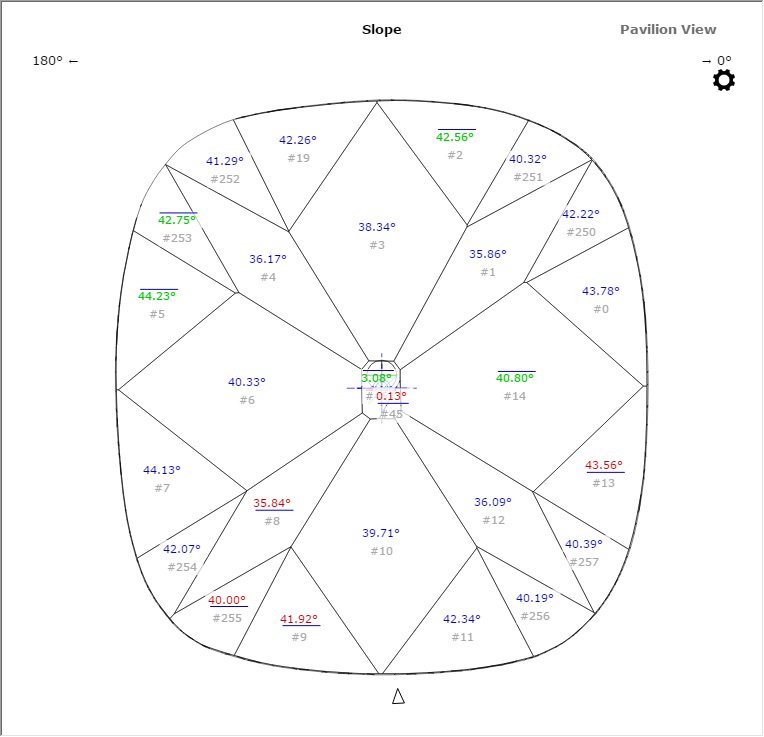
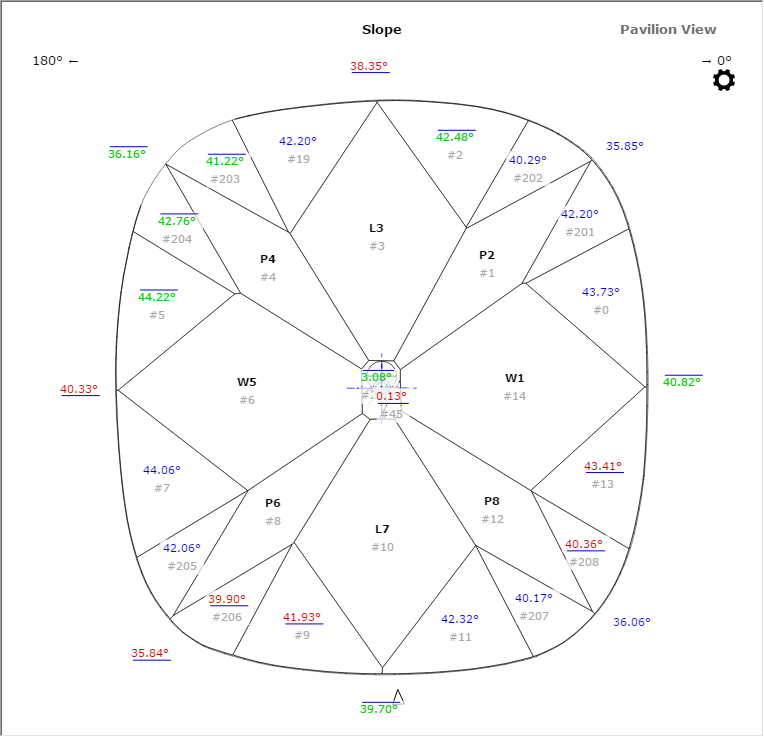
| Resulting I3D Pavilion View | |
|
|
- You can view the facet types of your sample (DMC format). Do one of the following:
- As you select your sample in Cutting & Method, it is added to the Models section. There click its name, then on the right panel, click Facet Types.
- Open your DMC in HP Carbon and then click the Facet Types button on the right panel. The file can be opened by:
- Drag and drop your DMC to the HP Carbon window.
- In HP Carbon, select File > Open, navigate to your folder, then start typing the name of your file. As soon as it is suggested, select the file and click Open.
- You can change something in the facet marking of your DMC sample. To do this, perform the steps:
- Open DMC and its facet types as described above.
- Make changes to the facet types.
- Click Export Sample, specify a name for your changed version, and then click Save.
- Add a new version of the sample to the system, remove the old one.
Create Custom кeport
- To create a Custom report, on the right panel click Facet Types. In the dialog, verify that the facet types are correct, and fix them if necessary.
- Click the Make Report button. Once the document is generated, it is opened in Microsoft Word.
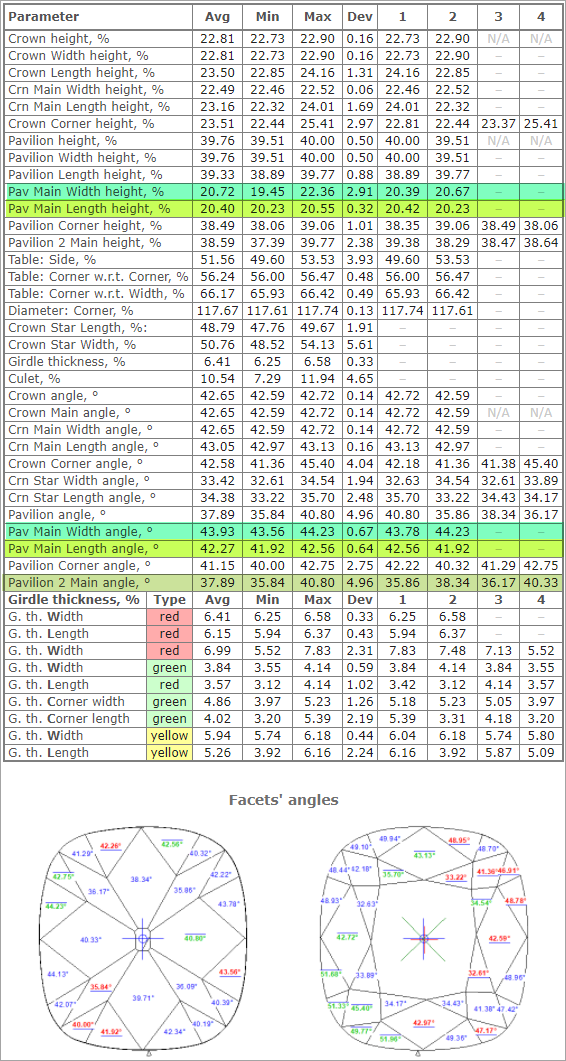
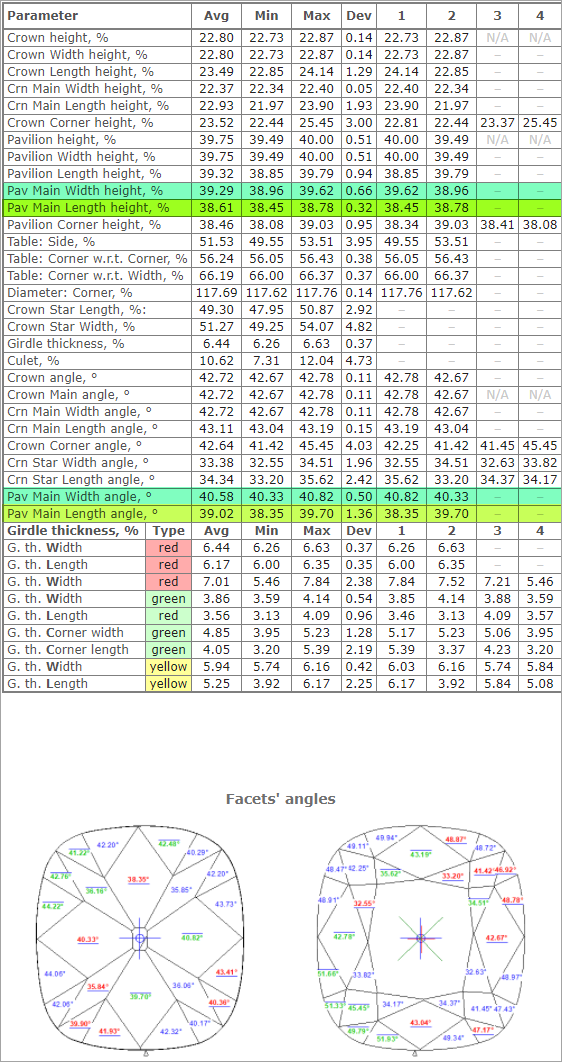
Among other parameters and images, the document will have two additional tables: one with Statistics data (Min, Max, Avg, Dev) for each parameter of each Facet Group. and another one with individual parameter values of every facet in every Facet Group, i.e. specific angles, azimuths, and heights of all the facets in every group:
Statistics table:
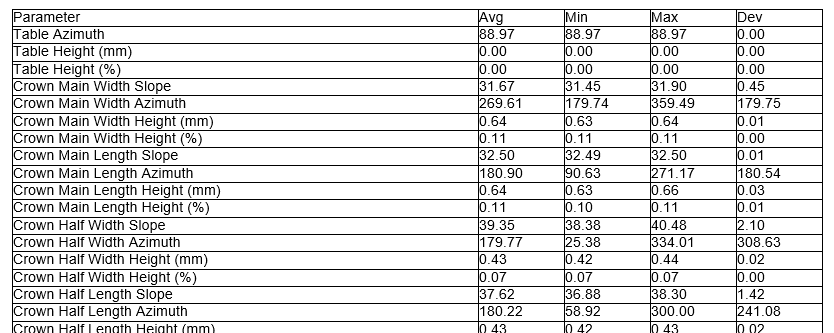
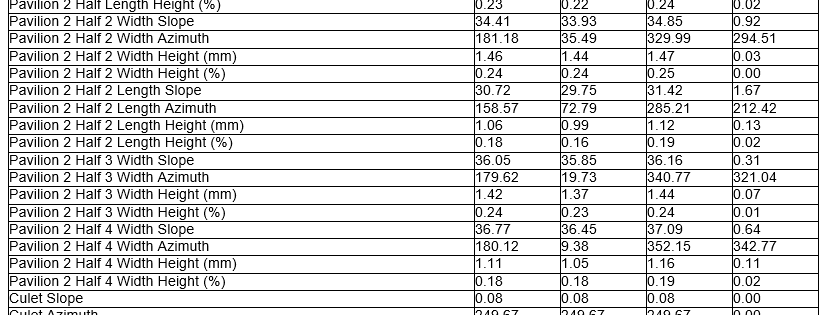
Individual values table:
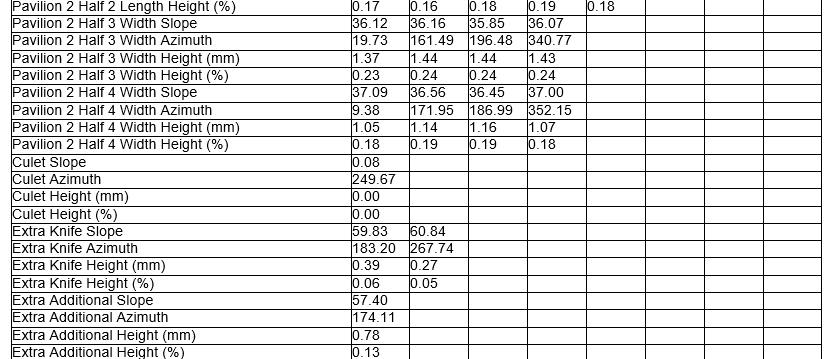
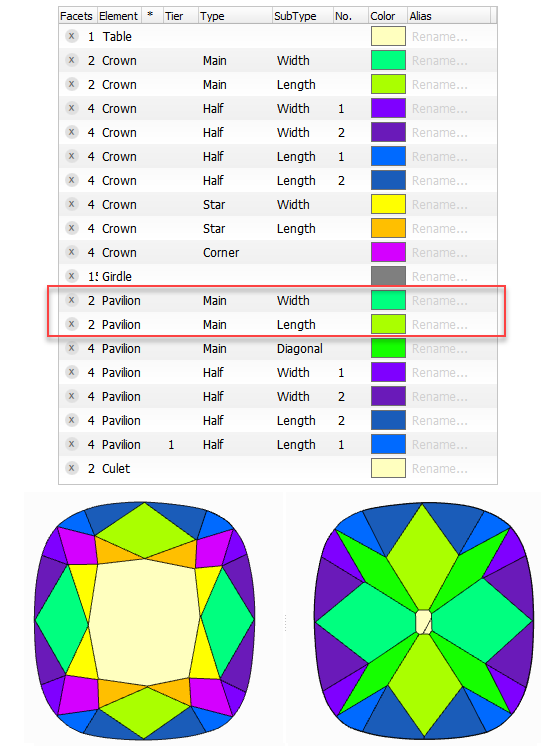
In the tables above for a Cushion 0 Scan, you can see values for the Pavilion 2 Half 4 Width group that we created earlier in the Sample Marking and which was automatically translated to the Scan model.
Facet types coloring
This page describes general principles of how to work with the facet types and Custom report. As the facet types functionality is under constant improvement, some colors presented on the figures in this article may be out-of-date. You can find the release 4.7.9 coloring description in the video:
Demo video of Custom report and facet types
There is a demo video that illustrates the above points and works with the Custom report on the Cushion sample:
Add Comment