Overview
In case if a model does not quite match the real stone (this, for example, may be a result of imperfect shadow or reflect scan), it may be manually adjusted by adding or removing edges. For this purpose, the Model Topology Editing Tool is presented in the system which allows removing extra edges and drawing in their place a new configuration - all this within one operation.
A brief overview of the tool and the latest changes in it are presented in the video:
Video summary:
- You can removу several extra edges and draw in their place as may new edges as you need - all this within one operation.
- You can add new edges across the deleted edges.
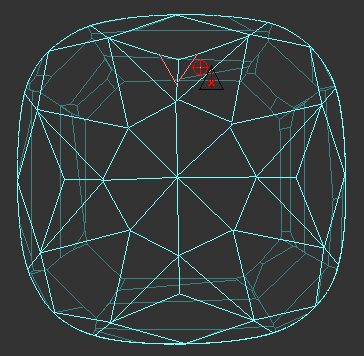
- You can add vertexes out of an edge - at any place on the facet. Note that dangling vertexes and edges are highlighted with red and will be removed on model recalculation.
- The tool snaps to the end of edges, which means when you are adding vertexes and put mouse pointer close to the end of the edge, the system snaps the pointer to the end of the edge which makes adding vertexes more precise and comfortable.
The model which you edit with the Model Topology Editing Tool may contain the following measured data:
- No contours
- Shadow contours
- Reflect contours
Model Editing
To edit the model, perform the following steps:
- Press "Scan"
 on the top panel to enter the Scan mode (unless it is already active). The Scan & Build panel with editing buttons will become accessible.
Make sure that the appropriate cutting type is selected.
A refinement with incorrect cutting type would result in a severely inconsistent model, which would be manifested by large errors in Model Building Info panel.To delete one or more edges, click the Delete button
 and select the edges by single-clicking. To deselect an edge, click it again.
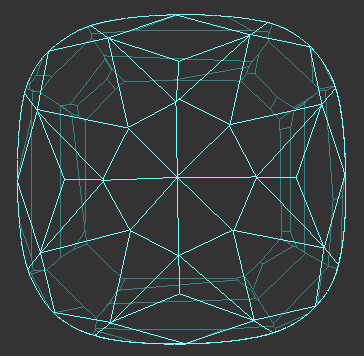
Edge removal example
Model used: Sample_cushion_edge_removal-hpo_3.19.37.oxgz
Before During After 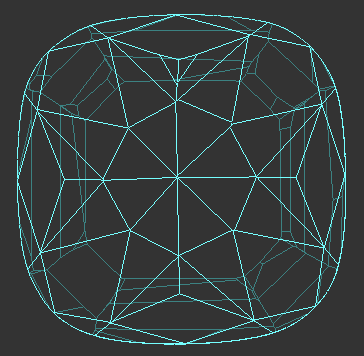
To add an edge, click one of the Add buttons:
 or
or  and specify the ends of the new edge on the model. The ends must be located on the existing edges. Note that both ends of the new edge must be on the same existing facet, so that the new edge would not span across multiple facets. To undo the addition of a new edge, click anywhere on it. It is possible to perform this on Photo view, using the reflection photographs to see where the missing edge might be.
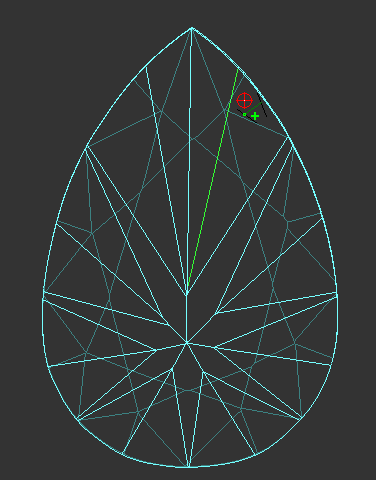
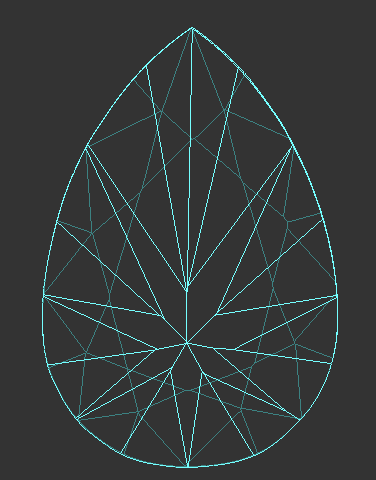
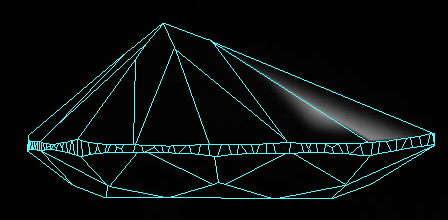
Edge addition example
Model used: Sample_pear_edge_addition-hpo_3.19.37.oxgz
Before During After 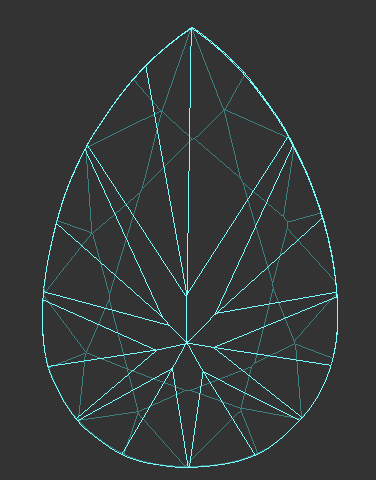
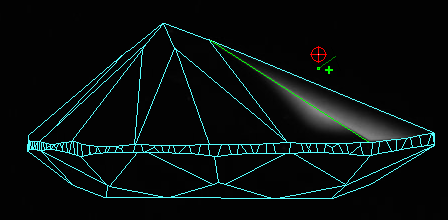
Alternatively, if the model is provided with a reflection photo set, it is possible to switch to Photo view while editing edges.
Edge addition example (photo view)
Model used: Sample_pear_edge_addition-hpo_3.19.37.zip
Before During After 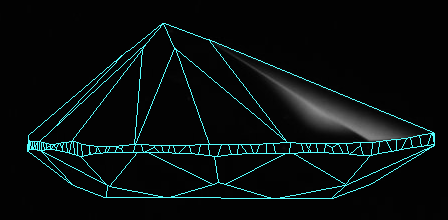
- Add edges with high precision produces an edge located as close as possible to the user's input;
- Add edges with low precision treats the user's input as a vague hint, so the resulting refined edge may appear some distance away.
- Add edges with high precision
- After you've made the changes to the model, click
 Recalculate model with selected edges.
- If the model contains Shadow or Reflect contours, the algorithm will refine the model so as to achieve the best fit to the contours. Note that the refinement is a complex process, and the resulting changes may propagate to the facets not incident to the edited (added or removed) edge.
- If the model does not contain any contours, it will still be refined against dummy contours based on the existing geometry, so even in this case the addition or removal of an edge may affect multiple other edges.
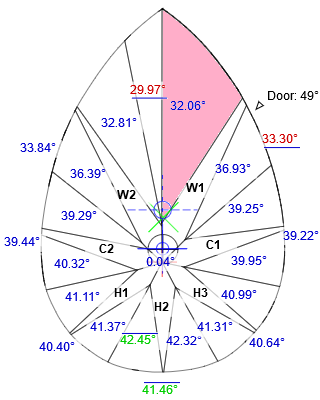
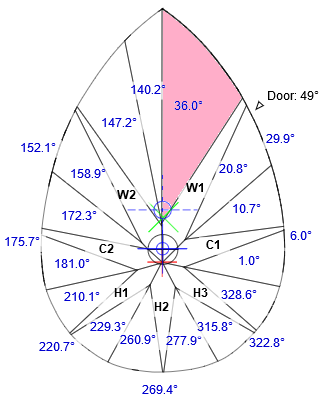
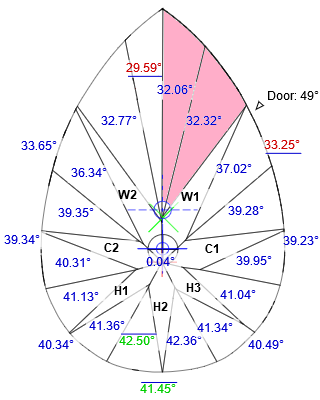
Before (note the facet highlighted in red where the missing edge should be) | After (note the problem facet now split in two) | ||
Facets angles | Facets azimuths | Facets angles | Facet azimuths |
Once the refinement is finished, the resulting model appears in the list (see Models management for more details) as new Edited model.
Video Sample (Previous Version)
In the video below, see another example of how the Model Topology Editing Tool is used:
The example is based on the previous version on the tool.
Add Comment