The “SmartNormalize” algorithm is intended for the deletion of excess vertices and facets and creating a more symmetrical model from a scanned or Smart Recut model for further optimization or scanning usage .
When to use it and what it will give
When to use?
Apply the "SmartNormalize" algorithm to a model:
- That you want to register as your in-house cut
- That you want to add as an allocation form to the existing cut
That you want to use as a sample during scanning
See details on each of these scenarios in the sections below.Note
You can also apply the "SmartNormalize" algorithm to any model to improve it in the way described below (see "What will it give?")
What will it give?
Your model geometric structure will improve in the following aspects:
- The excess elements will be removed, such as:
- Excess vertices
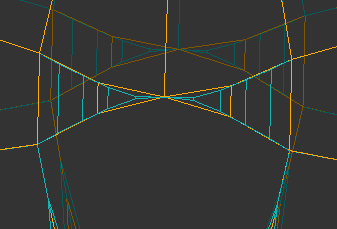
- Excess edges (junctions etc.) - a real physical object never has 4 or more facets converging on one vertex: there always is an excess edge of some length. At the same time, many algorithms require strict information that facets converge on one vertex. Therefore, such edges should be removed.
- Excess facets - the real excess facets may appear during cutting on purpose or accidentally, for example, girdle extra facets. Also, during scanning, a model may obtain excess facets physically not presented on the stone because of not ideal conditions (dust, etc.) Excess facets of both of these types should be removed from the models that are going to be processed by the algorithms.
- Your model will become more symmetrical
Scenario 1 - normalize model to register it as your in-house cut
You have a stone that you consider beautiful in the terms of balance between mass and optical parameters - you want similar diamonds to be the result of your cutting process. Scan it and then apply Smart Normalize to remove any imperfections of the built model, then register the result as your in-house cut. Stick future solutions to this cut with the hybrid appraiser and enjoy beautiful and massy diamonds of your desired shape.
Scenario 2 - normalize model to add it as allocation form
Want to add variations to your cut? Each variant should be a model of maximum symmetry and without excess vertices, junctions or facets. Apply Smart Normalize to your model, then add it as an allocation form to your existing cut - the more beautiful variations you have the greater the chances of getting an excellent solution are.
For creating in-house cuts and as allocation forms only the scanned models or solutions with a good balance of mass and optical properties should be used. See Cut evolution.
Scenario 3 - normalize model to use it as a sample during scanning
In your factory, you often aim to produce diamonds of specific cut. You want scans of such stones to be more precise. Take one of the good stones, scan it (for example, on Helium Polish scanner with ASCII model as output), then apply Smart Normalize to remove any imperfections of the built model, then save the result as a sample. Later scan your stones with this sample selected as a method - your models will be of much more quality.
How it works (technical details)
Below are some technical details about how the algorithm works.
The algorithm works in several stages:
- The girdle is replaced with the vertical one. For the rounded cuts, about 72 facets of approximately the same length are created that are placed on a smooth 2D line. For StepCut, the algorithm tries to get rid of excess facets but keeps parameters of the initial form of the girdle and the number of correct facets.
- From the model, the excess facets are removed that correspond to one of the following parameters:
- The facet area is less than the SquareLimit threshold (see SquareLimit description below)
- The facet is selected by a user manually using the Remove facets by Smart Normalize tool (see the Mark facets for removal section below)
- The model has facet types and among them, there is Element = "Cavity" or Type = ExtraFacet. If facet types are not specified, the facets detected as big knives are removed.
- The excess vertices are removed from the model and the symmetry is improved. Using the DistanceLimit threshold, the short edges are found and united into one vertex. If a facet transforms to the one having 1 or 2 vertices, such facet is removed. After this, the model is re-built which should provide a solid model taking into account the changes of the girdle and removed facets and short edges. This rebuild is controlled by the 3 goodness metrics:
- Strictly equal slopes for the facets with the same facet type group. This metric is enabled for a preset if the Custom Facet Marking parameter is "1", and disabled if "0". If facet types are not specified for a model and Custom Facet Marking is enabled for the preset, this preset is not run.
- Deviation from start. The model building process tries to minimize the deviation of final normals of facets from the start normals of facets .
- Symmetry. The model building process tries to improve the symmetry relatively to the found axes. The Deviation from start and Symmetry metrics contradict. The SymmetryCoeff parameter sets how many times the increase in symmetry is more important than minimizing the normals deviation.
The algorithm works with any cut and has 8 presets. In different presets, the balance of goodness metrics differs, so they can give different results. Users have to select the best result among the 8 presets. For highly asymmetrical models the best result most probably will be achieved with the most aggressive presets (higher values in the DistanceLimit, SymmetryCoeff, and Shift parameters). For the almost ideally symmetrical models, less aggressive presets will be enough. More aggressive presets are able to fix the significant imperfections of the initial model, but they also cause the risk of too much distortion of the model and getting a useless result.
If the SmartNormalize produced 4 results instead of 8, this most likely means that the input model does not have Facet Types.
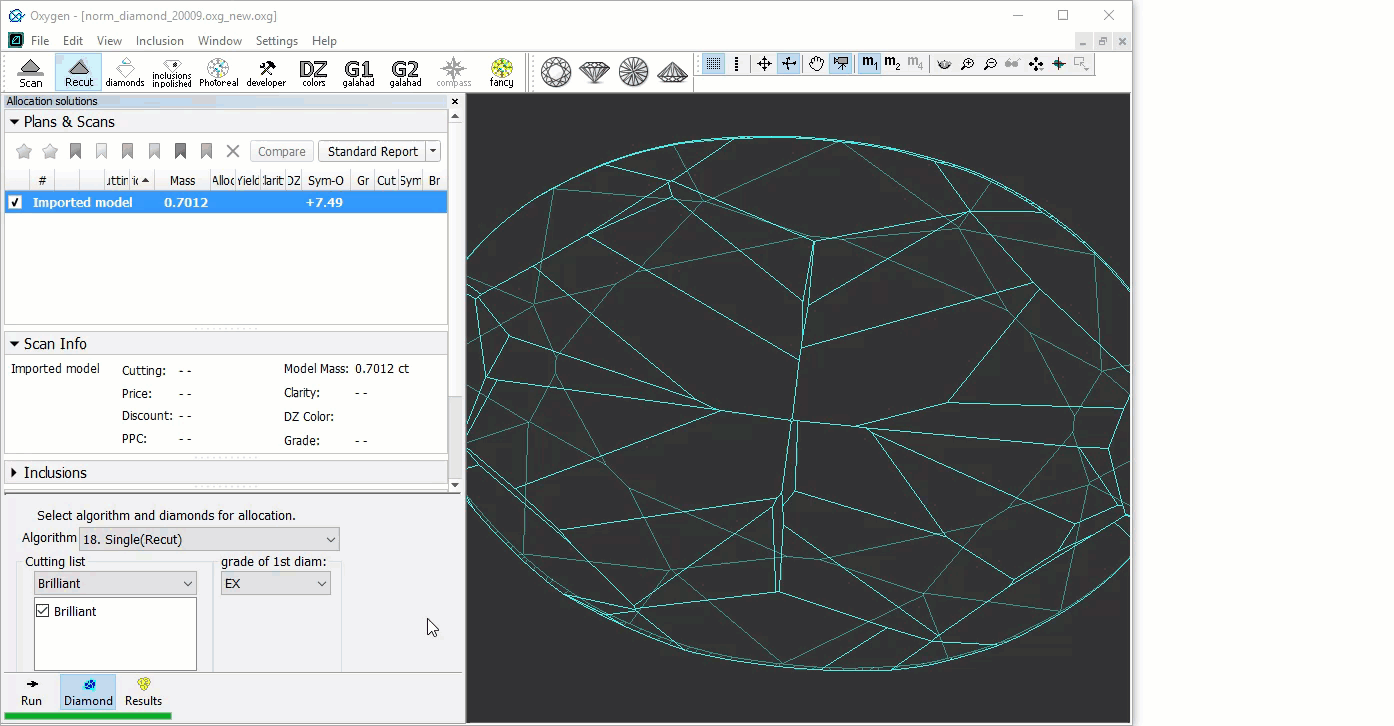
For example, Imported model could not have Facet Types after file opening. To create Facet Types, open the Facet Types menu. Note that after opening you will immediately see the coloring result of "Auto Types" function but not absence of facet types coloring even if model doesn’t have Facet Types. Do not worry, you are doing everything right, before opening the Facet Types menu, the coloring did not exist and program created it as Auto after opening of Facet Types dialog. Check out the current coloring and edit it if required. Close the Facet Types menu, and restart the SmartNormalize.
Note that weight as a parameter doesn't participate in optimization by the “SmartNormalize” algorithm. So the final solution could be with any weight. It is not important because the purpose of the algorithm is to get the correct model for further work. The results of the “SmartNormalize” work cannot be used as cutting plans.
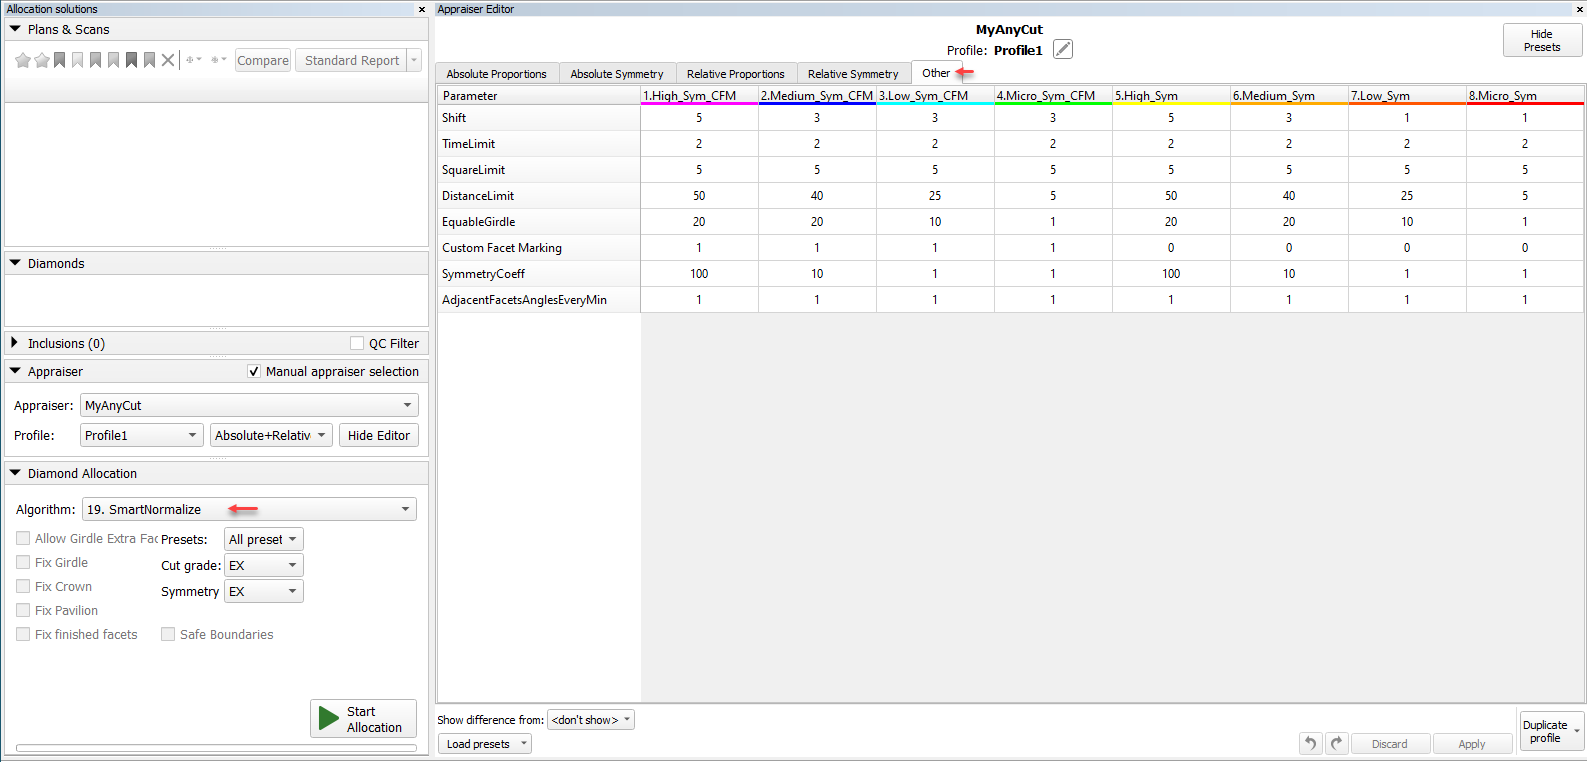
Configure algorithm behavior using parameters
The following parameters can be used to configure the “SmartNormalize” algorithm behavior and results:

- Shift - the distance that vertices can move away from the starting position during rebuilding. Necessary for the case when the Adjacent Facets Angle between facets is small and a slight change of the facet normals may result in a large vertex translation. The small Shift may block solution search when Custom Facet Marking is enabled.
- TimeLimit - a maximum running time of one rebuild. Stops the preset processing if the algorithm cannot rebuild the model.
- SquareLimit - small facets deletion threshold. Facet areas of the model proportionally transformed to 1ct weight are compared with this threshold. "5" = 5000 µm^2.
- DistanceLimit - short edges deletion threshold, Edge lengths of the model proportionally transformed to 1ct weight are compared with this threshold. Value is in µm. The threshold is divided into absolute and relative parts. The relative part reduces depending on the size of the horizontal section of the model on the height of the specific edge. Therefore, at the culet level where the section is minimal, smaller edges can be kept than at the level of a girdle where the section is maximal.
- EquableGirdle - quadrangular girdle facets that belong to one sector, that is they touch the same crown and pavilion Half facets, should have approximately the same length. The less this parameter is, the less deviation in edge length is acceptable in one sector during a rebuild.
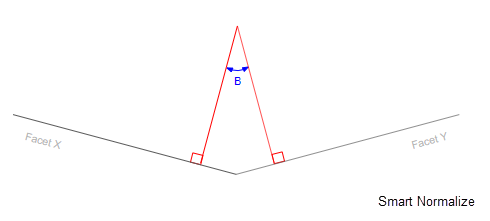
Custom Facet Marking - if enabled (any value different from "0", usually "1") for the preset then this preset takes into consideration the facet types: the facets from the same group will obtain the same Slope Angle.

On the picture:
- "Sym" presets work only with the symmetry axis
- "Sym"+"CFM" presets work with the symmetry axis and custom facet marking (CFM)
SymmetryCoeff - The Deviation from start and Symmetry metrics contradict. This parameter sets how many times the increase in symmetry is more important than minimizing the normals deviation.
Note
In all current presets the SymmetryCoeff differs from "0" to prevent users from selecting the asymmetrical models when this should not be done. The algorithm was configured for the models having from 1 to 9 symmetry axes. If all the presets produce distorted models, one of the probable reasons is the errors in the detection of symmetry axes or the pairs of symmetrical facets. This may be caused by the large asymmetry of the initial model or the non-standard number of symmetry axes. In this case try specifying facet types, then set SymmetryCoeff to "0" and run Smart Normalize without Symmetry.
- AdjacentFacetsAnglesEveryMin - sets limitation “not less than this value” for the angle between normals of any neighboring facets (see details in Adjacent Facets Angles).
Recommendations on usage
Here are some recommendations on how to configure and use the “SmartNormalize” algorithm:
- To improve output, specify facet types for the initial model. This:
- will guarantee deleting of excess facets
is necessary for working with enabled Custom Facet Marking parameter (see above)
If the SmartNormalize produced 4 results instead of 8, this most likely means that the input model does not have Facet Types.
For example, Imported model could not have Facet Types after file opening. To create Facet Types, open the Facet Types menu. Note that after opening you will immediately see the coloring result of "Auto Types" function but not absence of facet types coloring even if model doesn’t have Facet Types. Do not worry, you are doing everything right, before opening the Facet Types menu, the coloring did not exist and program created it as Auto after opening of Facet Types dialog. Check out the current coloring and edit it if required. Close the Facet Types menu, and restart the SmartNormalize.
- the facet types are automatically transferred to the resulting model which is useful during registering it as a new in-house cut
On Stage 1 (see above) the symmetrical sectors of the model which will in Stage 3 become of the same length, may have large differences in length. Because of this, the different number of girdle facets can go to non-symmetrical sectors. This can lead to poor performance of the Smart Recut algorithm for such models. If this situation occurs, it is recommended to run the Smart Normalize algorithm one more time - it should divide a girdle into facets correctly because initially, the sectors have the same length.
Before SN 
After 1st run of SN 
After 2nd run of SN 
a
- The small value of the Shift parameter may block solution search when Custom Facet Marking is enabled.
If all the presets produce distorted models, one of the probable reasons is the errors in the detection of symmetry axes or the pairs of symmetrical facets. This may be caused by the large asymmetry of the initial model or the non-standard number of symmetry axes. In this case try specifying facet types, then set SymmetryCoeff to "0" and run Smart Normalize without Symmetry.
For square cuts, the algorithm enforces the final GidleRatio to 1.0 to reach the corresponding symmetry.
The algorithm can work with the models in which crown and pavilion touch in a vertex or edge. For such cases, the facet types must be specified.
- Nonconvex heart cuts are supported by Smart Normalize and Smart Recut. However, in the case of Hearts, the algorithm more often has difficulties with the girdle shape and finding the correct symmetry axes for the scanned models. Thus for building Heart allocation forms it is better to use the models created in the Cut Designer or the solutions of Recut or Smart Recut algorithms.
Mark facets for removal
An Element Multi Selection Tool can be used with the "SmartNormalize" algorithm. Using the tool, you can manually select the facets to be mandatorily removed from a model by the "SmartNormalize" algorithm. To use the tool, in the Recut mode select your scan or solution in the list, then select the "SmartNormalize" algorithm and then on the main panel toolbox, click  > Remove facets by Smart Normalize. This activates the Element Multi Selection Tool; now in the Scene, you can mark facets to be removed by the algorithm with a mouse click. Facets marked for removal are highlighted with red.
As you finished with marking facets, on the main panel toolbox, click > Deactivate Element Multi Selection tool. This deactivates the tool.
Note that after marking the facets for removal, they are only highlighted in the Scene when the "SmartNormalize" algorithm is selected.
You can find some details on this functionality and the example of using it in the video:
Add Comment