Overview
HPOxygen is designed to work with multiple models simultaneously in a transparent and intuitive manner. The working models are listed on the Plans & Scans panel.
The models are named automatically in a following manner:
| Name | Origin | Possible number of instances per project |
|---|---|---|
| Shadow scan | Model produced by shadow scanning. | At most one, since performing a new shadow scan erases the existing models. |
Pavilion Reflect scan Crown Reflect scan | Models produced by reflect scanning. | Any number. |
| Edited model | Model produced by manual editing. | Any number. |
| Refined scan | Name used by older versions of HPOxygen instead of modern Reflect scan and Edited model. | Any number. |
| Imported model | Model imported from an *.oxgz file (to do so, press File → Import → Model in the top menu), or opened from a *.dmc, *.gem, or *.mmd file. | Any number. |
| Sample | Model imported as a sample (to do so, press Load Sample on the Scan & Build panel). | At most one, since loading a new sample unloads the existing one. |
| <number> | Recut solution. | Any number. |
A model can't be renamed. When preparing a polish report, though, it is possible to enter an alternative name for a model to be used within the scope of that report.
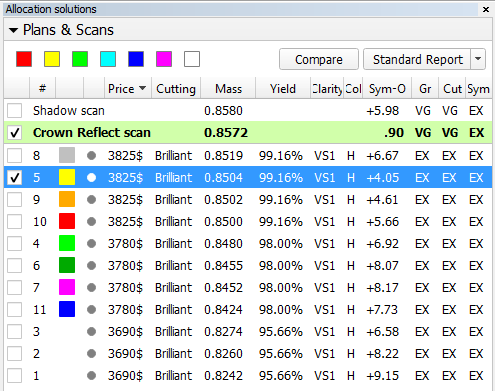
The list contains the following data for each model:
| Name | Title | Meaning |
|---|---|---|
| - | Checkbox indicating whether the solution is selected (see Selecting below). |
| # | Model Name/Solution Number | Model name (assigned automatically); in case of recut solutions, just the number. |
| - | Label Color | Color label. Applicable to solutions only. |
| - | Clarity Status | Clarity status marker. Possible values: |
| Price | Price | Estimated price according to the price list. Applicable to solutions only. |
| Cutting | Cutting | Cutting type. Applicable to solutions only. |
| Mass | Mass | Mass of the stone. |
| Yield | Yield | Yield (percentage of mass of the original stone retained in the recut). Applicable to solutions only. |
| Clarity | Clarity | Estimated clarity grade. Applicable to solutions only. |
| Col | Diamond color (DZ) | Estimated color. See DZ Color Estimate for more details. |
| Sym-O | Optical Symmetry | Estimated optical symmetry. When turned on, requires the recalculation of optical symmetry for all models upon opening a file, which is a computationally demanding procedure and may cause perceptible delay. By default, this option is off, and the column is displayed empty. |
| Gr | Grade by GIA Facetware | Estimated overall grade. |
| Cut | Cut Grade by GIA Facetware | Estimated cut grade. |
| Sym | Symmetry Grade by GIA Facetware | Estimated symmetry grade. |


Clicking at any column header sorts the list by the corresponding column value. Note, however, that the scans are still listed separately before the solutions, regardless of the sort order.
The Scan & Build panel also contains the list of working models with the same basic functionality. Note that it contains just the scans, and not the recut solutions. The columns specific to solutions are also hidden.

Main Scan
One of the scans is considered the Main Scan. Its name in the list is emphasized with bold font and (only when selected together with another model) green background.
All manual edits and reflect scans take the current Main Scan model as the initial approximation and produce new Edited models or Reflect scans, correspondingly.
Recut solutions search uses the current Main Scan model as the original.
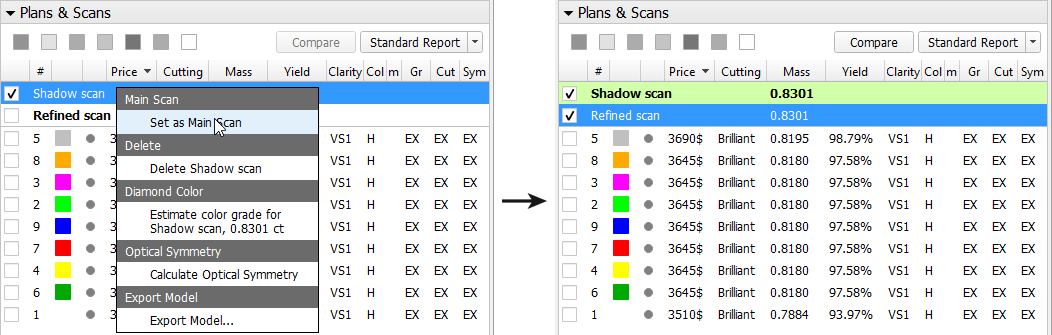
Any scan (except Sample, see below) can be made the Main Scan by right-clicking it in the list and selecting Set as Main Scan:
*.dmc file on the Scan & Build panel. Once loaded, it remains in your list of models under the name Sample.Selecting models
Any model can be selected for viewing. Moreover, any combination of models may be selected simultaneously and viewed together in different colors (assigned automatically). For more details on selection interface, see below.
The selection persists when the user switches between the panels Plans & Scans and Scan & Build.
When a recut solution is selected, the Main Scan is selected too (unless the user deselects it explicitly by unchecking its check box).
The last selected model is designated current model and marked with a dark blue background.
The selection behavior is summarized in the table below:
| Action | Scan (including the Main Scan) | Solution | |
|---|---|---|---|
| Click | If this is the current model: does nothing. Otherwise: selects it, makes it current, and deselects the rest. | If this is the current model: does nothing. Otherwise: selects it, makes it current, selects also the Main Scan, and deselects the rest. | |
Ctrl + Click | 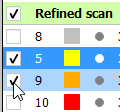 | If this is the current model: does nothing. Otherwise: toggles selection of this model, not resetting the current and not affecting the rest. | |
| Shift + Click | If this is the current model: does nothing. Otherwise: selects all models in the list between this and the current model (inclusive), and makes this model current. | ||
| Right click | If this model is selected: opens the context menu for it (see below). Otherwise: selects it, makes it current, deselects the rest, and opens the context menu. | If this model is selected: opens the context menu for it. Otherwise: selects it, makes it current, selects also the Main Scan, deselects the rest, and opens the context menu. | |
| Arrow keys (Up / Down) | Selects the model one step up or down in the list from the current one, makes it current, and deselects the rest. | Selects the model one step up or down in the list from the current one, makes it current, selects also the Main Scan, and deselects the rest. | |
Any model except the Main Scan (see above) can be deleted from the list by pressing Delete on the keyboard or selecting Delete model in the context menu.
Context Menu
Right-clicking on a model in the list causes the context menu to appear.
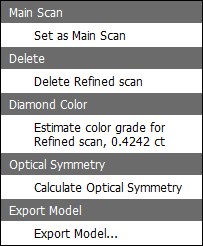
When a single scan is selected, the menu contains the following available actions:
| Main Scan | Makes this scan the Main Scan (see above). |
|---|---|---|
| Delete | Deletes the selected scan. | |
| Diamond Color | Initiates the color estimation procedure (see DZ Color Estimate). | |
| Optical Symmetry | Toggles the optical symmetry calculation for all existing and new models. | |
| Export Model | Exports the model in a user-selected format (see Export). |
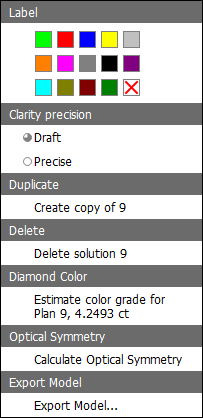
When a single solution is selected (possibly together with the Main Scan), the menu contains the following available actions:
| Label | Select the color label for this solution. Initially, the solutions obtained by Smart Recut (see Smart Recut for details) are assigned color labels in accordance with the corresponding presets. In all other methods, the solution labels are initially left blank. |
|---|---|---|
| Clarity precision | Sets the clarity precision to Draft or Precise (initially set to neither). | |
| Duplicate | Create a duplicate of this solution and add it to the list. | |
| Delete | Deletes the selected solution. | |
| Diamond Color | Initiates the color estimation procedure (see DZ Color Estimate). | |
| Optical Symmetry | Toggles the optical symmetry calculation for all existing and new models. | |
| Export Model | Exports the model in a user-selected format (see Export). |
When multiple scans are selected, the set of available actions narrows down to Delete and Optical symmetry.
When multiple models including some solution(s) are selected, the available actions are Label, Delete, and Optical symmetry, with the implication that Label applies only to the solutions and not to the scans.
Note also that the Main Scan can not be deleted even when deleting multiple selections in which it is included.
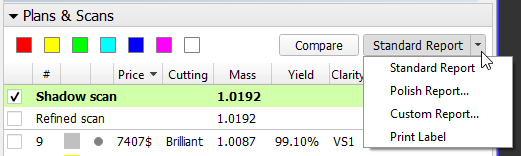
Top Buttons
The top part of the Plans & Scans panel contains two buttons that act on the selected model(s):
- Compare button initiates the comparative report (see Comparative report for details) if two models are selected. Otherwise, the button is disabled.

- Polish report button initiates the polish report dialog.

Note that the latter button is multi-optional. The dropdown list to the right provides a selection of options: Standard Report, Polish Report, Custom Report, and Print Label. Once selected, the option persists until the program is closed or a new model is opened.
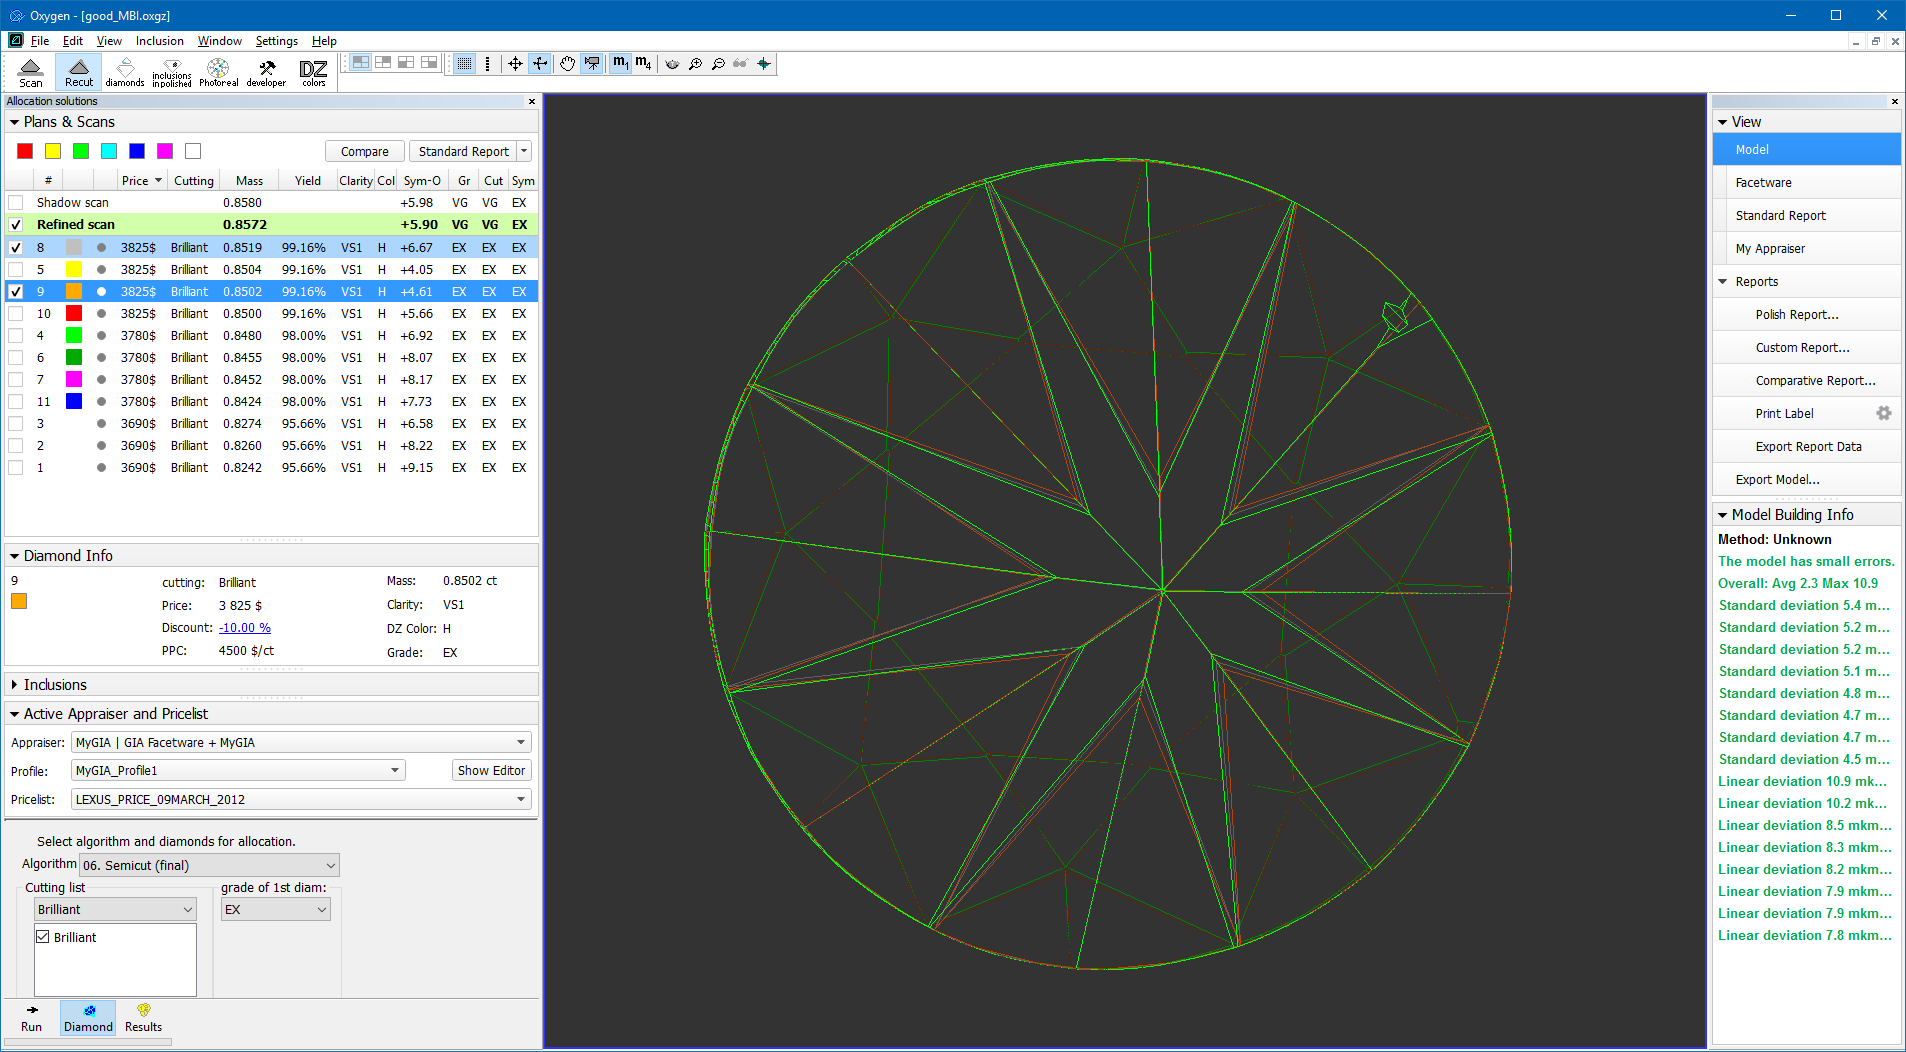
Model Building Info
When a scan is selected, Model Building Info panel is shown to the right (see Model Building Info (MBI) for more details).
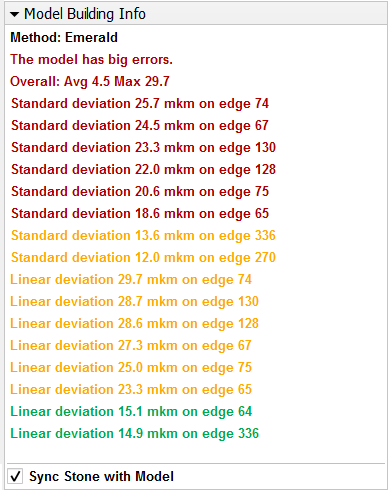
The building info describes how well the model matches the scanned contours. It contains the header referring to the overall model quality, followed by the lines that describe individual problem spots. Lines are color-coded according to the severity of the errors they signify. Each of these lines is a link; pressing such a link while viewing the model in the Photo mode would orient the model so as to display the corresponding contour. The matching photo is also shown. If Sync stone with model is checked, then the actual stone would be also oriented the same way, which would position the problem-causing edge against the door. This is useful for manual cleaning of the stone, in case if the deviation was caused by dirt.
Scanned models prepared in the older versions of HPOxygen may lack the Model Building Info.
Comparing models
Any two models can be selected for comparison (see Comparative Report). If one recut solution is selected, it would be compared against the Main Scan (which is automatically selected as well in this case). If two solutions are selected, they would be compared against each other, even though the Main Scan is selected too.
The comparison behavior is summarized in the table below:
| Models selected | Action of Comparative report |
|---|---|
| One | Not available. |
| Two | Compares the two models. |
| Three | If one of the three models is the Main Scan: compares the other two. Otherwise: not available. |
| Four or more | Not available. |