The article is intended for operator who is going to use plug-in for quick vertical and horizontal disparities control during the work with the DM in the first time.
Step-by-step guide
Run the program and connect to the microscope. Click on the "Tools" tab at the right program panel and find 'Disparity' plugin:
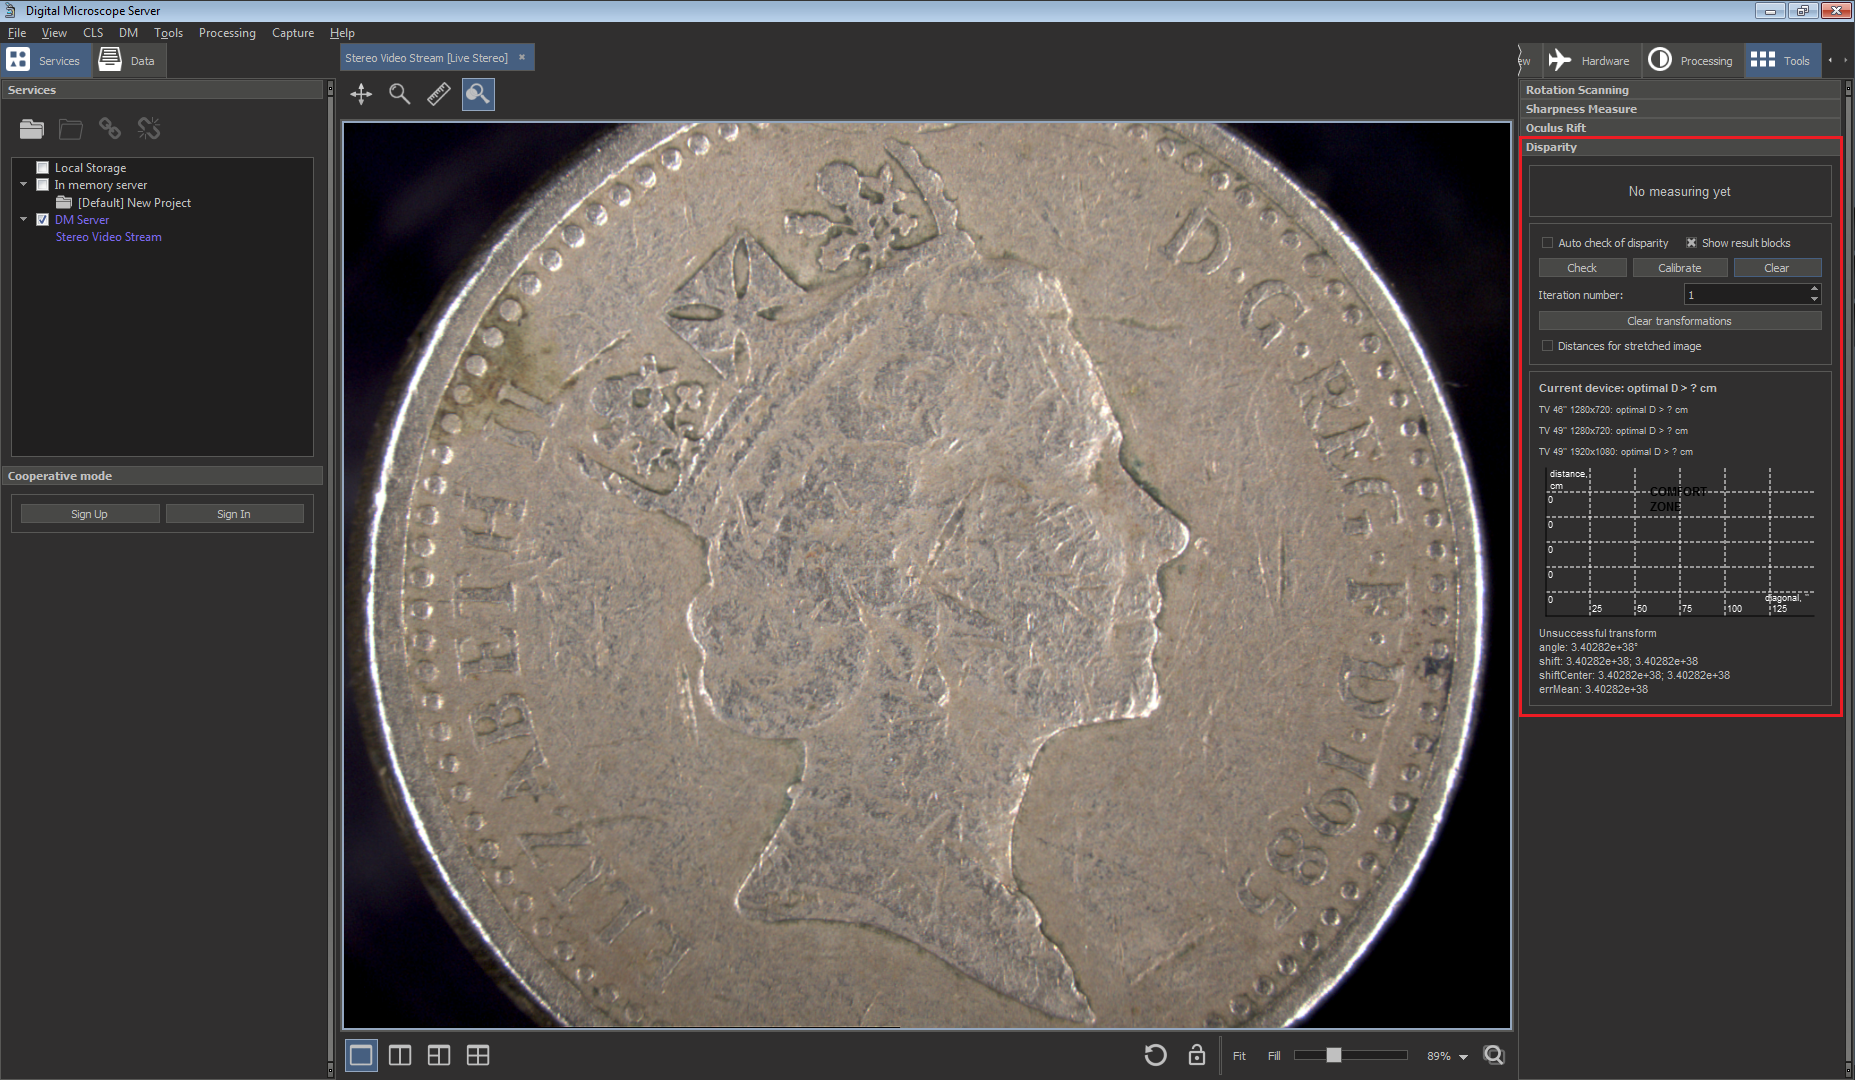
Disparity panel
Item Description 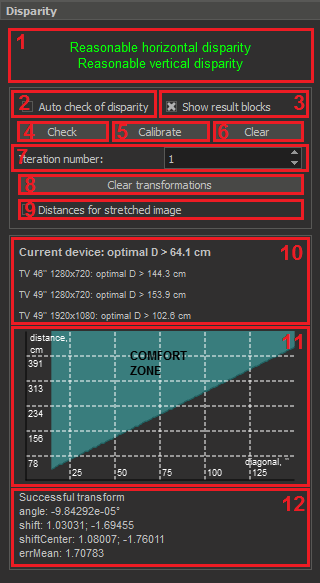
1 The result of the check of horizontal and vertical disparities2 Activate/deactivate auto checking disparity mode3 Show/hide result blocks4 Start checking the state of disparities5 Start stereo geometry calibration (for current zoom)6 Clear the current disparity measurements7 The control for the number of iterations of calibration8 Clear the table of transformations, applied to the data9 Check it, if you want to see the viewing distance values for the stretched images to fullscreen10 The optimal distance to watch the image from different screens11 The chart demonstrating the dependency of the distance from the size of the screen12 The parameters of the calibrationPut a flat calibration object in the camera viewport. It should be orthogonal to the optical axis. Fit focus at the object surface.
Set minimum zoom.
Push the "Check" button and check current disparity. Also you can activate auto checking of disparity mode if motors/zoom/focus values are changed by the "Auto check of disparity" checkbox. The plugin will tell you in the special information area, if it's everything ok and recommend to perform calibration if something is wrong with the vertical or horizontal disparity.
After checking the application should look like that:Reasonable horizontal disparity Problems with horizontal disparity Wrong horizontal disparity Hard to answer 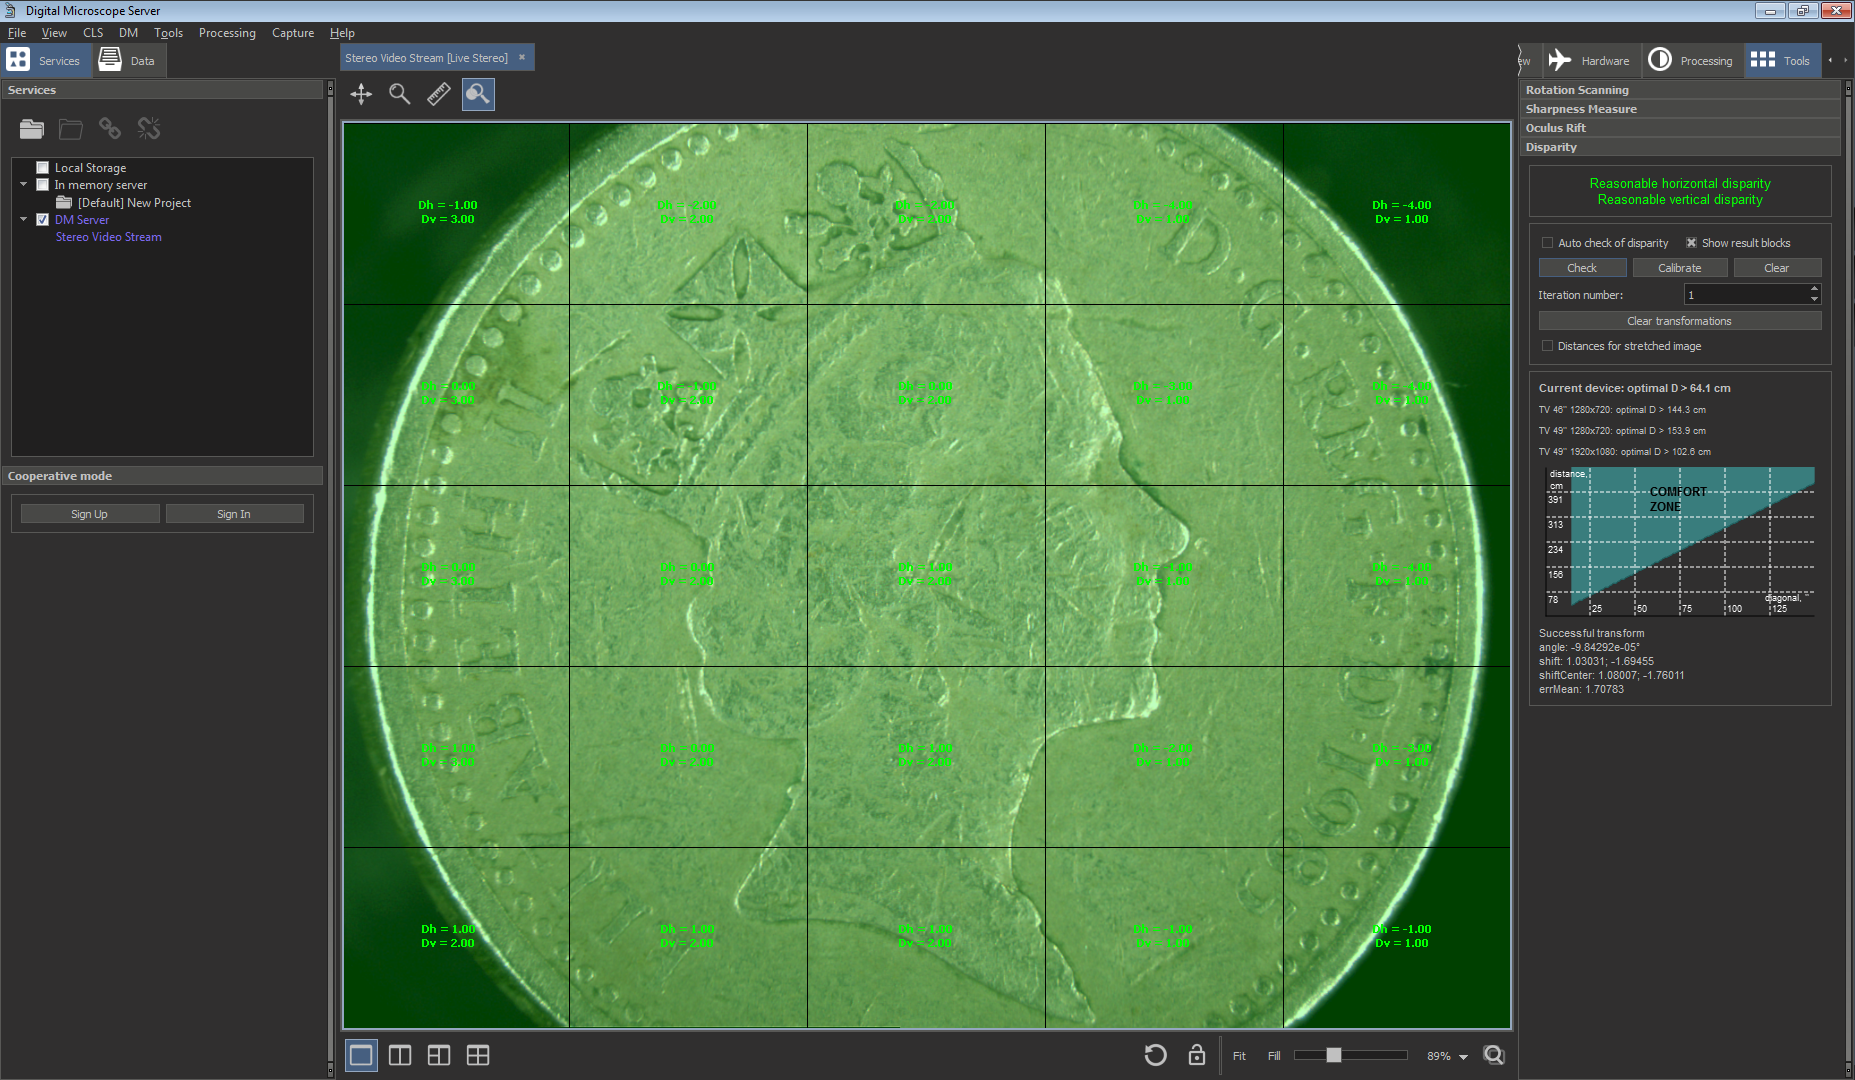
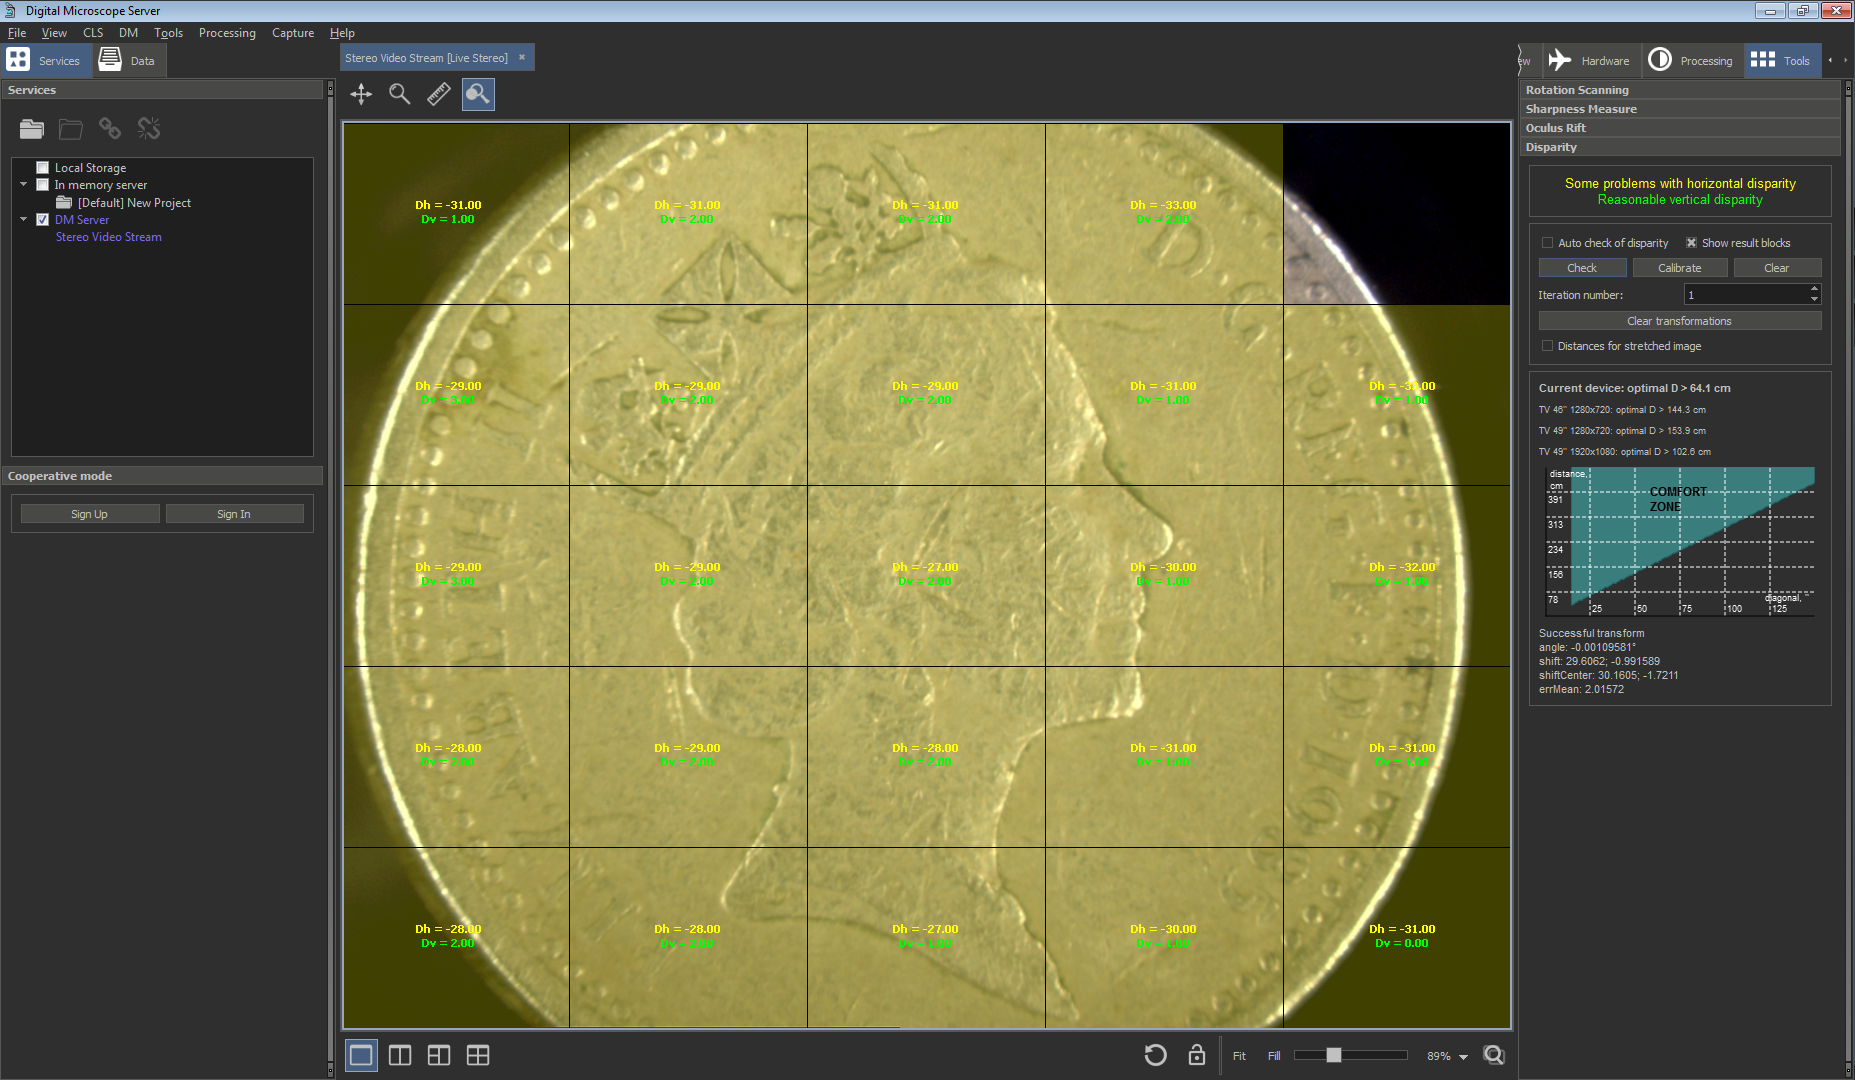
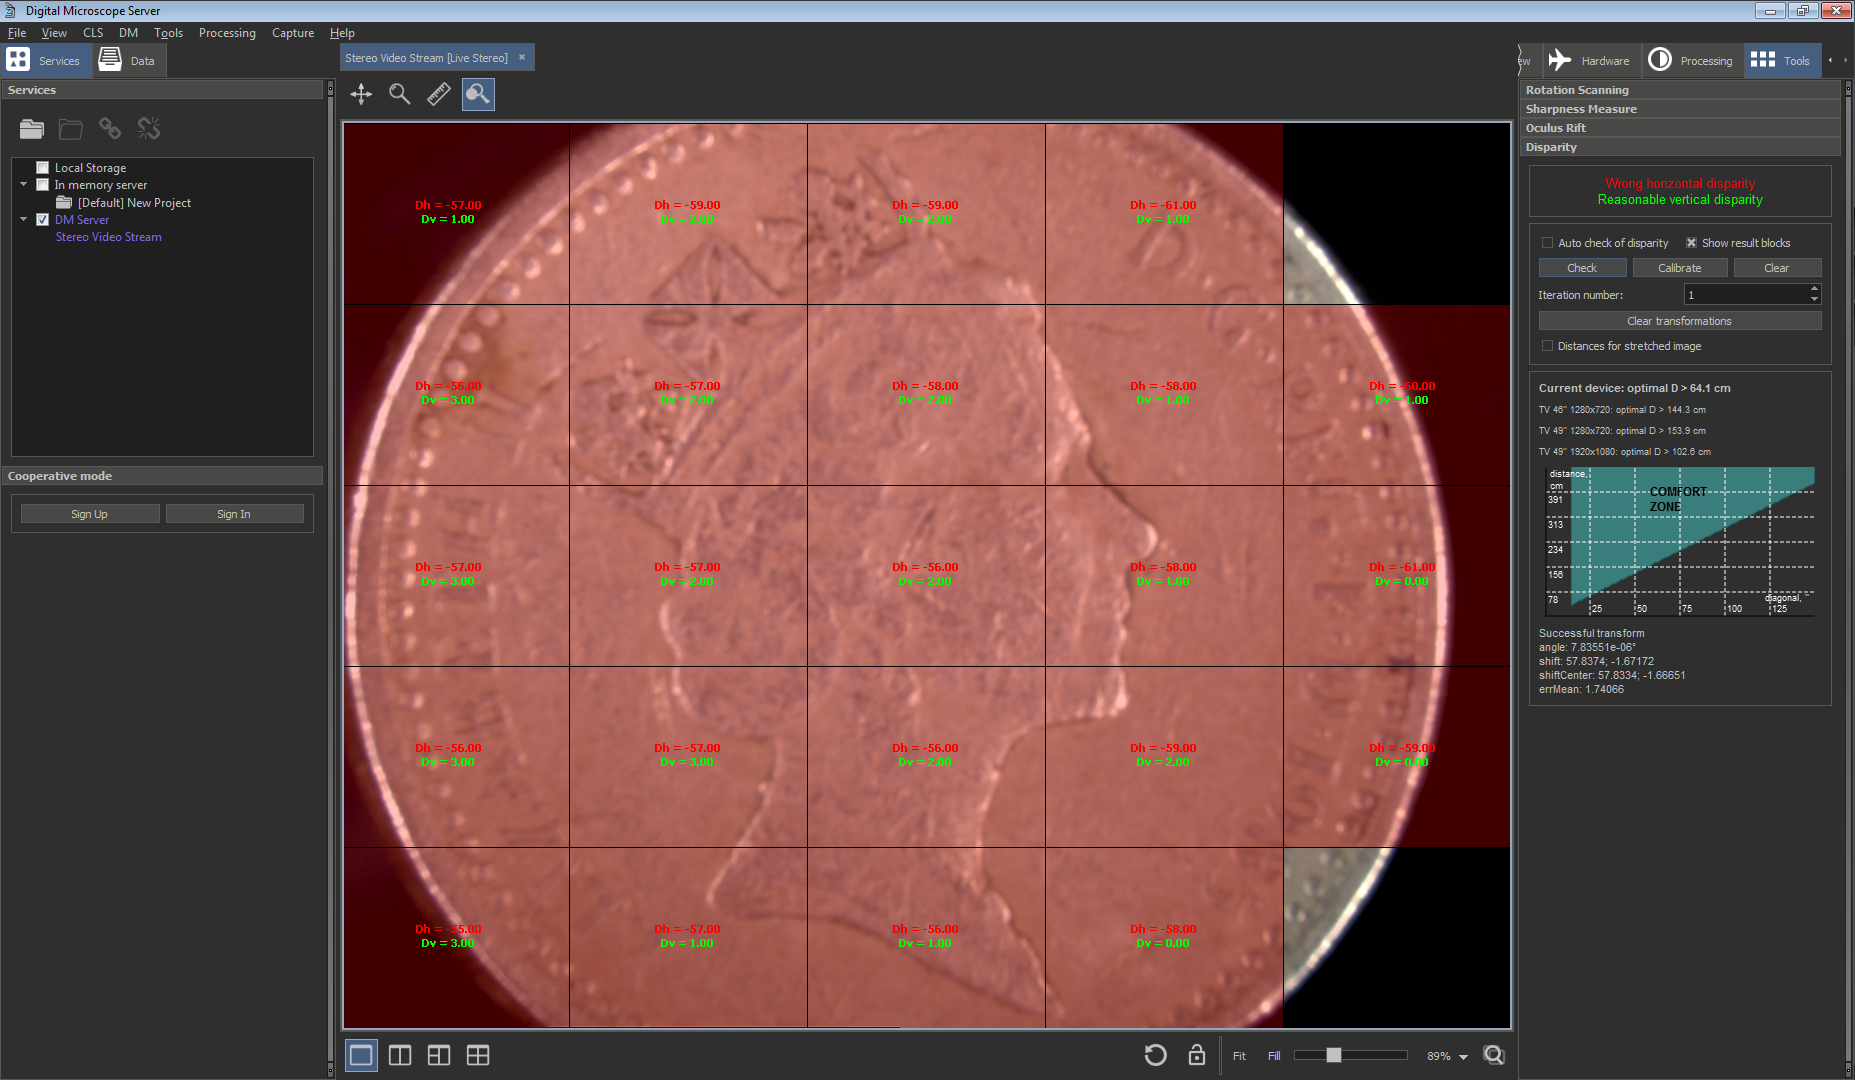
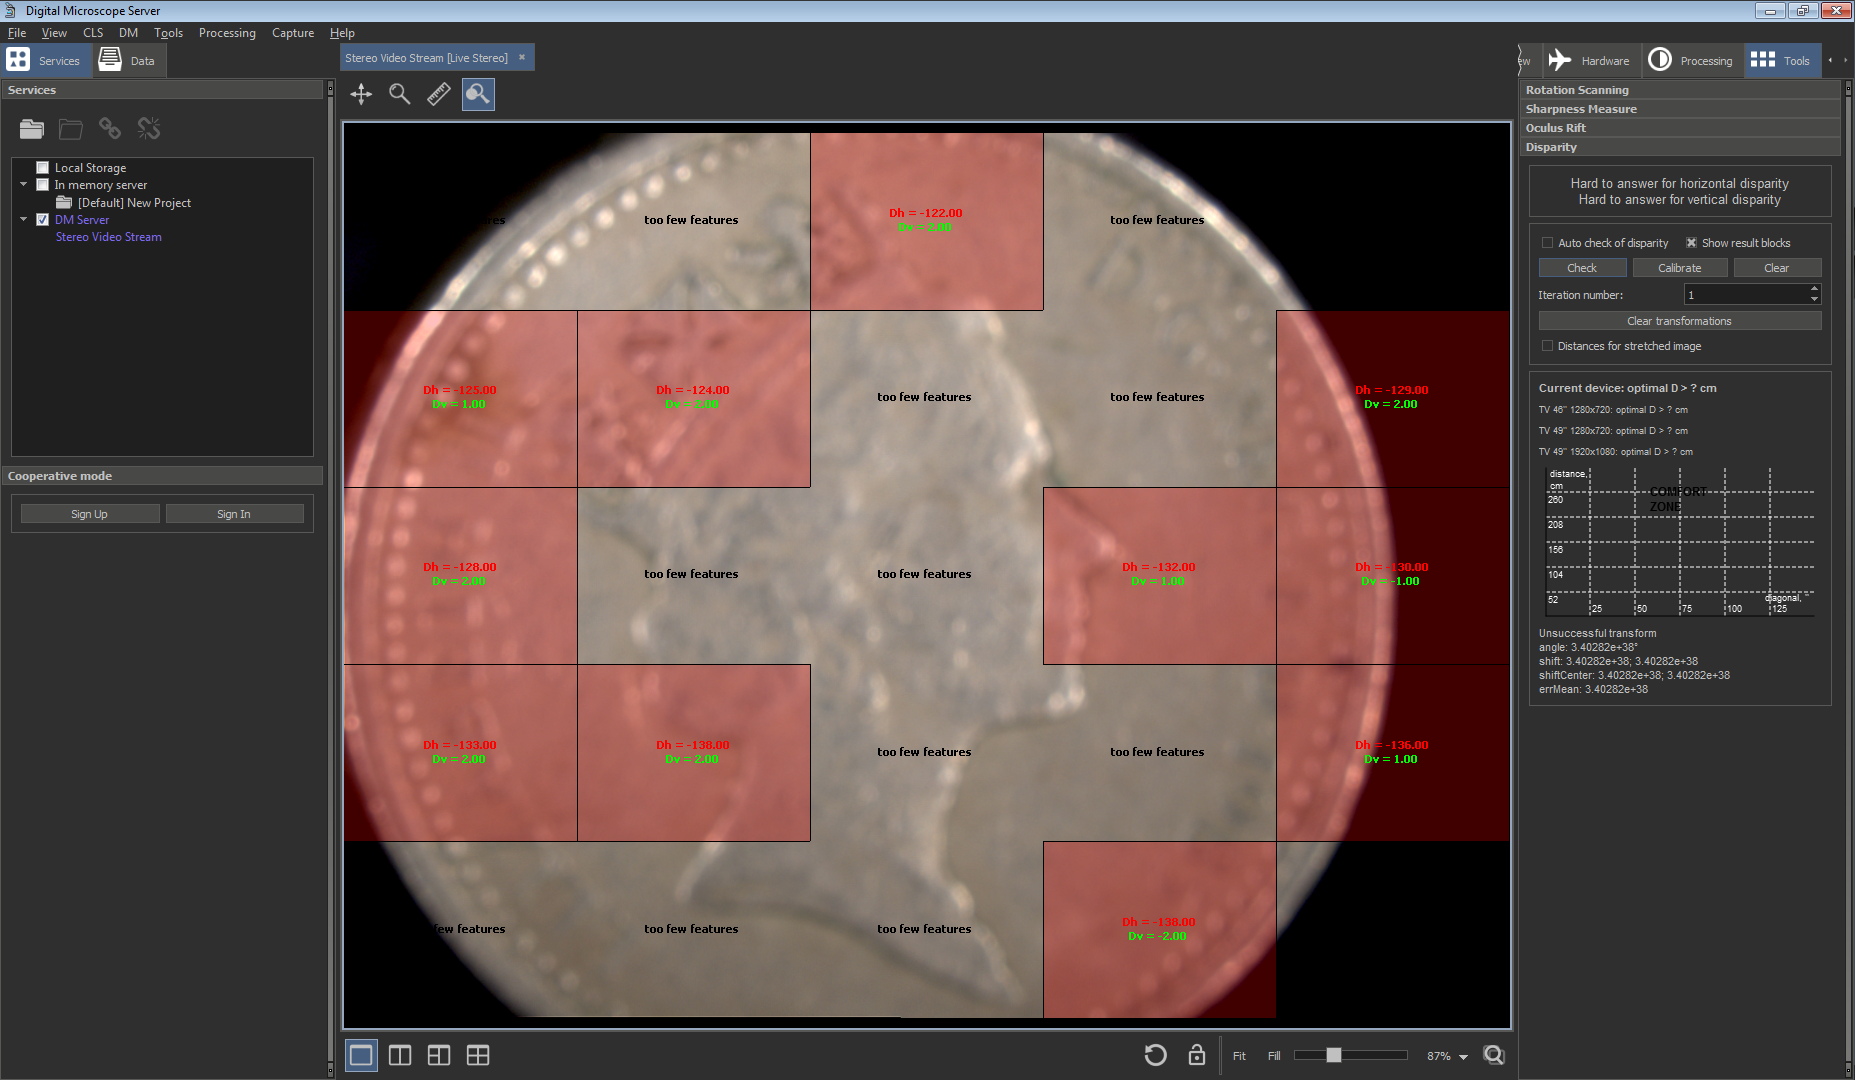
Overlay color demands on disparity:
Color Disparity Demands GREENgood disparity <= HorizontalDisparityLowThreshold (for horizontal disparity) / VerticalDisparityLowThreshold (for vertical disparity) YELLOWdisparity > HorizontalDisparityLowThreshold / VerticalDisparityLowThreshold, and disparity <= HorizontalDisparityHighThreshold / VerticalDisparityHighThreshold REDbad, need calibration disparity > HorizontalDisparityHighThreshold / VerticalDisparityHighThreshold If you see yellow or red regions push the "Calibrate" button (the button is unavailable in case of video). After some time you should see that those regions are become green. If they are not, please check the step 2.
You can also set the number of the iterations of calibration. If the number is greater than 1, the calibration will be performed specified times. After each iteration the parameters of the calibration will be recalculated and the new transform will be got and applied.
- To show/hide result blocks use the "Show result blocks" checkbox
Change zoom to maximum value.
Do steps 3.a - 3.c for this zoom
Check the 'Auto check of disparity' checkbox.
Zoom out step but step from maximum zoom the minimum, fit focus on the calibration object surface if necessary and wait until the plugin shows you regions with color-coded disparity. Check that most of them should be green at any zoom. If it is not, do steps 3.a - 3c for this zoom.
- To clear colored overlays for disparity push the "Clear" button.
- To clear the calibration results push the "Clear transformations" button.
- If you want to see the viewing distance values for the stretched images to fullscreen, please use the "Distances for stretched image" checkbox
Configuring of the disparity plugin
You may configure the plugin by the appropriate settings in 'msaconfig.xml':
<config>
  <id>com.octonus.dm.CVerticalDisparityPlugin/2.0</id>
  <values>
    <key name="AutoCheckIntervalMS" value="750"/>
    <key name="HorizontalDisparityLowThreshold" value="20"/>
    <key name="HorizontalDisparityHighThreshold" value="45"/>
    <key name="VerticalDisparityLowThreshold" value="3"/>
    <key name="VerticalDisparityHighThreshold" value="8"/>
    <key name="CellResolution" value="5"/>
    <key name="KeypointRequiredAmount" value="10"/>
    <key name="BlockPercentForOKSituation" value="60"/>
    <key name="BlockPercentForStateDetection" value="60"/>
  </values>
 </config>
The parameters HorizontalDisparityLowThreshold, VerticalDisparityLowThreshold, HorizontalDisparityHighThreshold, and VerticalDisparityHighThreshold are responsible for the decision of the microscope state (if it needs calibration)
If you need additional settings during work, you should add the string:
<key name="ShowControls" value="true"/>
inside your config. To remove the additional controls you should set the key "ShowControls" to "false" or just remove the whole string with this key.