The 'White Balance' panel ('Hardware' tab, right panel) allows to adjust the white balance on the lighting configuration:
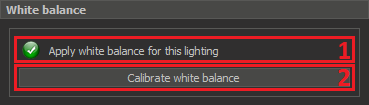
- The current status of applying white balance for actual lighting
- The button to calibrate white balance for the current lighting
If white balance is already configured for the current lighting, the status is as follows:

Otherwise, the user will see the following status:

Calibrating white balance for each led group
Preparations
- Place a sheet of white paper under the lens so that the entire image area is filled with this sheet. Focus on the surface of the sheet.
- Select 'Manual' mode. Disable autocontrast, autoexposure, image stabilization. Select 'Continuous' mode:
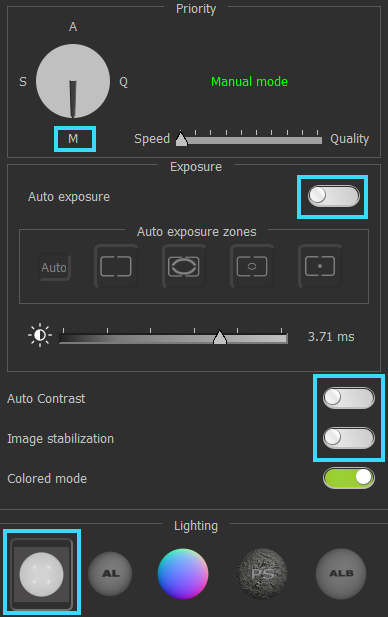
Then, do next steps for each led group:
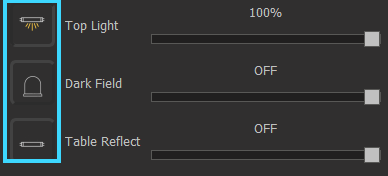
- Switch On only the one led group and switch Off other led groups. For example, switch on the 'Top Light' and switch off 'Dark field and 'Table reflect'.
- Use the 'brightness' slider to make image brightness higher, but without overexposured zones:

- Check the brightness using the 'Histogram' ('Data' tab on the left side of the DALS program). It should be higher
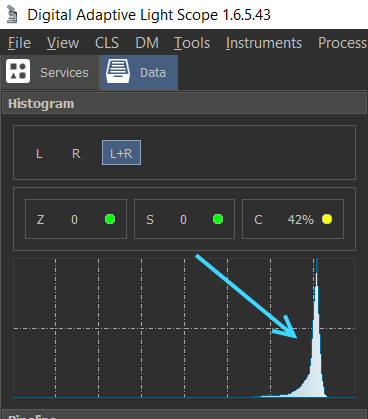
- Press the 'Calibrate white balance' button and wait until the calibration process is finished (the button will become enable again). Check the paper color, it should be grey.