Brightness and white balance calibration
- Run DiBox with "/setup" argument.
- Put a teflon calibration object to the holder. Select the "Table Color UV Free" lighting preset.
- Calibrate white balance for this lighting:
- Click on the button
 on the left program panel.
 - Move mouse over the picture with teflon and press CTRL + Left mouse button. You should see changing of WB coeffs
 and changing image color. Color under the mouse cursor should be gray or almost gray.
 - Press make photo button
 to save WB for the lighting preset.
- Click on the button
- Remember exposure that was on the lighting preset. Denote this value as E0.
- Adjust exposure using the exposure field
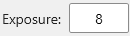 until the color under mouse cursor on image is closest to (208, 208, 208). Denote new exposure as E1.
 - Calculate K = E1 / E0. Open file %AppData%\Octonus\DiBox\RawSettings.xmland set K to the FullSpectrumMultiplier field. Save the file.
- Change the holder to the darkfield holder. Select the "Darkfield" lighting preset. Do 3-6 steps for it, but change the RearMultiplier field in the RawSettings.xml file.
Please, note, that you shouldn't save the changed exposure to settings by pressing button after adjusting the exposure. Do it only in "/setup" mode only after calibrating WB and only before changing the exposure.
button after adjusting the exposure. Do it only in "/setup" mode only after calibrating WB and only before changing the exposure.Finalization of white balance calibration
Now white balance is calibrated for three lighting presets: "Office", "Table Color UV Free" and "Darkfield". You should calibrate WB for "Table Color UV Free" and "Darkfield" while calibrating the brightness. Then, calibrate WB for the "Office":
- Put a teflon calibration object to the holder.
- Select the "Office" lighting preset.
- Do the step 3 from the "Brightness and white balance calibration" section of this page.
Then, copy WB settings for these lighting presets to XML config files for correspondent lightings presets using the PresetsHelper program.