You can adjust some elements of the HP Oxygen interface for your everyday needs and tasks.
Configurable Set of Columns in Solution List
The set of displayed columns for the scan/solution list is configurable: you can select columns to be displayed/hidden and also change their order. The function is available for:
- The
 mode, the Plans & Scans section.
 The
 mode, the Models section.
Notes:
- The configuration for each mode is performed and stored separately.
- The configuration is not available in the Lock to Scan mode.
 To customize columns, right-click the name of any column, then in the context menu select/clear checkboxes for your columns. For advanced configuration (several columns at once, change order), in the context menu, click Details. The Adjust columns dialog is displayed. Here you can select/deselect several columns at once and change their order by drag-and-drop.
In the Adjust columns dialog, you can find 3 separate groups:
- Core information - you cannot hide or move these columns.
- Main information - you can hide, reorder is possible only within the group, columns from group "3" will never be able to go before these ones.
- Other information - you can hide and reorder within the group.

Note that for the Multiple Diamonds in One Solution mode, the Adjust columns dialog differs: you can customize both solution and diamonds columns.
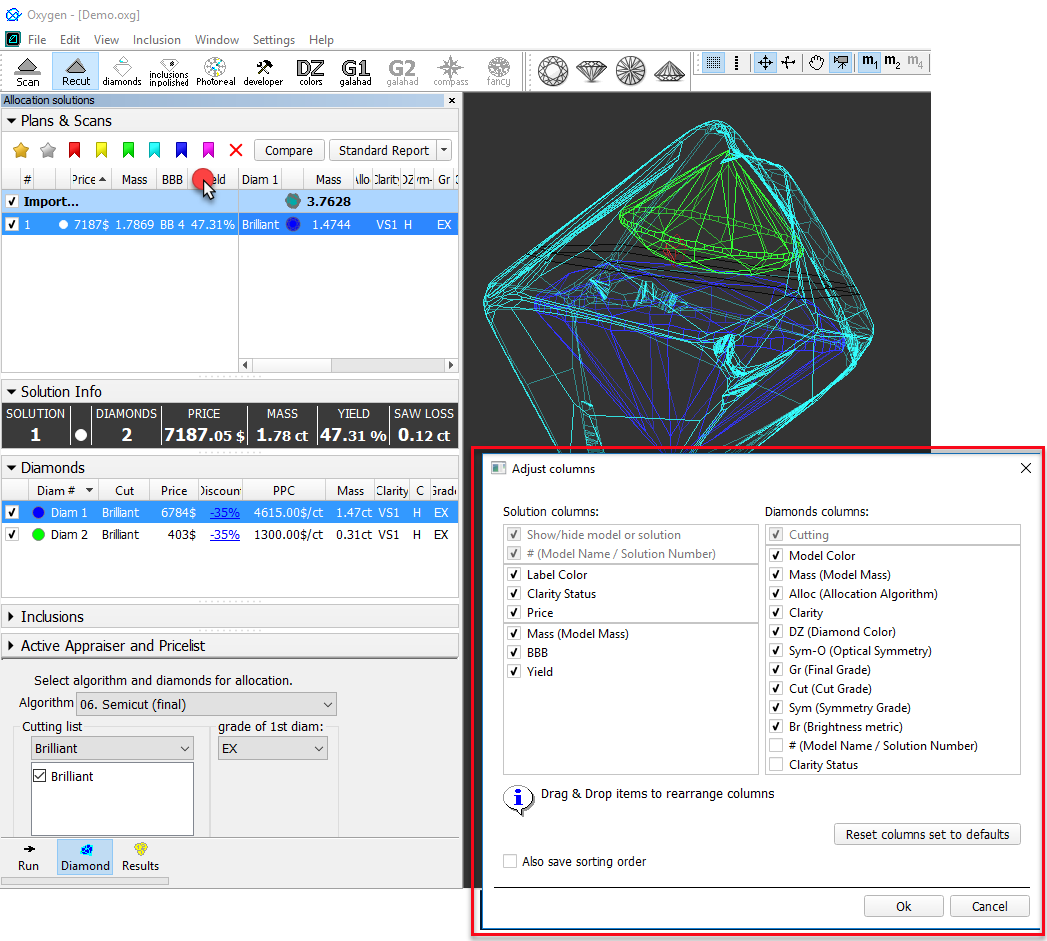
To restore the default set of columns in the default order, click Reset columns set to defaults.
Besides setting the column set, you may also save sorting order you currently use (the Also save sorting order option).
| Also save sorting order | |
|---|---|
| Selected | Not Selected |
Sorting you use when closing the current project will be used for the next project you open. Note Once selected, the option stays active in spite of restarting the program or opening the next projects. | For the next project you open, its own saved sorting will be used. Notes
|
Scene Model and Photos View - Show Grid Option
For the Scene in Model or Photos view, you can show the grid. To enable the grid, set Scene to the Model or Photos view, then from the main menu, select View > Show Grid. To disable the grid, clear the Show Grid checkbox. As you zoom in/out, the grid step and units (mkm, mm) adjust to the current zoom level.
With the grid enabled, you can click  to display vertical and horizontal measurements (mm) of the projection of the displayed model in its current position.
Click  again to hide measurements
Add Comment