Introduction
Color targets are used to create color correction profiles to be used in ViBox and DiBox software. This document explains, how to capture a proper image of a color target.
Different types of color targets and their intentions are covered in the section "Target types". All requirements are summarized in the list at the beginning of the section "Requirements", further content of the same section describes all items in details.
Target types
There are a number of different color targets. For now, we have tested the following:
- ColorChecker
- ColorCheckerSG
- Pages of Munsell Atlas
We recommend to use different targets for different tasks:
- ColorChecker to adjust white balance and exposure, see requirement 4a
- ColorCheckerSG for general color calibration
- Page of Munsell Atlas with the appropriate hue to improve color rendition of a particular color hue
Requirements
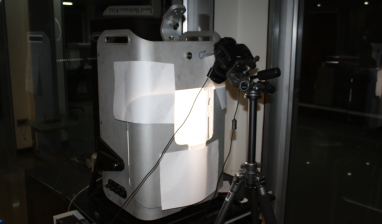
Here is the quick checklist on all the requirements. Use it as a cheat sheet. See details in further sections. See the image of the setup below.
- Geometry
- Target parallel to ceiling
- Camera at 45° angle
- Illumination consistency
- No Front LEDs are used
- All Top LEDs have white color
- Doors of ViBox device are closed
- Illumination uniformity
- All Top LEDs are enabled
- One or two white diffusers are installed
- ViBox mirrors are covered with white paper
- Camera settings
- ColorChecker white patch has reference values
- ISO is not lower than 200
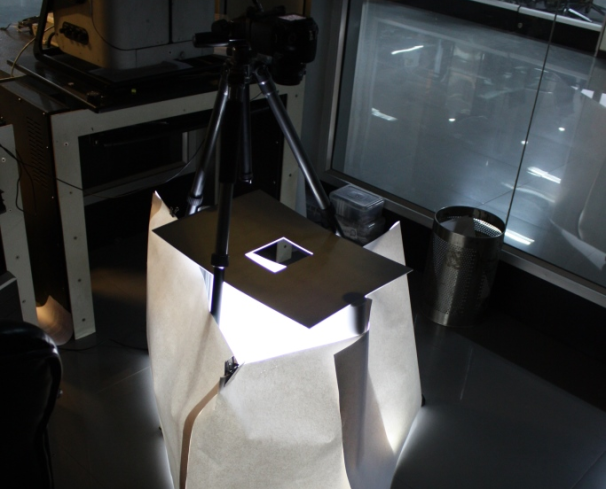
Appropriate setup for ViBox with all requirements satisfied
Geometry
The target should be located parallel to the illumination surface. In case of ViBox device — parallel to the ceiling. The angle between camera's optical axis and the normal to target's surface should be close to 45°.
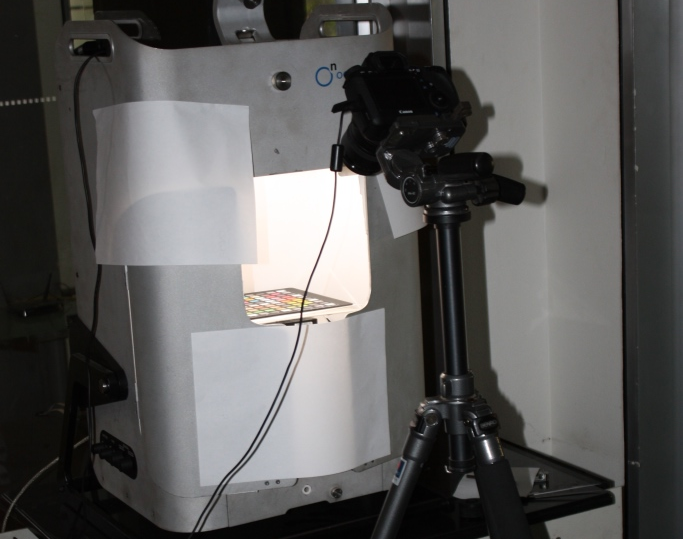
The assumed way is to place the camera on a tripod. See the image below.
Camera is placed on a tripod to achieve the proper angle
Illumination consistency
A color correction profile is applicable only for illuminations with the same spectra. In order to improve the applicability range of a color profile only one type of LEDs should be used when taking an image of a color target. White top LEDs are recommended.
Doors of ViBox device should be closed to reduce influence of indoor light. If there is no way to cover the indoor light (e.g. when DiBox light rings are used outside any device), it should be shut down. A target should be illuminated solely with the source being calibrated.
Illumination uniformity
Illumination uniformity is very important for creation of reliable color profiles. To achieve this, one should use white diffusers to smoothen the point light sources like LEDs.
One can use a diffuser of a different color, but this is not recommended. All Top LEDs should be enabled to improve uniformity of the illumination.
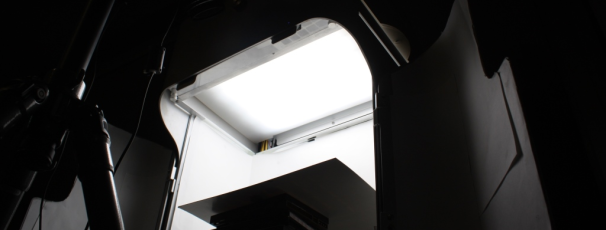
Proper usage of diffusers with all Top LEDs turned on
ViBox mirrors should be removed or covered up with some reflective material which do not change light spectrum. One can use white paper for this task. But it is important to make sure the paper don't have any color tint. You can take a picture of the paper located near a white patch of the color target and make sure they have the same color tint.
When in doubt, whether the illumination is uniform or not, check the outer white patches of ColorCheckerSG target. Their RGB values should vary in no more than 9-11 points.
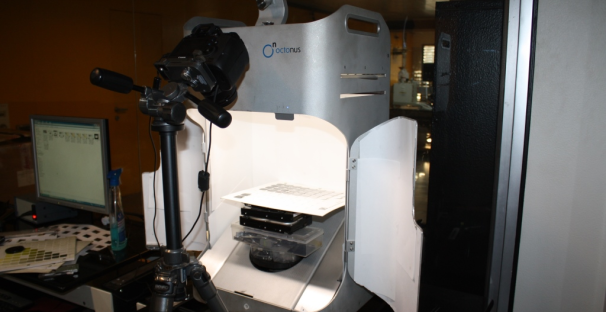
Below is the example of uniform and consistent illumination setup for DiBox light:
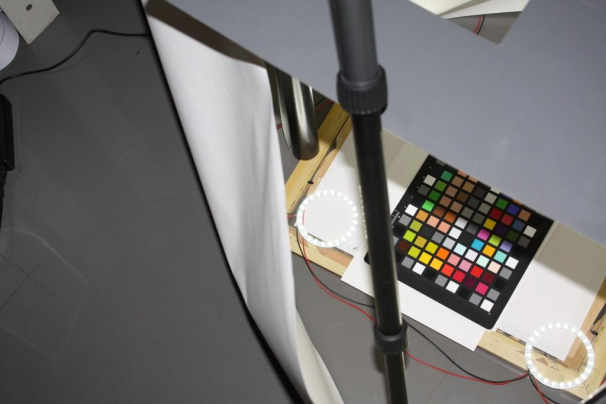
Possible illumination setup for DiBox light
Camera settings
Several camera settings, such as Tv, Av and ISO have no influence on color rendition. But it is important to set ISO to the value not less than 200 to make sure color is not distorted due to the noise.
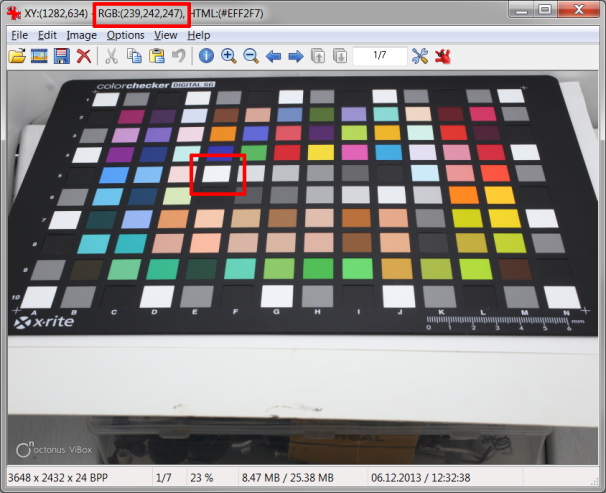
Camera white balance and exposure should be adjusted in such a way that the image of a white patch of the color target has reference RGB values. As a rule of thumb, maximum difference between RGB channels should not exceed 3-4 points, and difference between mean value of RGB channels and mean value of reference RGB channels should not exceed 5-7.
The tricky thing is that different color targets have slightly different values for white patches. Before applying a color correction profile, it is important to set camera white balance using the same patch of the same target. To avoid mistakes, we recommend to always use ColorChecker to set white balance. Even if you don't use it for profile generation.
Reference RGB values of the white patch of ColorChecker is (245, 245, 243). That means, that if you have image with the white patch of color, guess, (241, 242, 243), it is acceptable. But if you have color (240, 247, 242) or (232, 233, 232), it is not acceptable. Too green in the first case, too dark in the second case.
Examples
In this section several images of properly and poorly captured images of color targets are shown.
Good images
Below are properly captured images, they are examples of what you should do
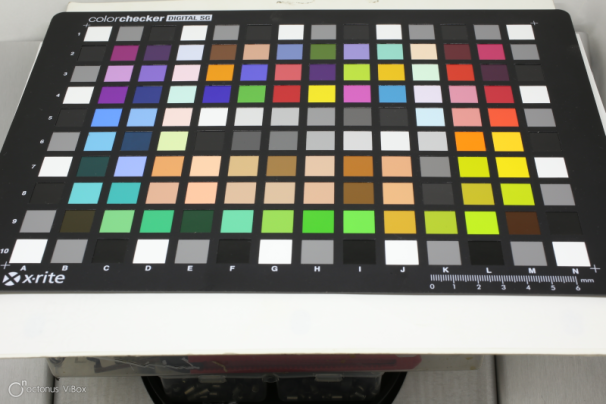
Good image of ColorCheckerSG
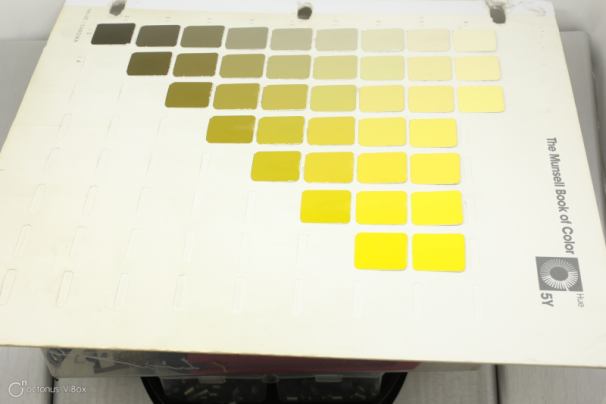
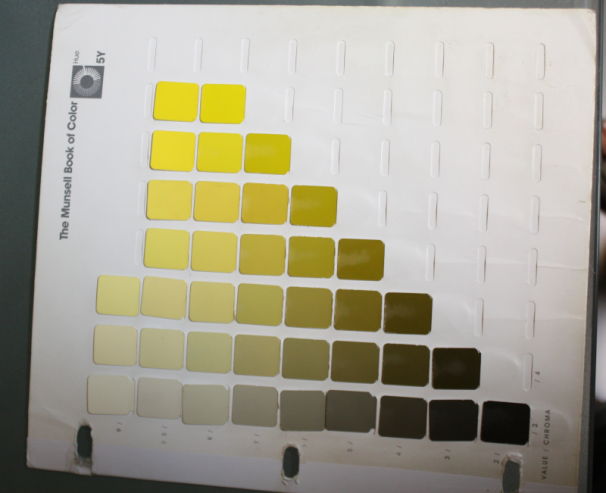
Good image of Munsell 5Y page
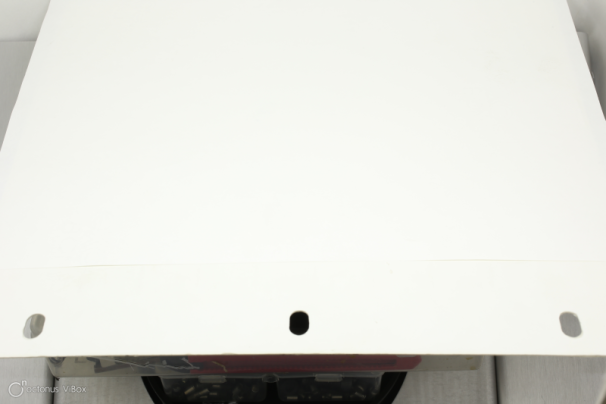
Illumination uniformity is checked by shooting blank white page, variations of RGB values are no more than 10.
Bad images
Below are poorly captured images, they are examples of what you should not do
Bad image: target is not uniformly lit
Bad image: strong reflections of LEDs
Bad image: white balance is not good enough