...
| Panel | ||||||
|---|---|---|---|---|---|---|
| ||||||
|
Setting Up a Printer
- Install drivers for your printer model from the official DYMO site.
- Set paper size in printer properties
- Navigate to DYMO printer preferences under Control Panel → Devices and Printers.
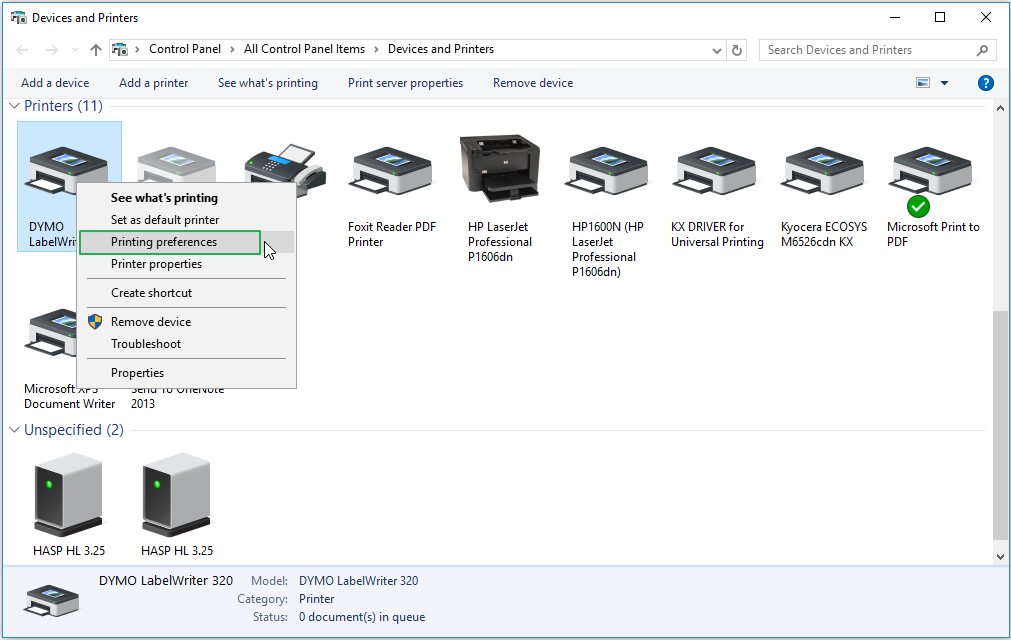
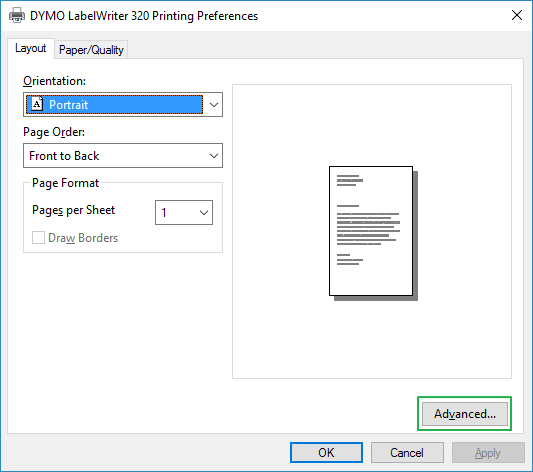
- In preferences select Advanced.
- In advanced options select paper size.
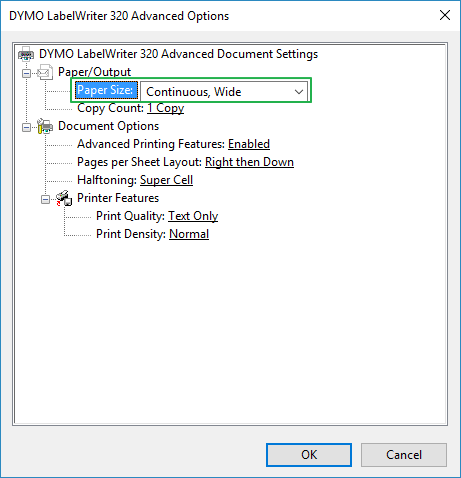
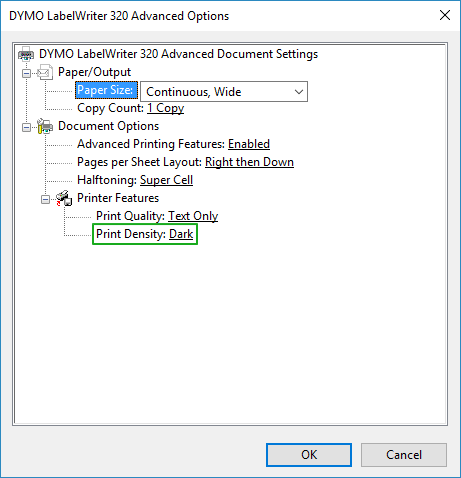
To use continuous paper, you must set paper size to "Continuous, Wide". - To improve printing quality of Label Reports, set Print Density setting to "Dark"
Note Please reboot your computer for these changes to take effect.
Note If you are still having trouble with printing of Label reports after the above steps, please in Advanced options select "30252 Address" paper size, click OK, then click Apply. And please repeat these steps for "Continuous, Wide" paper size.
- Navigate to DYMO printer preferences under Control Panel → Devices and Printers.
- You can find out how to load a printer with paper in printer's User Guide available on the official DYMO site.
Note that some non-genuine DYMO labels and continuous paper can't fit label spool spindle. In this case you can just put a paper roll inside a printer without placing a roll on a spindle. - To improve printing quality of Label Reports, set Print Density feature to "Dark" in the described above DYMO printer preferences dialog (Control Panel → Devices and Printers→Printing preferences→Advanced).
Printing Labels
To print a label, press Print Label on the right panel.
...
Label report for selected model (solution or scan) will be printed.
If anything goes wrong, an error message will be displayed instead.
Error Messages
The possible error messages and their meanings are:
| Message | Meaning |
|---|---|
| Error printing - label printer not found | DYMO printer is not installed. |
| Error printing - printer is offline | DYMO printer is installed but turned off. |
| Error printing - generic error | Some other error. |
Report Example
Settings
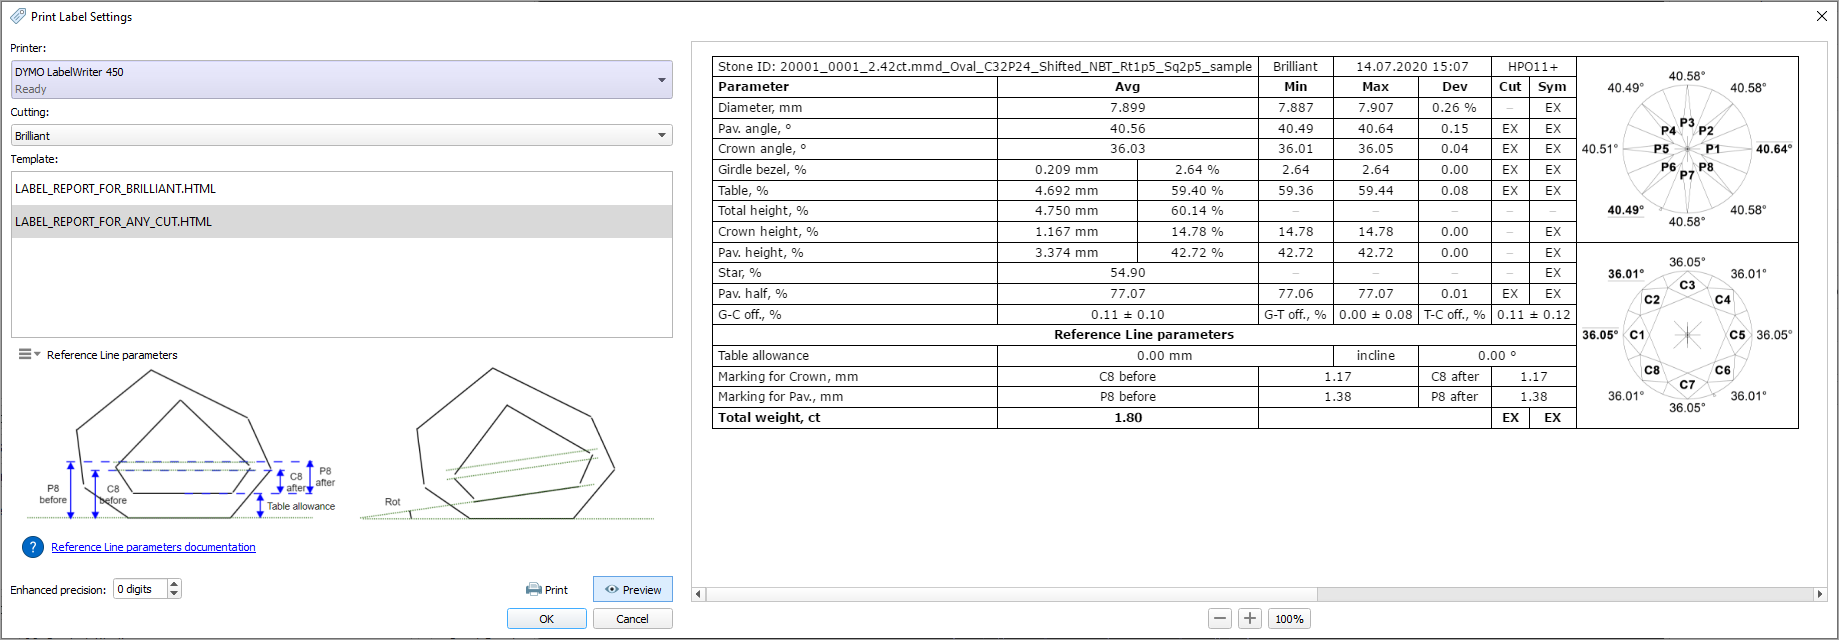
To set up label report printing settings, click the cogwheel icon next to Print Label on the right panel:
...
- Select printer on which the label reports will be printed. Currently selected printer is marked with grey circle to the right of the printer name. Label printers are shown on blue background.
- Select template that will be used to print label report. Template is selected separately for each cutting type. Cutting type is determined automatically, but you can override it using the Cutting type combo box.
Currently selected template is marked with grey circle to the right of the template name. - Set higher precision using the Enhanced check box.
- Print report with selected settings by pressing the Print Report button.
- Show a preview of a report with selected settings by pressing the Show preview button.
You can see an example of a preview below: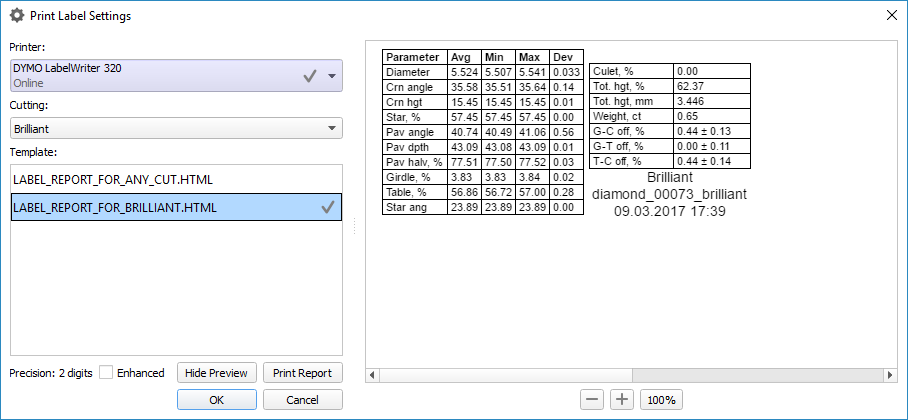
You can zoom preview in and out by pressing the + and - buttons and by using mouse wheel. Pressing the 100% button will show the preview in 100% zoom.