...
In coming versions, we will introduce a method to (re-)apply Sample marking to the current model at any given time.
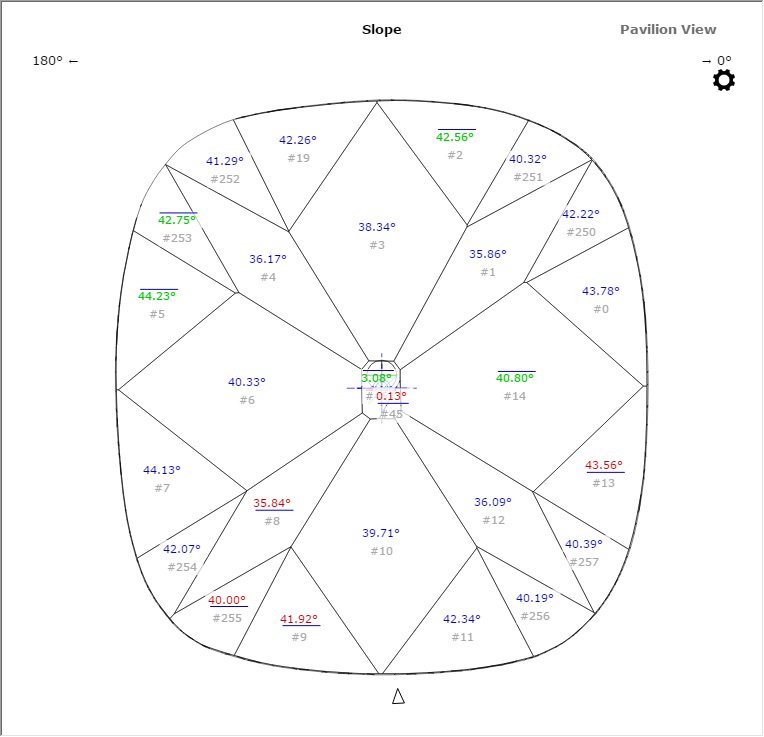
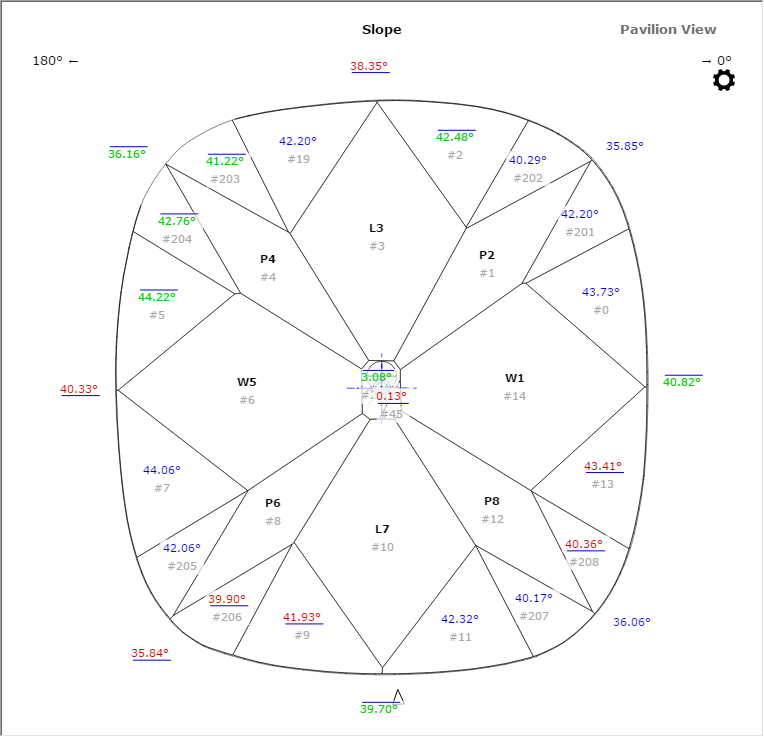
Automatic Applying Facet Marking from Sample
During scanning using a loaded sample cutting, a facet marking from this sample is automatically transferred to the created 3D model. This provides an effective way of getting the correct facet classification (marking) for your model and creating the appropriate reports.
For example:
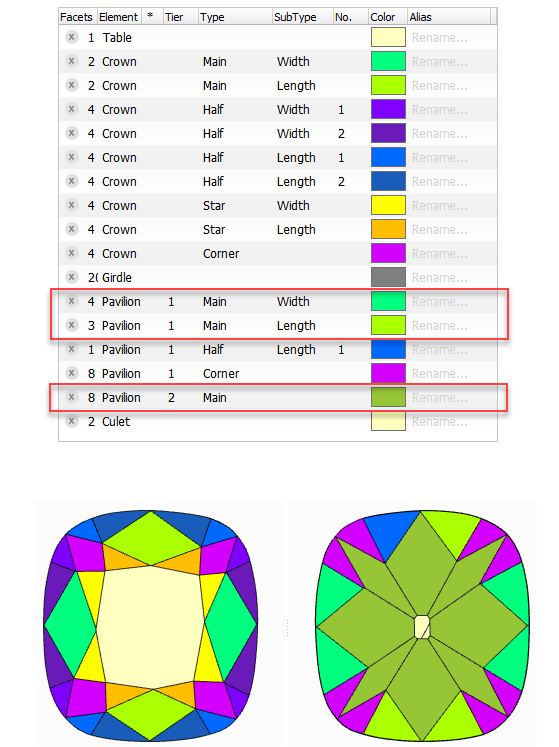
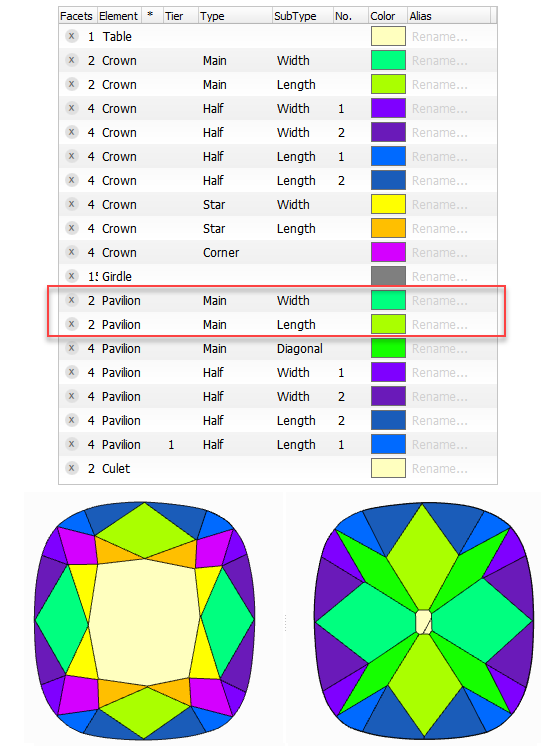
| Auto Marking | Marking of Sample and Resulting Marking (identical) |
|
|
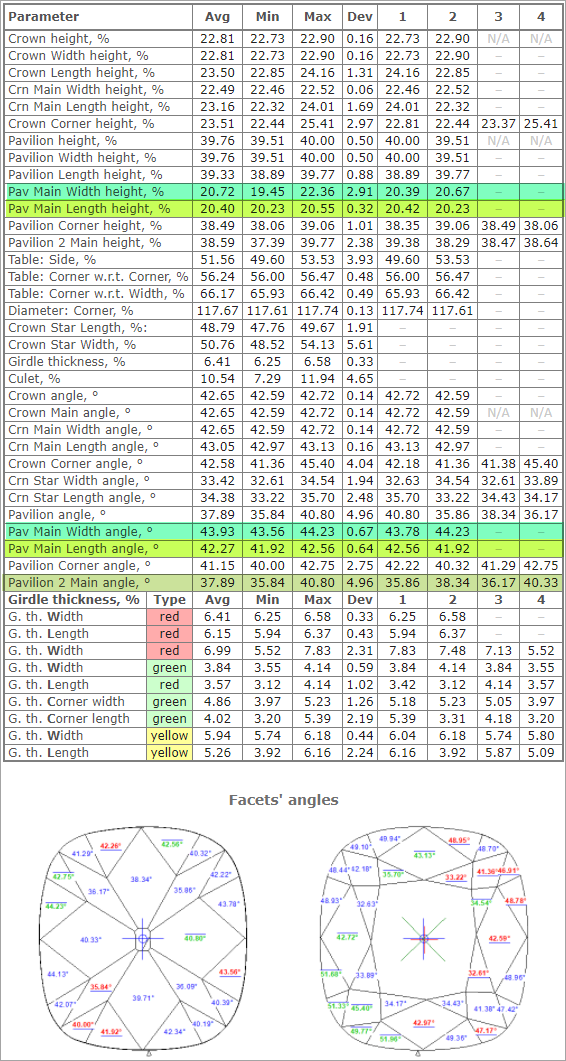
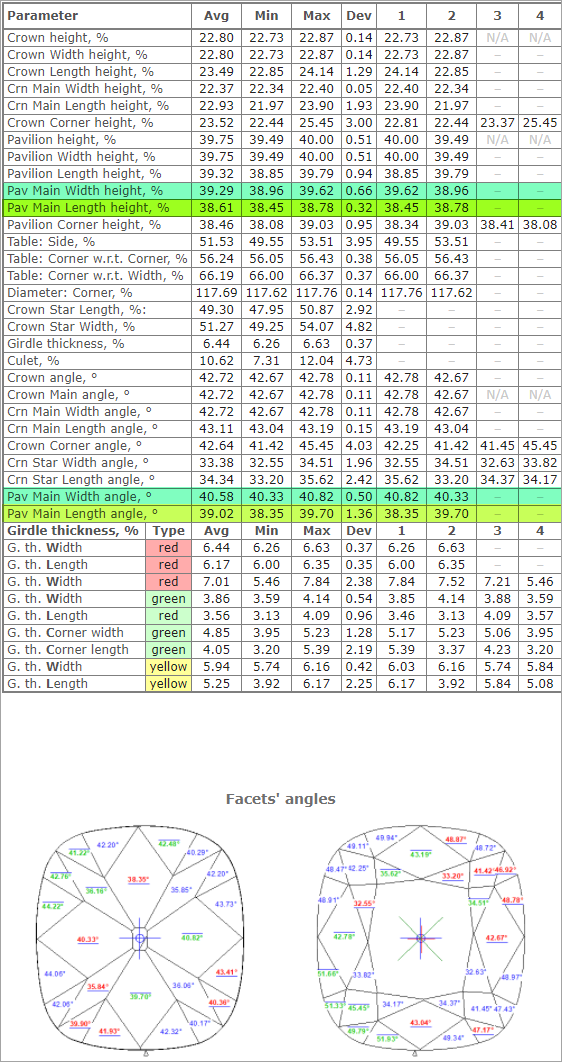
Resulting Polish Report (strings for Pav Main Width, Pav Main Length, and Pavilion 2 Main are highlighted with the colors from Facet Marking) | |
|
|
| Resulting I3D Pavilion View | |
|
|
- You can view the facet marking of your sample (DMC format). Do one of the following:
- As you select your sample in Cutting & Method, it is added to the Models section. There click its name, then on the right panel, click Facet Marking.
- Open your DMC in HP Carbon and then click the Facet Marking button on the right panel. The file can be opened by:
- Drag and drop your DMC to the HP Carbon window.
- In HP Carbon, select File > Open, navigate to your folder, then start typing the name of your file. As soon as it is suggested, select the file and click Open.
- You can change something in the facet marking of your DMC sample. To do this, perform the steps:
- Open DMC and its facet marking as described above.
- Make changes to the facet marking.
- Click Export Sample, specify a name for your changed version, and then click Save.
- Add a new version of the sample to the system, remove the old one.
Creating Custom Report
To create a Custom Report simply choose Facet Marking... among the report options in the right panel. In the dialog, verify that the Facet Marking is correct, and fix it if necessary.
...