Exposure calibration is needed to minimize the differences in brightness between image from the stereo microscope cameras (left and right). In addition, the calibration and the subsequent compensation helps to maintain constant brighness while zoom and aperture can be changed.
Step-by-step guide
- Place the white sheet of paper horizontally under the lens as shown on the scheme:
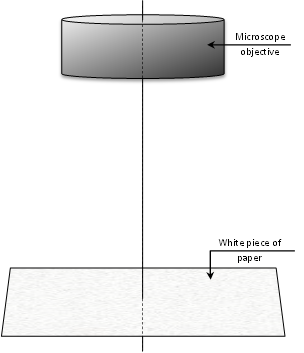
Please make sure that the sheet is uniformly illuminated and there is no any dots, dirt and so on in the center area of the sheet. - For calibration you’ll need running DM application. Please make sure you have working stereo view before calibration.
- Focus precisely on on the surface. You can toggle off stereo (Alt + S) and use mono viewing (Alt + L for left camera and Alt + R for right one) to make sure you are focused on the surface. Better to perform this on the high zoom values.
- Increase light to the maximum.
Start calibration process in the menu: Hardware → Calibration → Exposure Calibration.
- Wait until the calibration process will be completed. Don’t touch the paper sheet, don't move it, don’t change the lighting. You can watch the progress on microscope display or on the progress dialog.
You can abort calibration process by pressing Cancel, but in this case, correction of the stereo channels brightness will not work properly.
After the complete of process you’ll see the dialog with success or error message. In case of error you’ll find the dm.log file in the application folder. Also you can see all usefull frames after last calibration in the AutoExpCalibrationScreens folder (the root directory of the application).
 Note: For extended information in log you should change the logging level in the msaconfig.xml file. See the details here.
After the calibration brightness correction will be enabled automatically. All correction parameters are stored in exp_correction.xml which is automatically loaded at the DM software startup.
Related articles