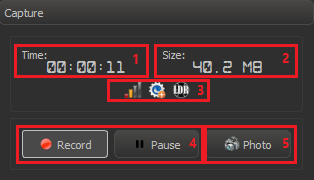
You can capture stereo video and images from the microscope cameras. The 'Capture' panel ('Data' tab, left panel) is designed for this.
- The duration of the recorded video. Timer will be stopped, while recording is paused.
- The approximate size of the recorded video (value may be slightly inaccurate).
Icons for display the parameters of the recorded video.
Buttons for recording video.
Button for capturing the current frame with metadata.
Recording Video
| Button | Description |
|---|---|
/ | Start / stop video recording |
| Pause / continue video recording |
Recording Parameters
| Recording Quality | |
|---|---|
| Icon | Parameter |
| Low quality / Smal file | |
| Normal quality / Medium file (default) | |
| Reference quality / Large file | |
| Highest quality / Very large file | |
| Metadata | |
| Icon | Parameter |
| Recording without metadata | |
| Recording with built-in metadata (default) | |
| Dynamic Range | |
| Icon | Parameter |
| Recording LDR video (default) | |
| Recording HDR video | |
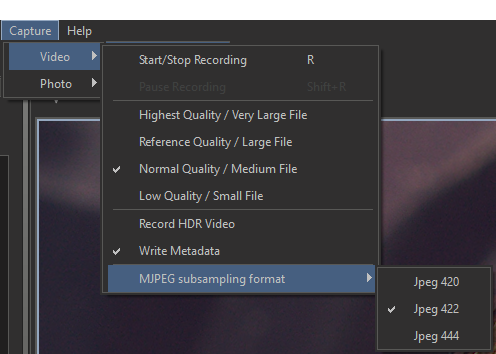
The recording parameters can be changed via the application menu: Capture → Video
DM Beta 27 video capture update
In DM Beta 27 the approach for capturing video was changed. The recorded video is first captured into fast internal format and then this internal format is converted into final video in a background process.
The logic of the main GUI elements remains practically the same, there are some exceptions:
- When recording HDR video we capture an slightly packed 12-bit video (mjpg) that is converted than to 10-bit mp4 video. This video is designed for playing on devices with support of HDR10. The encoder is HEVC 10 bit.
- There is an additional option for chroma subsampling: YUV 4:2:0, YUV 4:2:2, YUV 4:4:4. YUV 4:4:4 gives the best quality, but not all devices support it. For HDR video we recommend to use YUV 4:2:0 and YUV 4:2:2 (YUV 4:2:2 is better if supported).
- On capture panel you can see the estimate of size of resulting video, not the actual size of video, because at the time of capture we do not know the exact size of file.
- For recording HDR films you must have enough space on the disk (50-100 Gb at least)
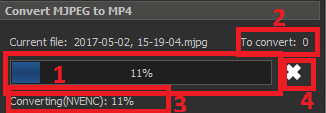
After you finished capture of video the process of video convertion starts and you can see the progress-bar of convertion process:
- Main progress-bar
- Files for convertion in queue (maximum one file is converted at a time)
- Status of convertion of the file
- Cross for aborting convertion.
Convertion of the file does not block the start of new recording, but in microscipts capture it may influence on FPS of capture (depends on hardware).
Capturing Frames
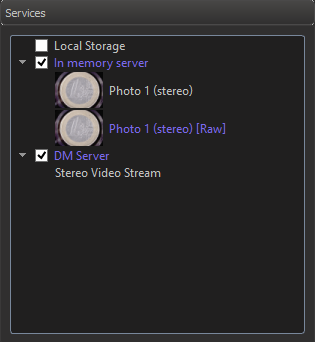
When you press the 'Photo' button, the current frame was not saved to disk. This frame appears in the list of application data ('Services' tab, left panel) and can be opened in a separate view tab.
Then the image can be saved with the menu command: File → Save As...


