Purpose
Use inclusions markup instruments to make simple markup for stone polishers to specify what is necessary to do with the stone.
Draw ellipses with inclusion type icons, write comments and export them as image.
Examples
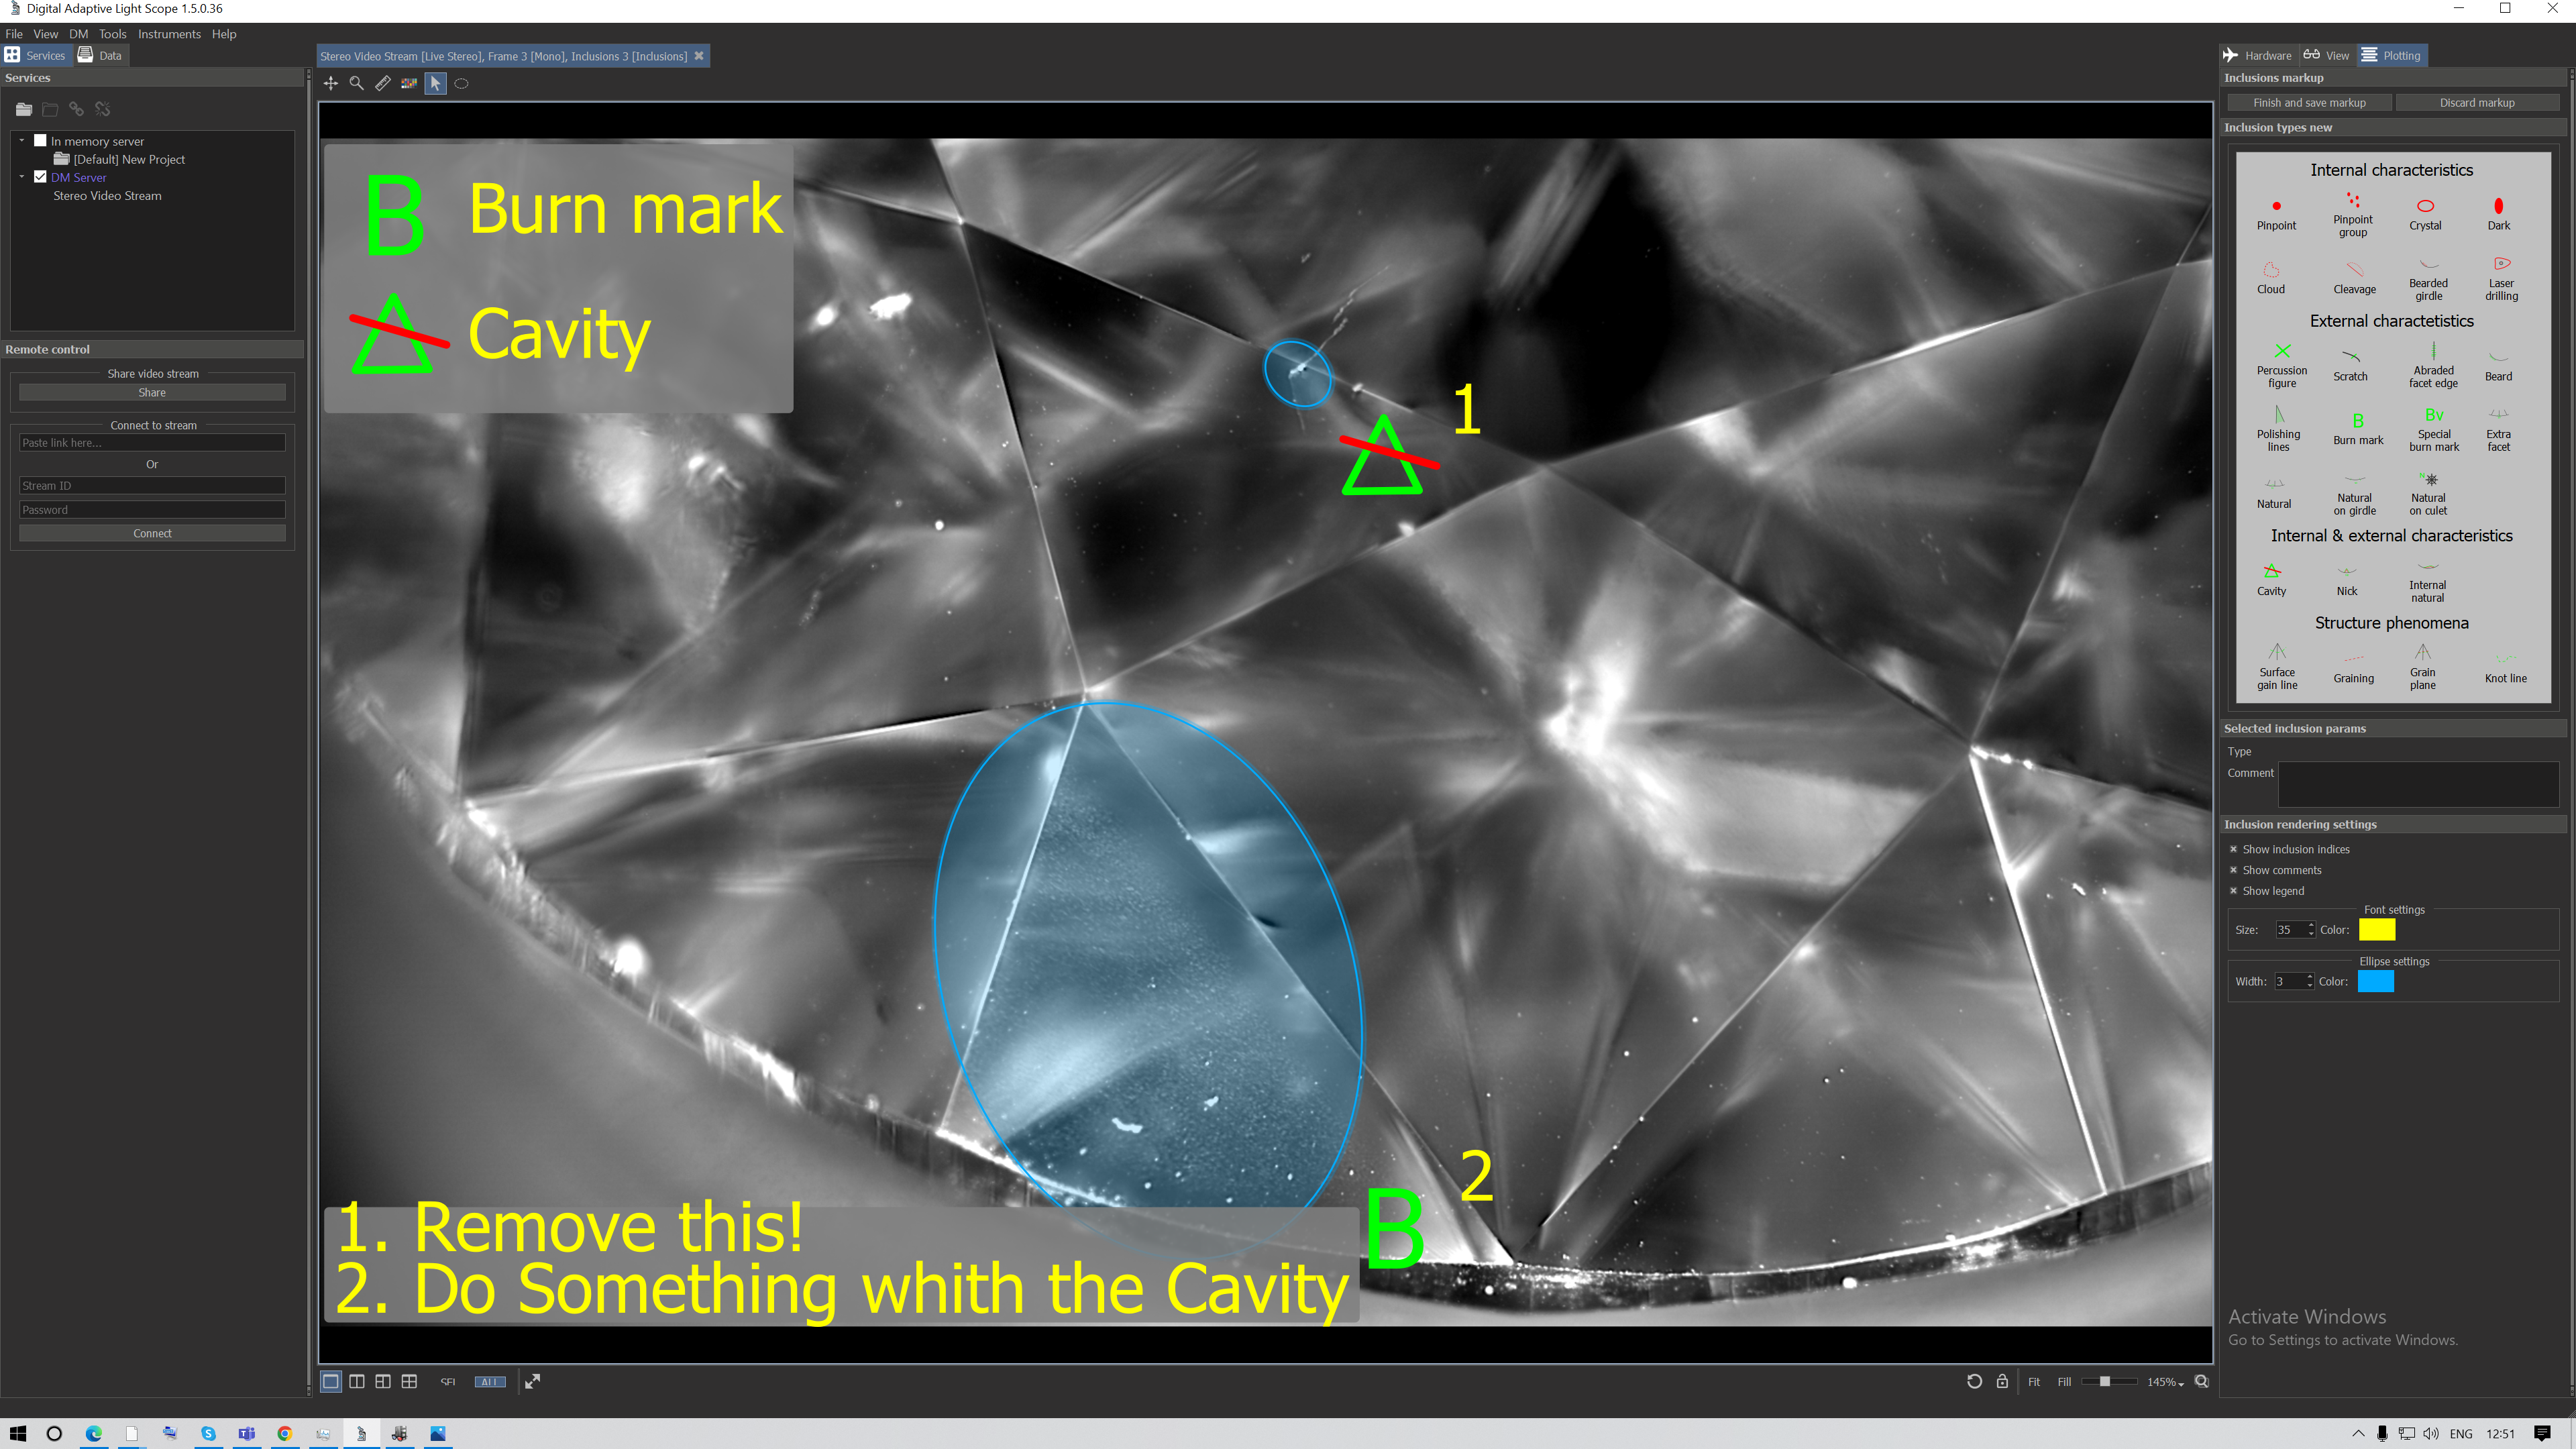
Example of the markup in the DALS program:
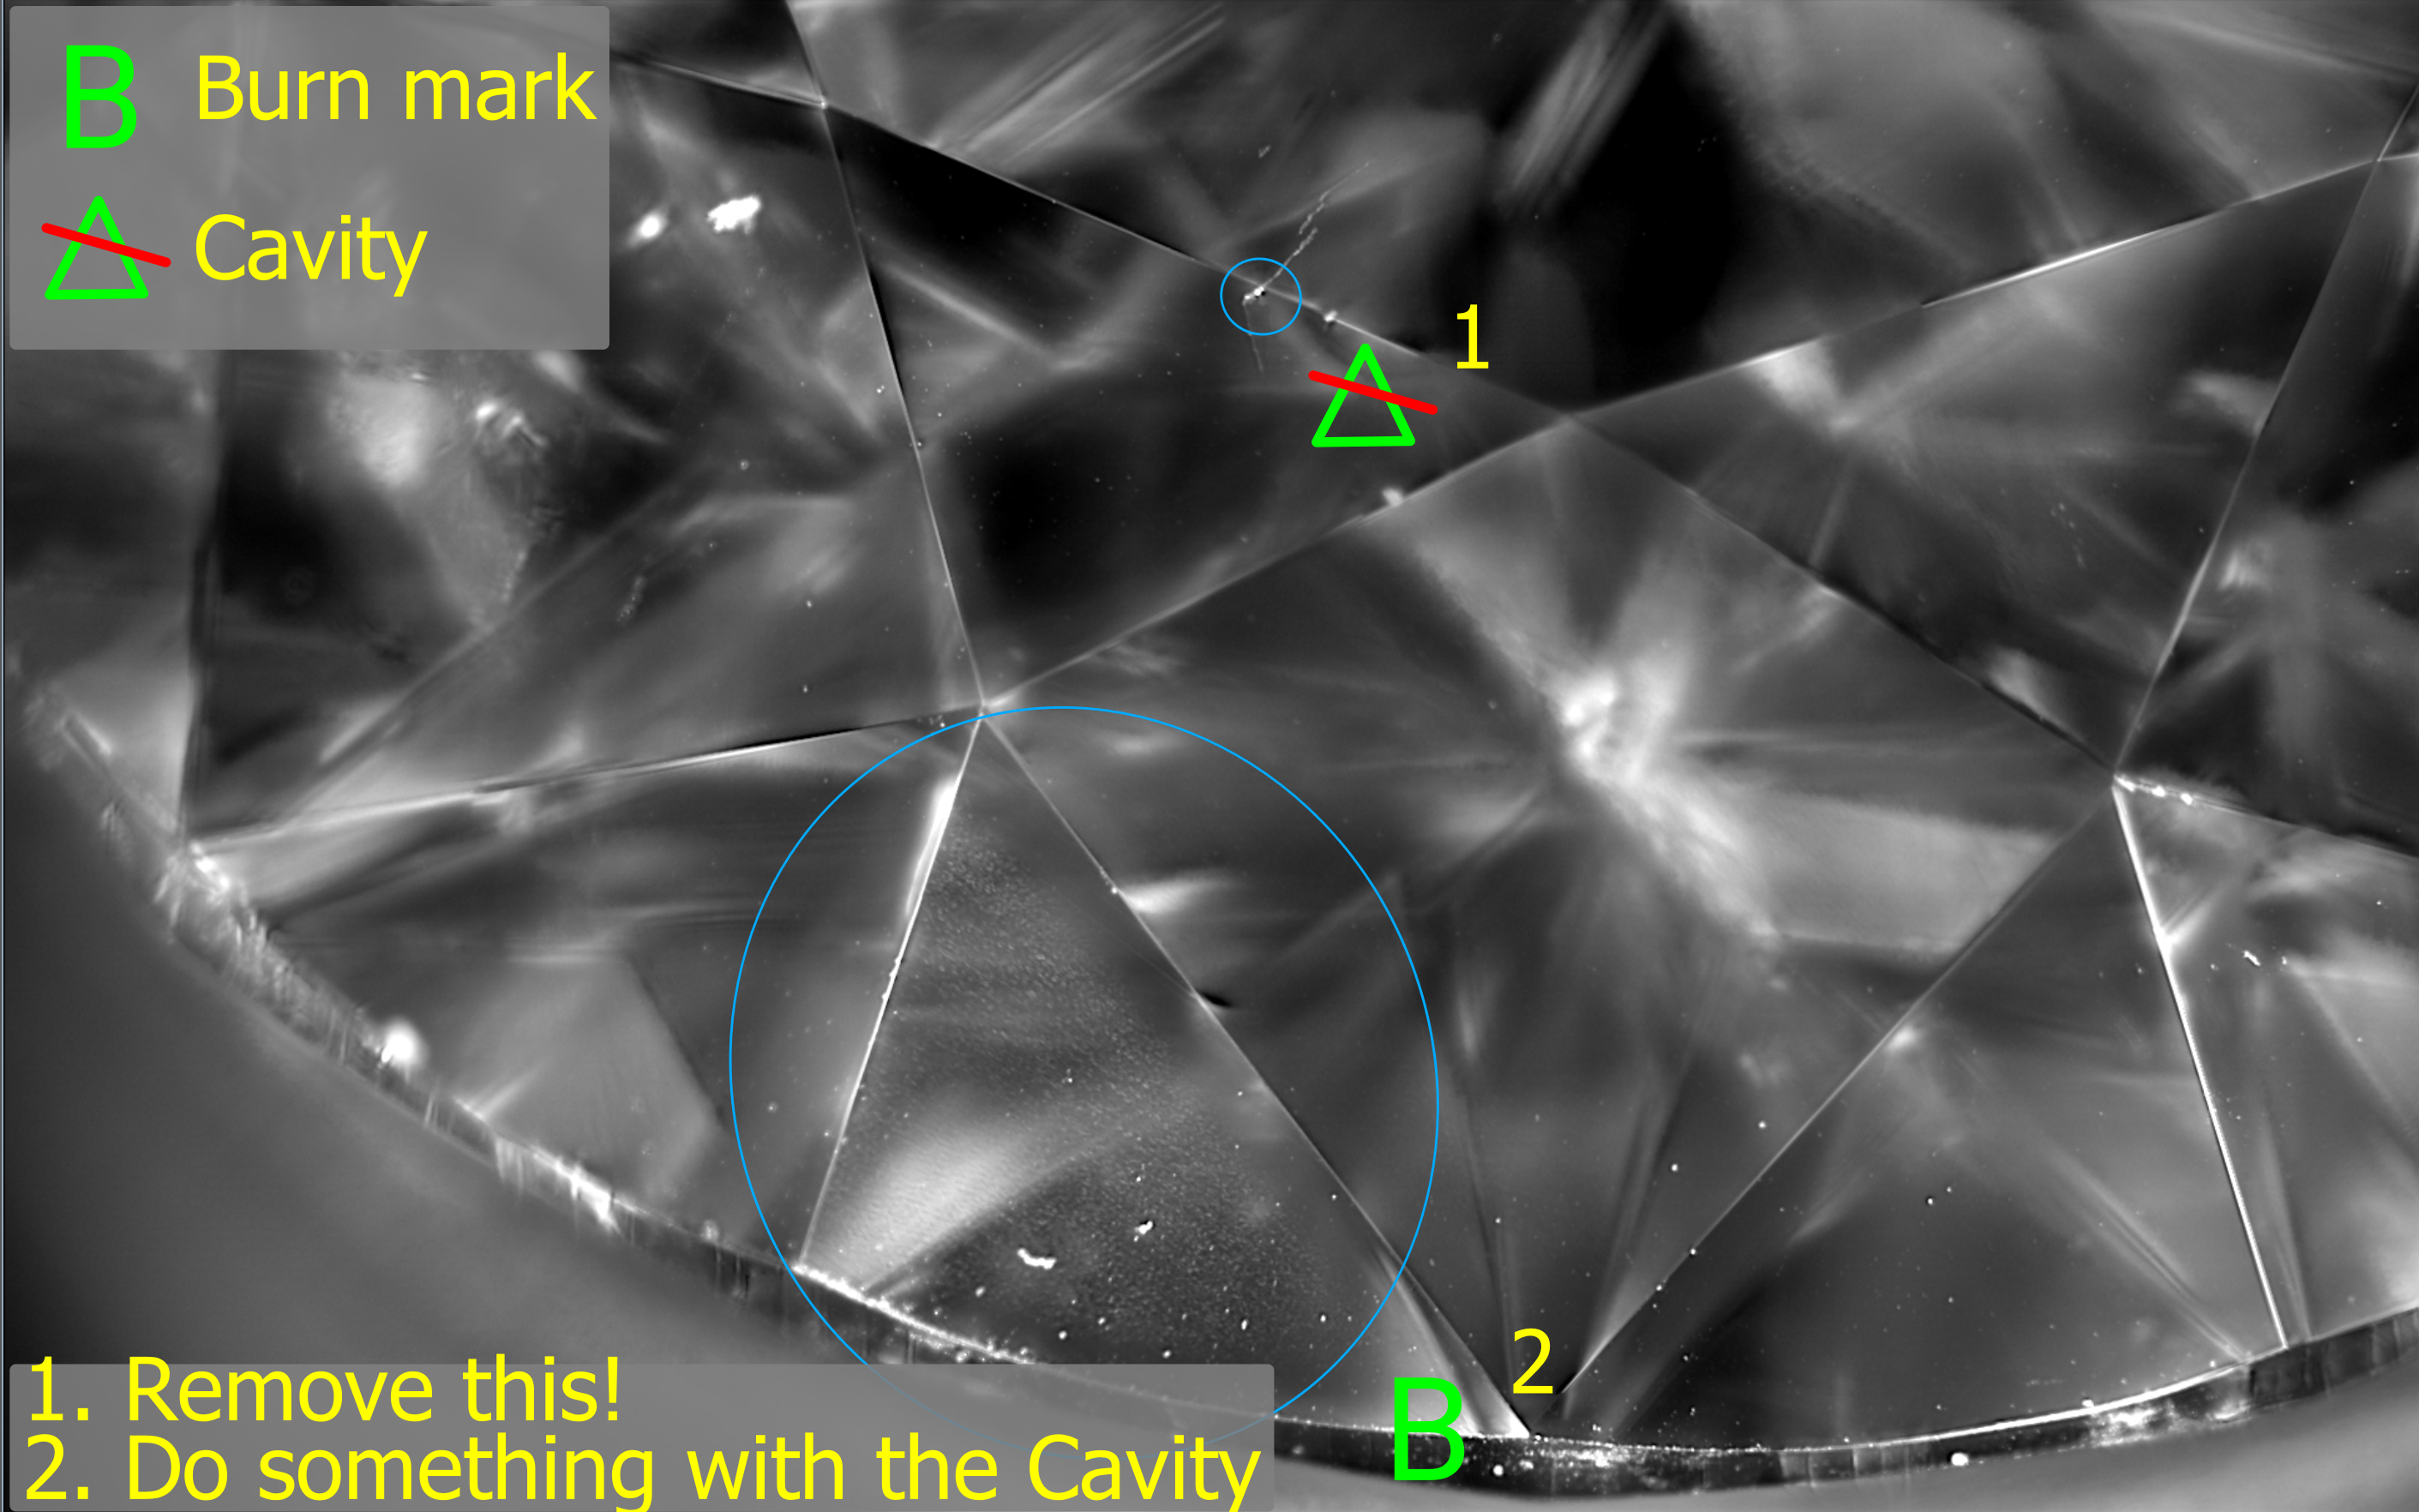
Example of the exported result:
Setup
To create inclusion markups check the "Inclusion plotting" checkbox while installing the DALS program.

Workflow
DALS supports inclusion markup on images and on a stream from a microscope. We describe the microscope stream scenario below. The scenario of markup inclusions on images is the same.
- First, connect to the microscope using the menu item 'DM > Connect to microscope' or the 'C' shortcut.
- After that we recommend to press 'Fit' button
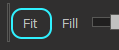 in the bottom instruments panel to fit image from the camera to the screen. It is necessary to see what will be added to the markup result including comments.
 - Setup light settings, fit the object's (diamond's) position & rotation, setup microscope zoom and focus to fit interesting object's position for markup into the program viewport.
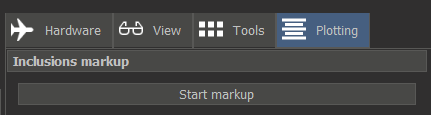
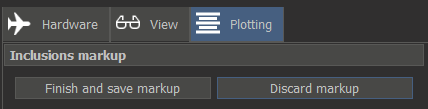
- Open the 'Plotting' tab and find the ''Inclusions markup" section:
- Mark inclusions, write comments for inclusions (will be described below in the 'Making markup' section)
- Finish the markup using one of two buttons in this panel:
If you want to save the markup result to a file, press the 'Finish and save markup' button. Then specify where you want to save the result, extension and press 'Save' button.
If you want to discard this markup, press 'Discard markup' button. - Go to step 2 if you want to make new markup for a new diamond or for a another view on the stone.
Making markup
After you click on the 'Start markup' button, you will see several panels to make an inclusions markup:
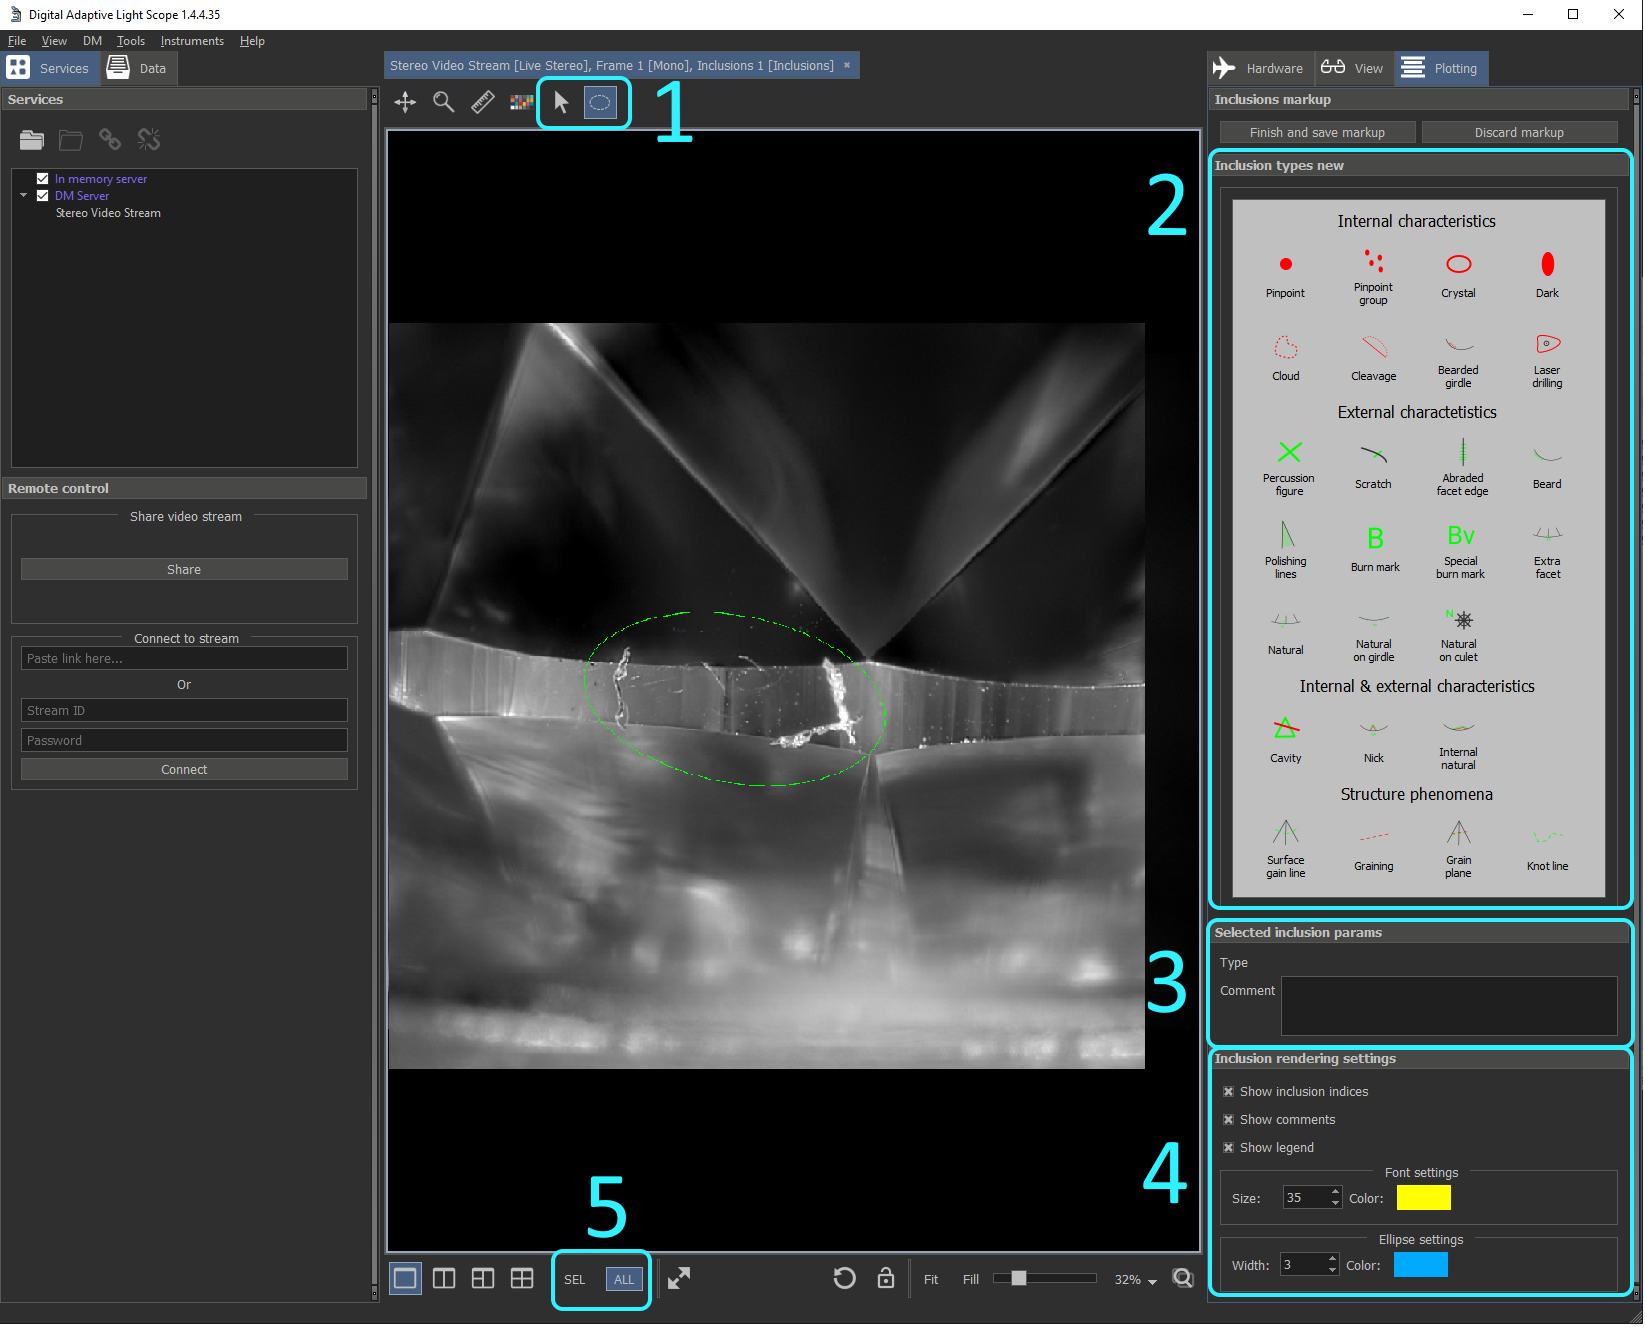
- Instruments for inclusion markup:
 By default the 'ellipse inclusion instrument' is selected. It is the main instrument for inclusions markup. Create inclusions with it. Also you can select, move, delete inclusions using this instrument.
 Instrument with arrow icon is the 'selection instrument'. It is only for selection, moving and deleting inclusions.
- Panel to select inclusion type of a creating inclusion or selected inclusion(-s).
- Panel to change a comment to the selected inclusion.
- Panel to change markup rendering settings.
- Instruments to specify what to see: all inclusions (ALL), only selected inclusions (SEL) or none.
To create a markup for an inclusion use the 'ellipse inclusion instrument' . Using it you can circle the inclusion with the ellipse by three mouse clicks:
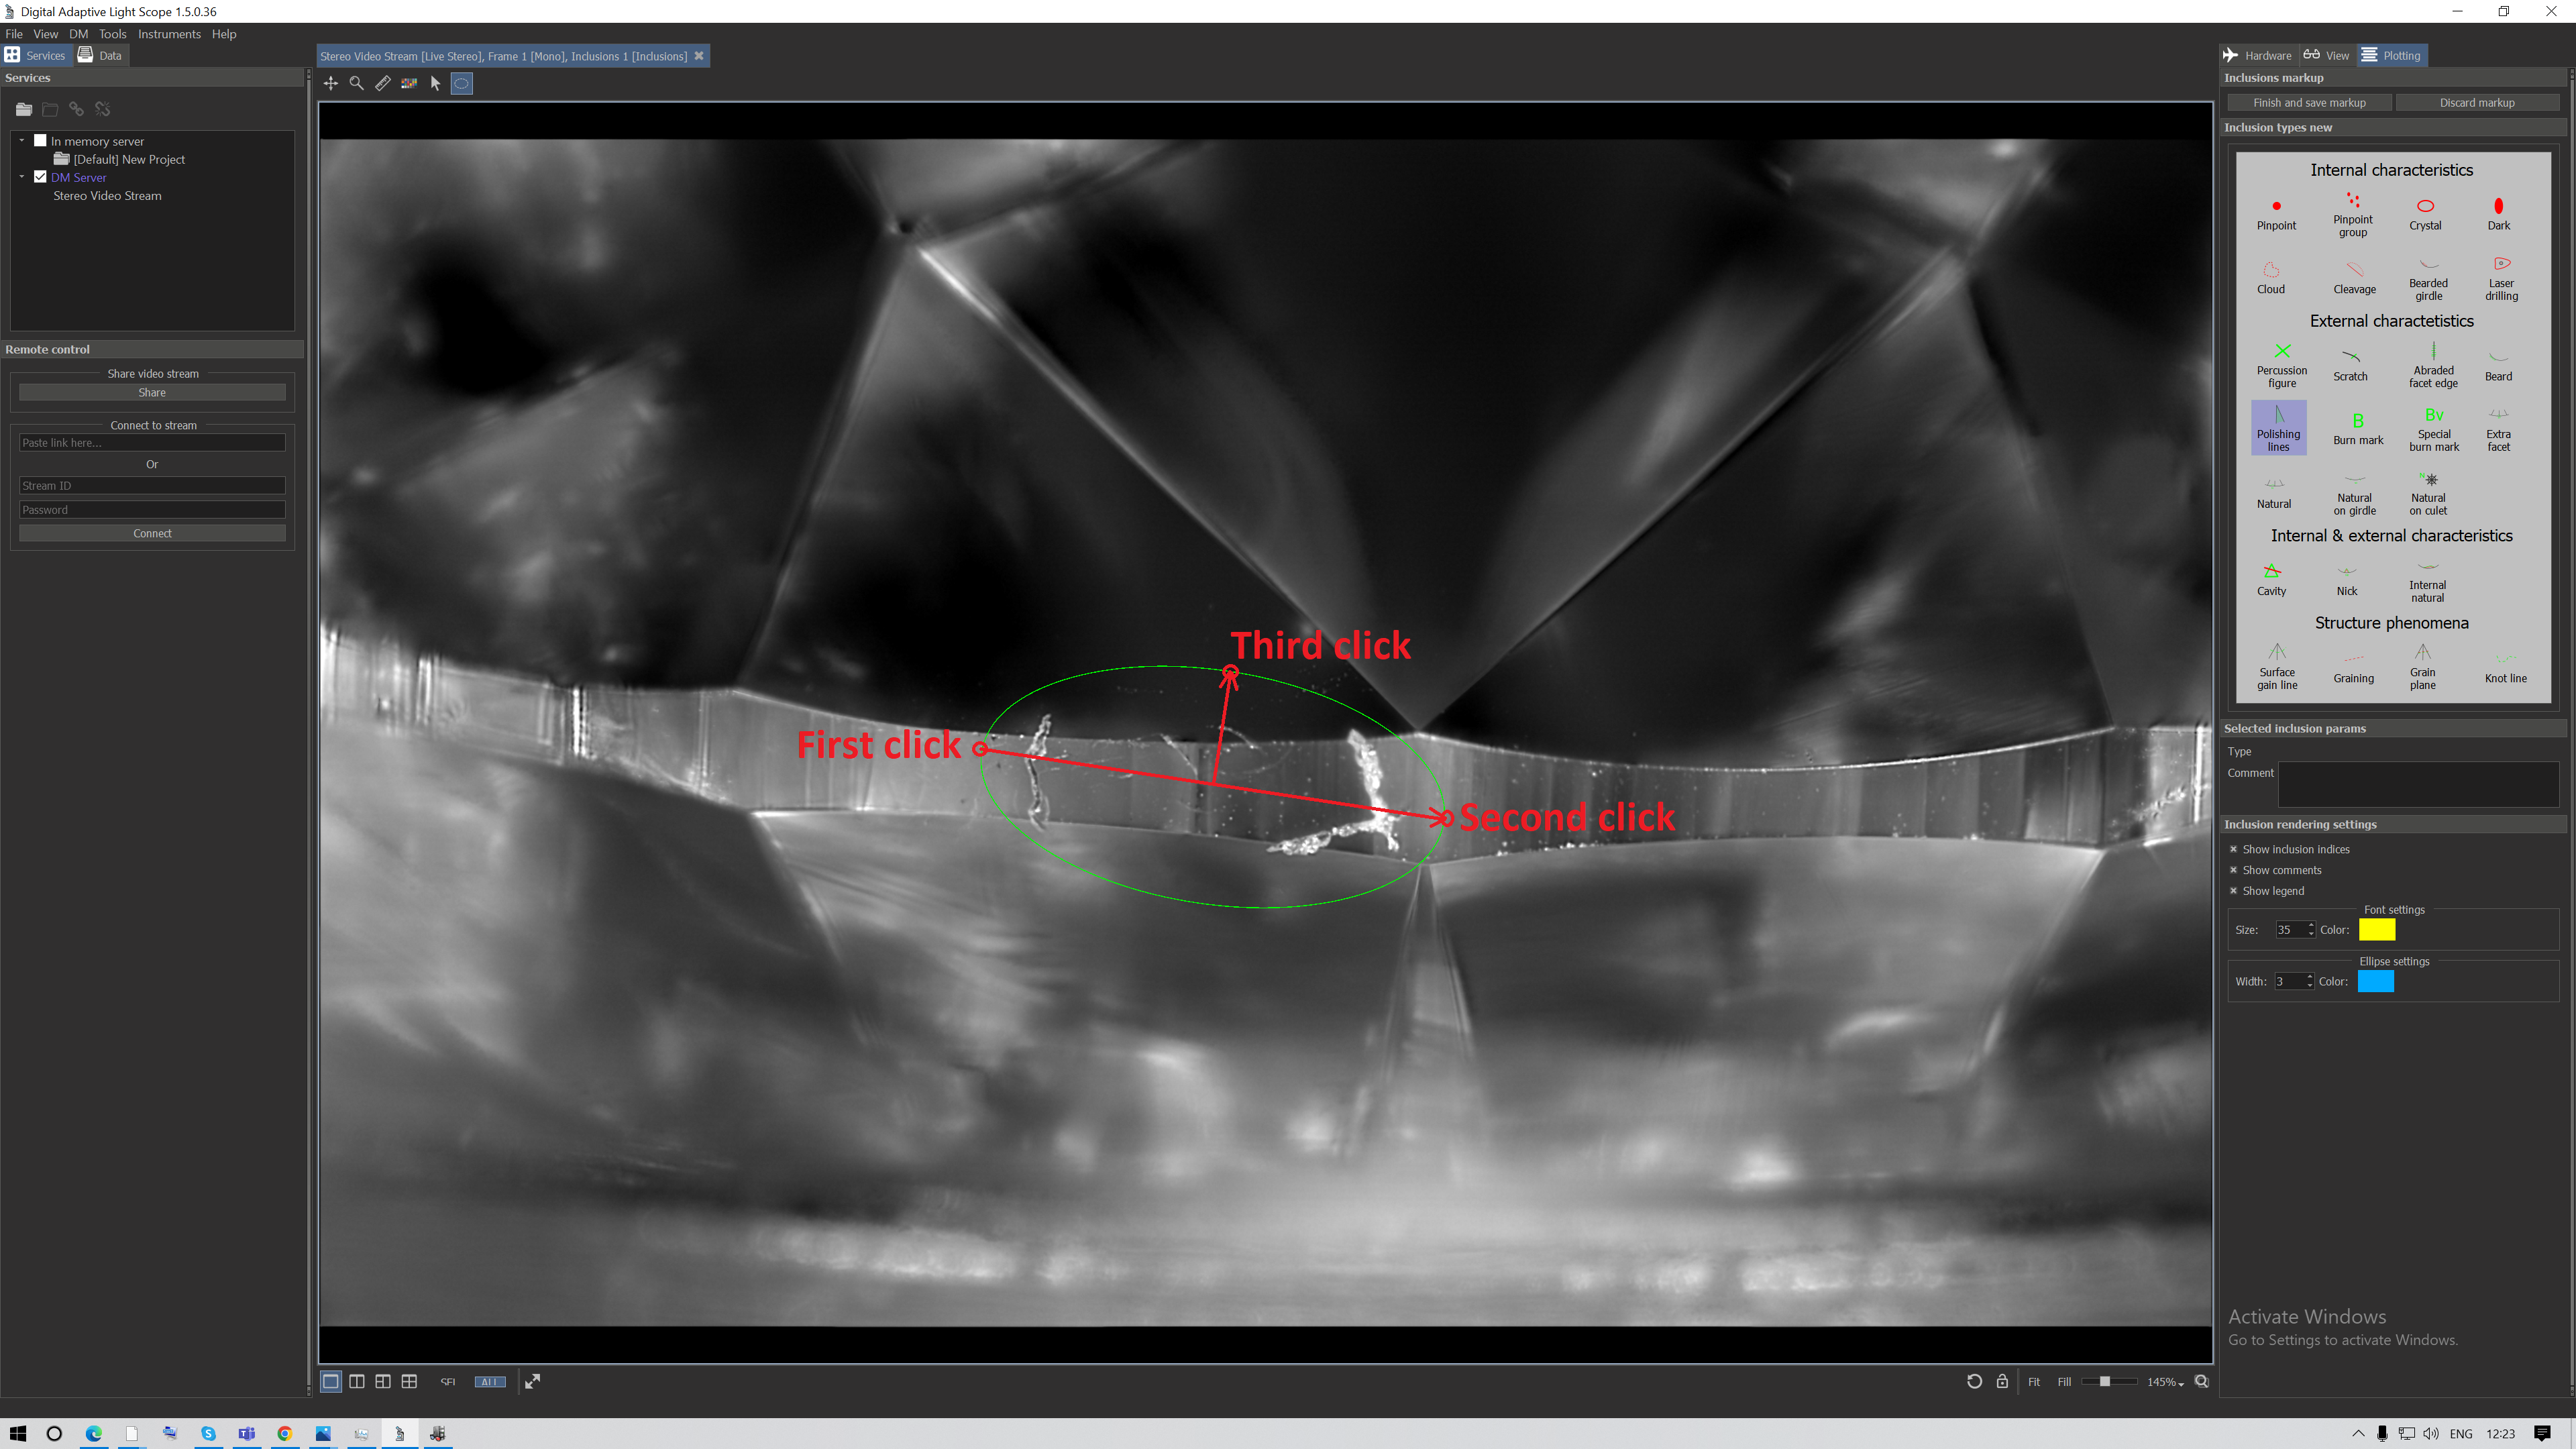
After third click you will see the created ellipse with the inclusion index and the inclusion icon near the ellipse, you may also change inclusion type on the right panel:
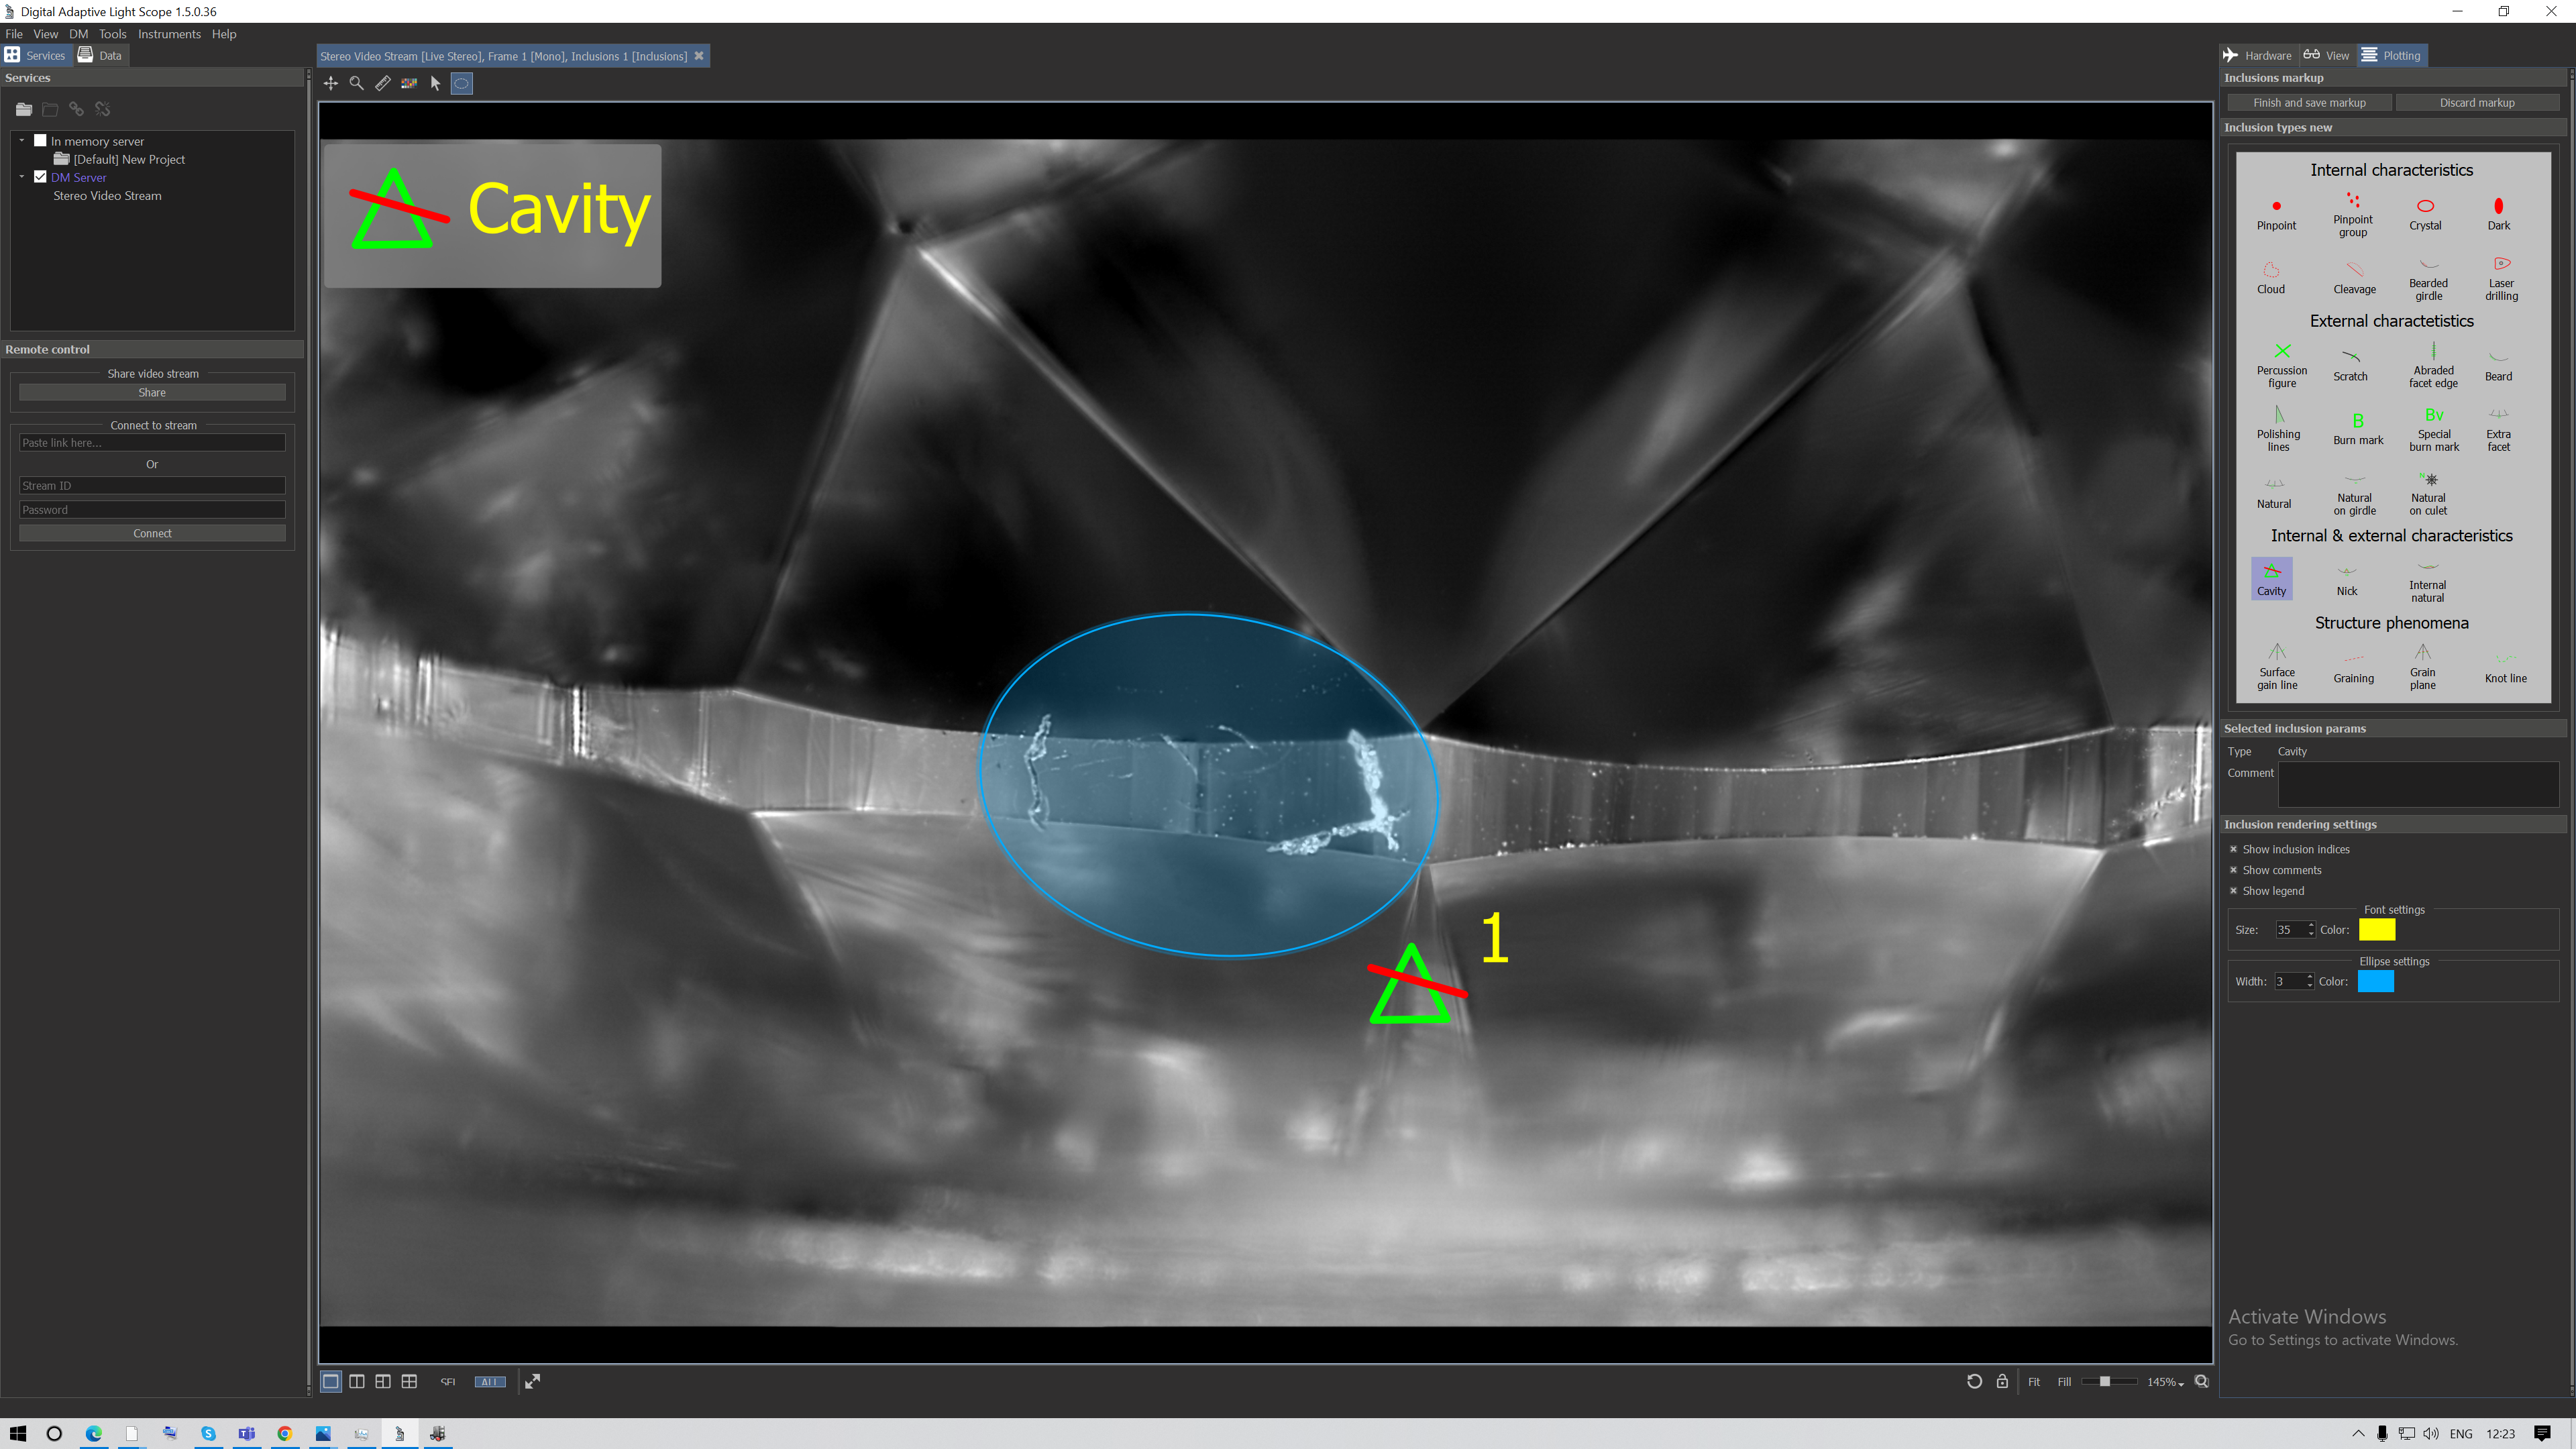
You can see the legend for added inclusions at the top left angle of the image.
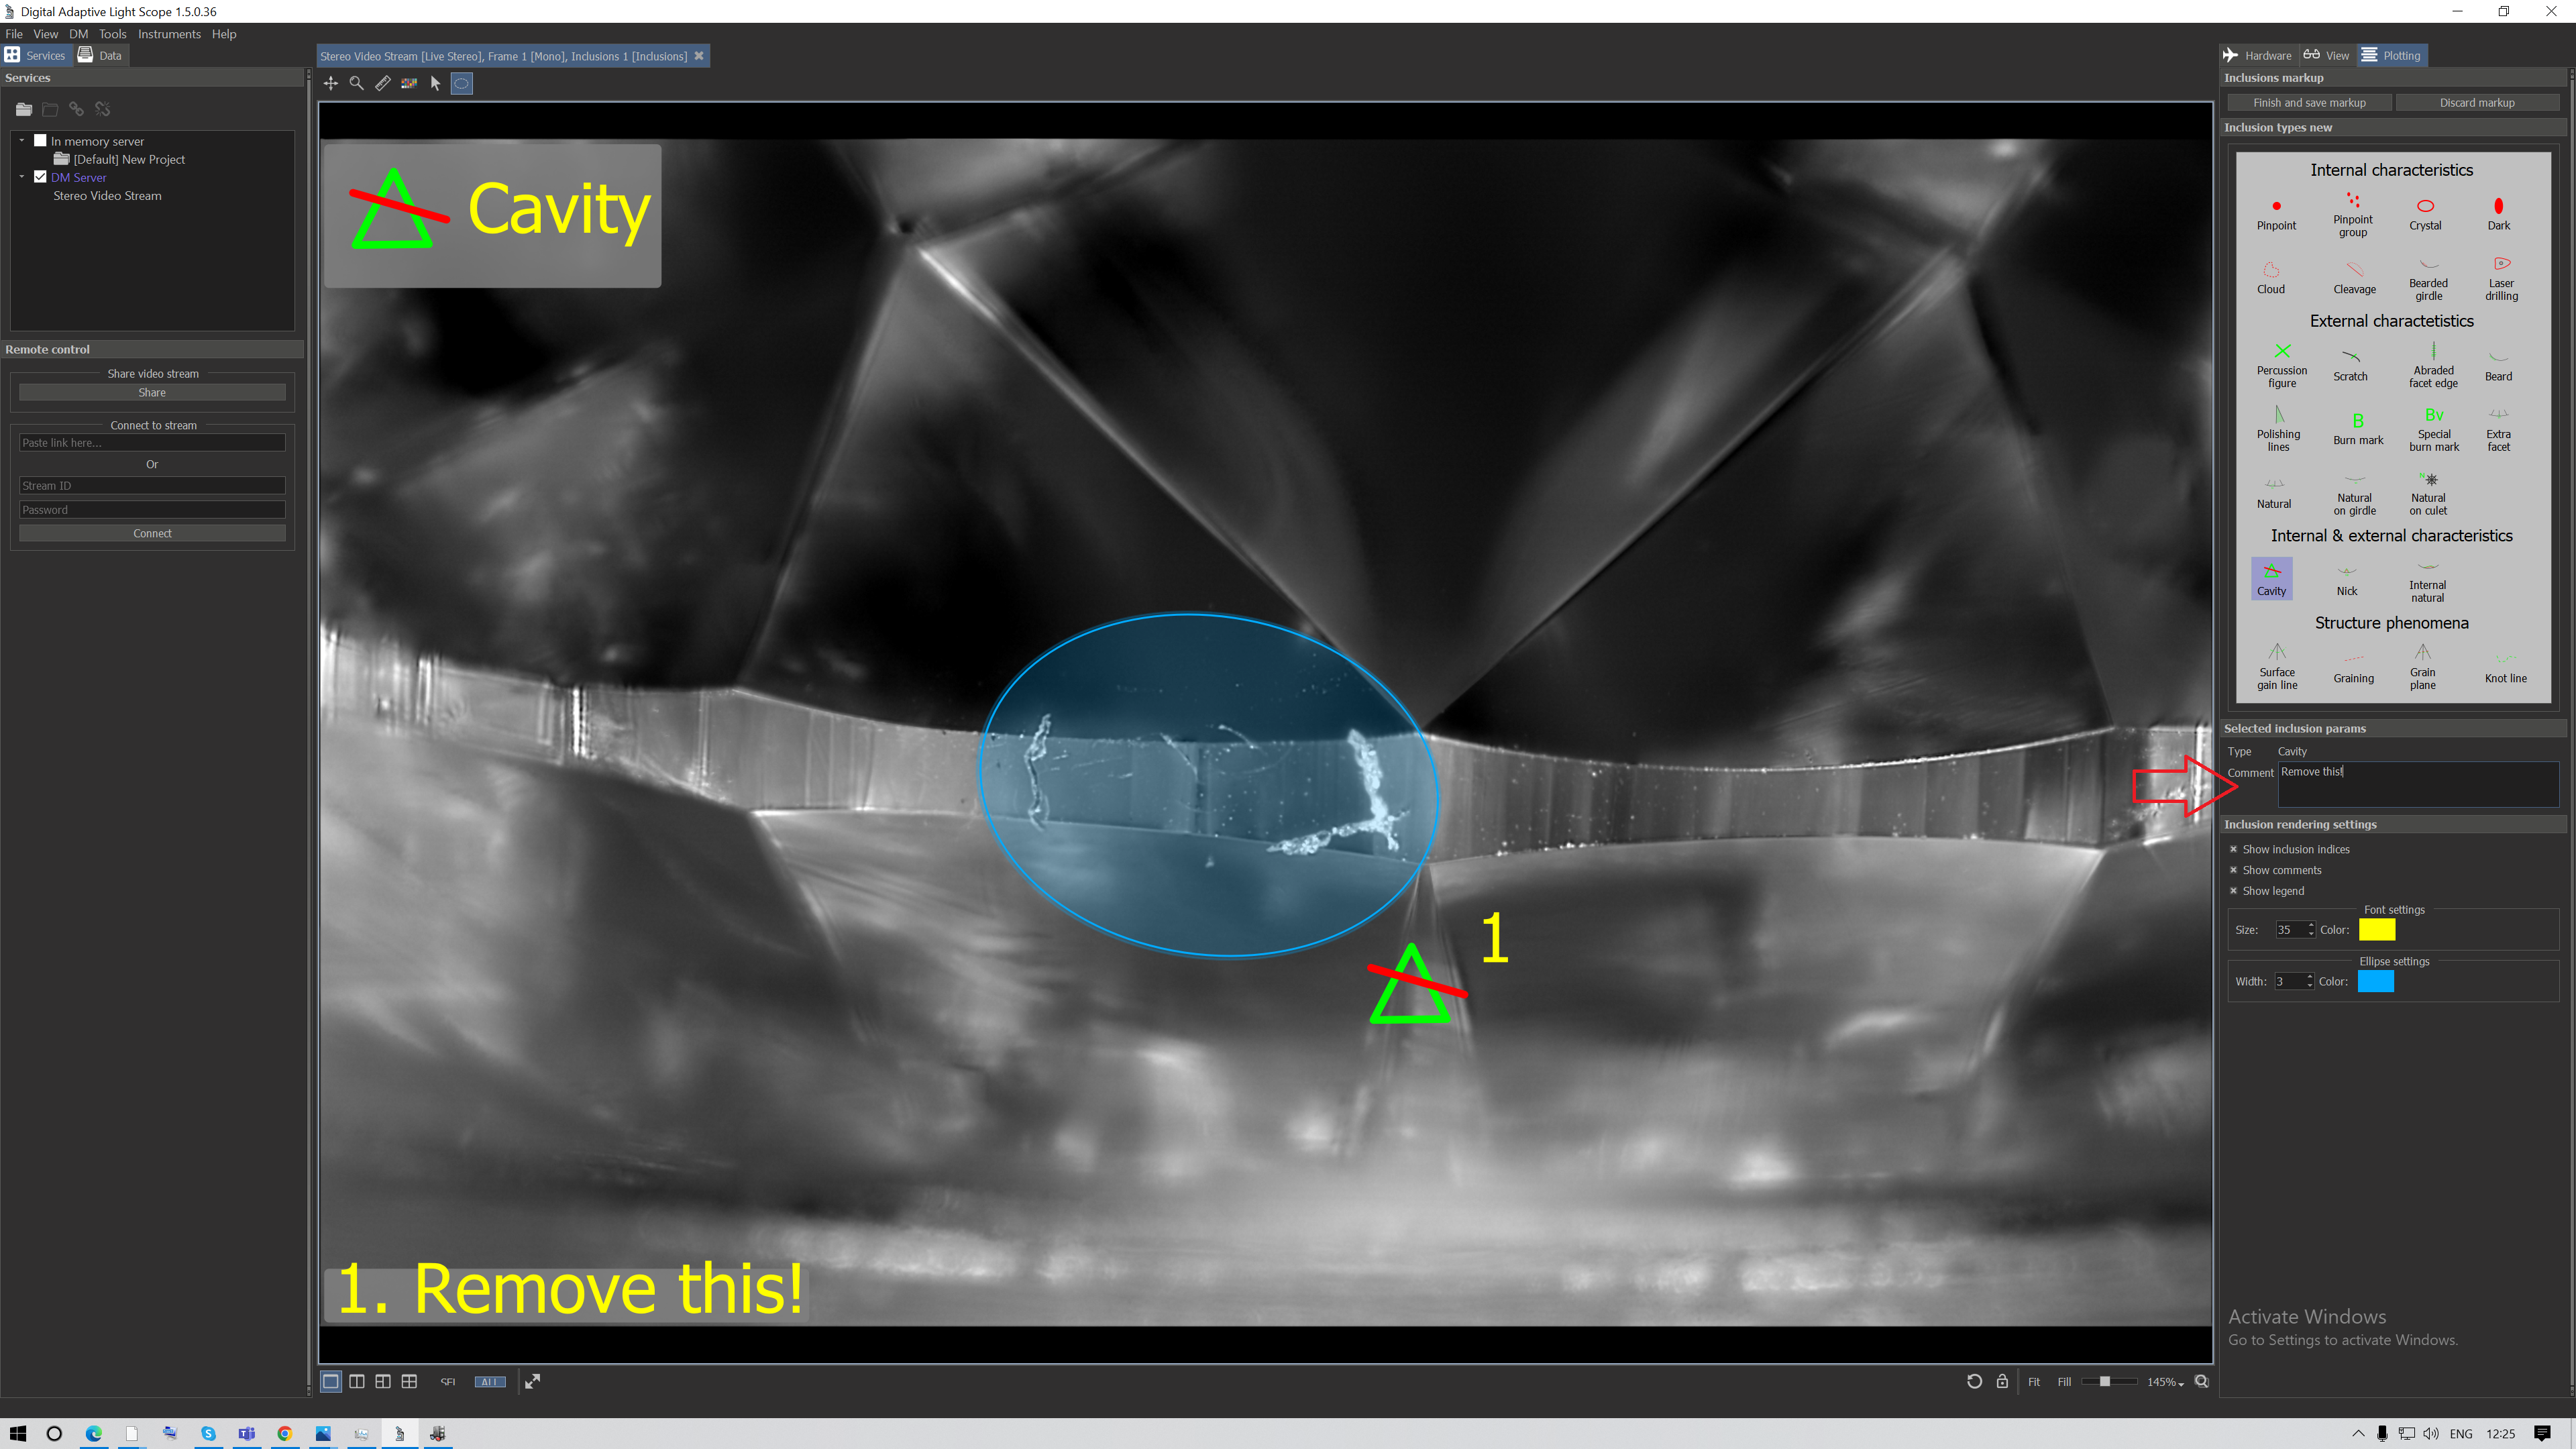
To add comment, click on the markup to select it and then click on the text edit box and type the comment. You will see it at the bottom left angle of the image:
After adding necessary ellipses and comments you will see something like this (another example with two inclusions):

Customize text color, font size, ellipse background color or ellipse border width if necessary.
To save the result and return to the stream, please click on the 'Finish and save markup' button.