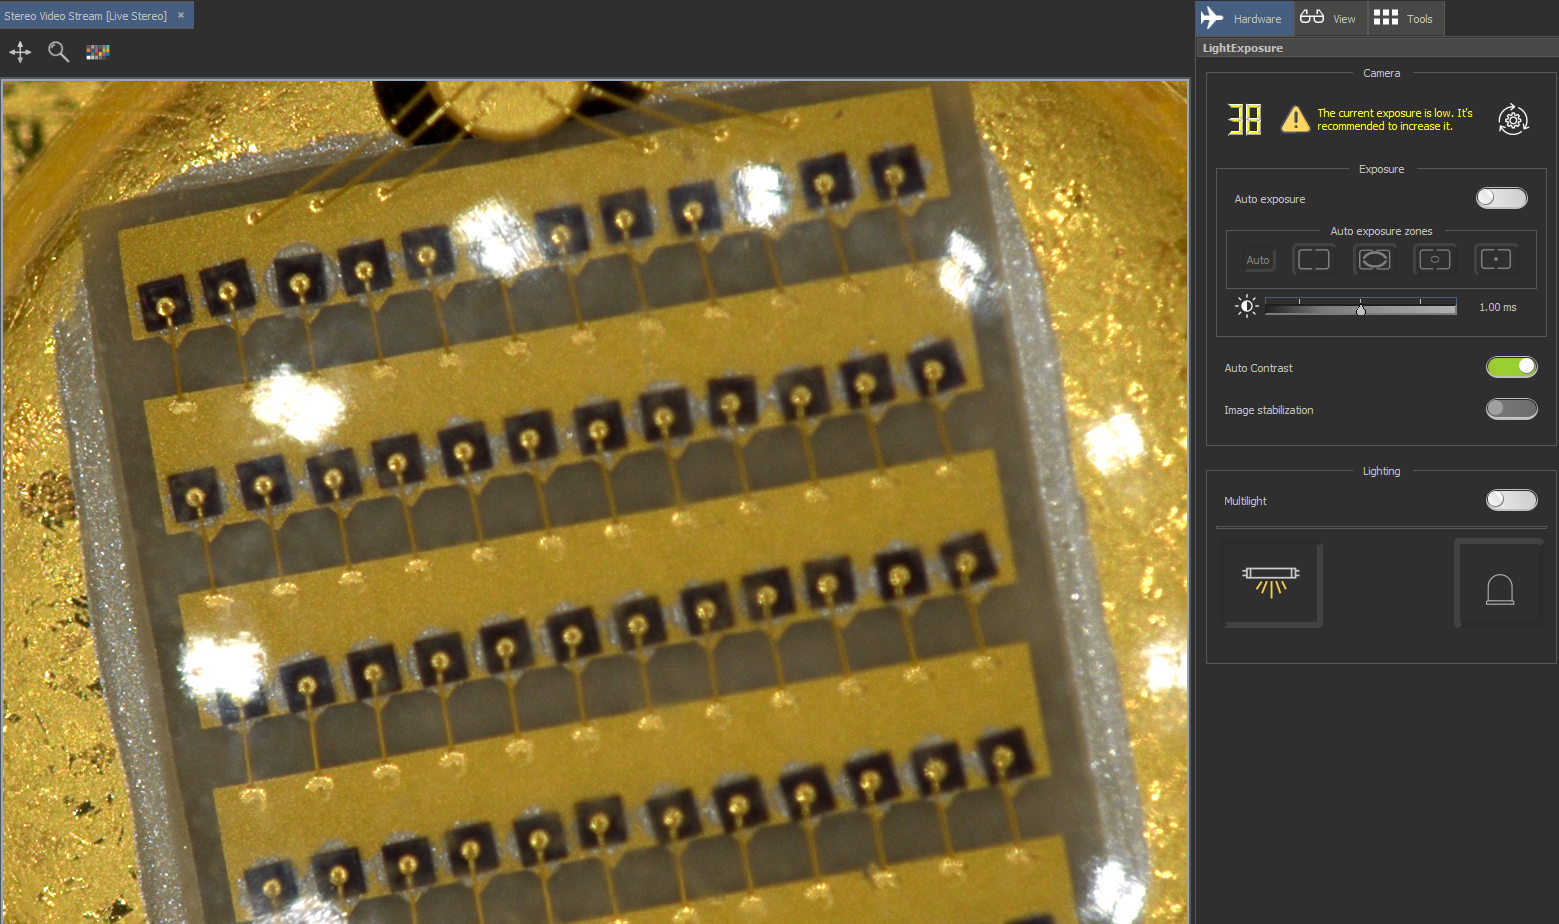
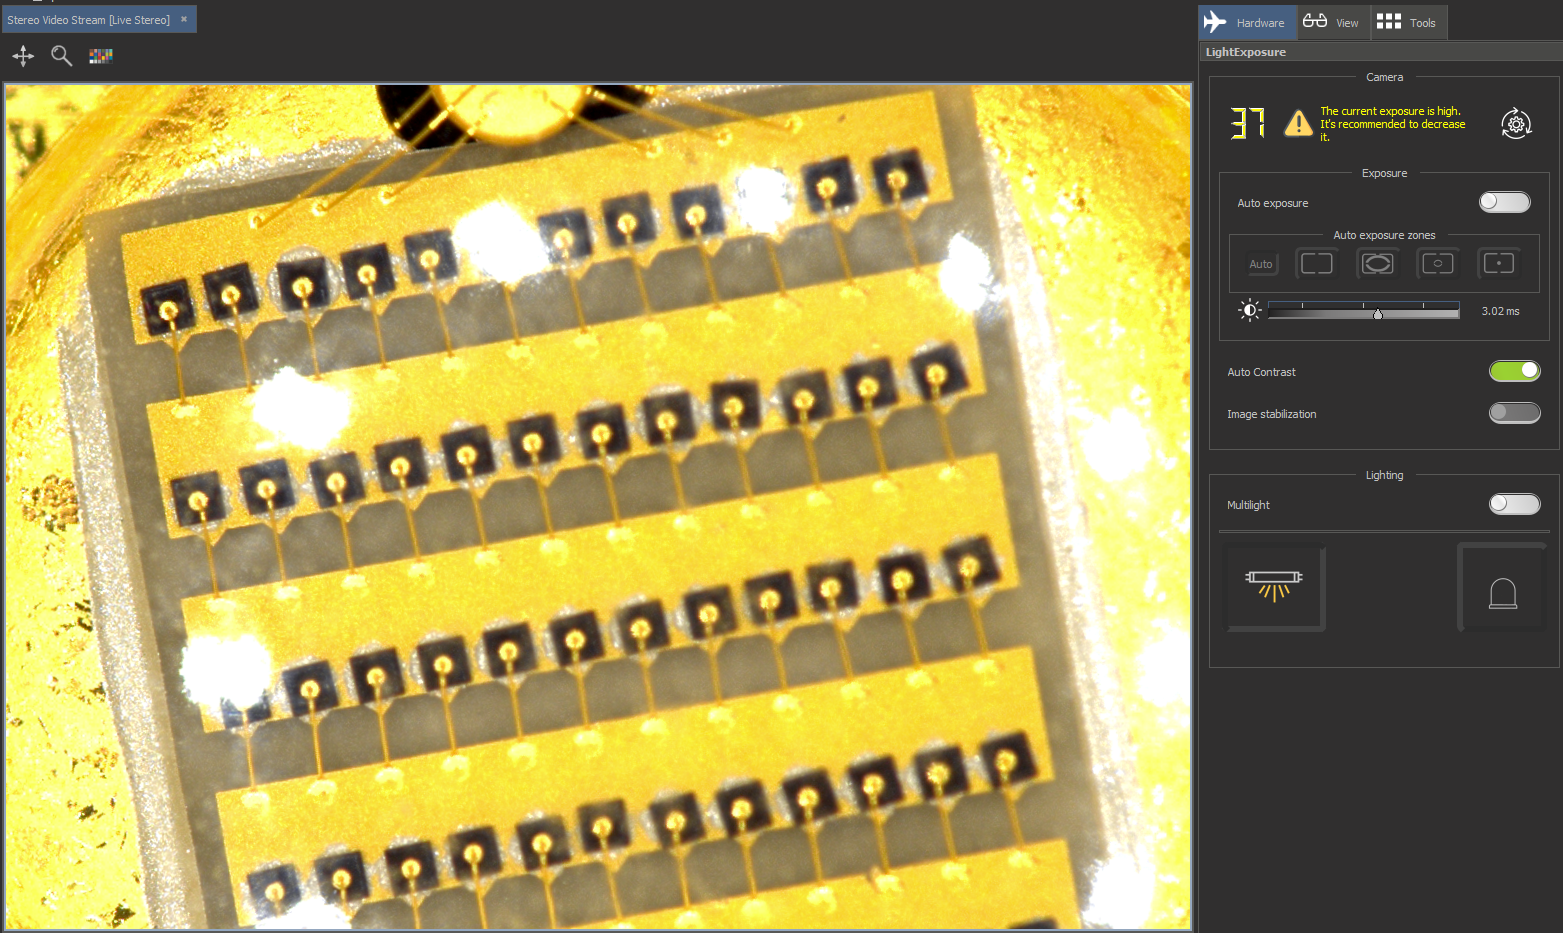
Locates on the right panel in the Hardware plugins tab:
|
|
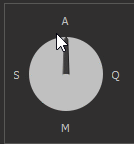
4. Priority mode dial. This control allows you to control the following modes (See details):
5. Speed-Quality balance slider. Show and control in manual mode the number of averaged frames during image stabilization. See details. | |
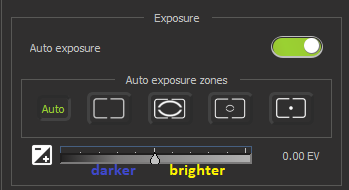
| 6. Auto Exposure switch button. Allows to automatically set the correct exposure of the scene being shot. By default is on. 7. Auto exposure zones panel. The panel has 5 predefined zones. AE zone is the area by which the exposure is automatically estimated. Zones in order from left to right:
8. Controls for Exposure compensation or correction. See details. | |
9. GUI element for image contrast control. By default is on. See details. 10. The image stabilization option is used only in multilight mode in order to compensate for the uniform movement of an object in the frame for a clearer resulting photo. | |
| 11. Option to multi-light mode using. By default this option is off. See details. | |
| 12. Button for switching on the lighting mode "Top Light", by default is on. | |
| 13. Button for switching on the lighting mode "Darkfield", by default is off. | |
| 14. A label showing the percentage balance between light sources if both are on. See details. | |
| 15. A lighting balance slider between Top-Light and Darkfield if both are on. See details. |
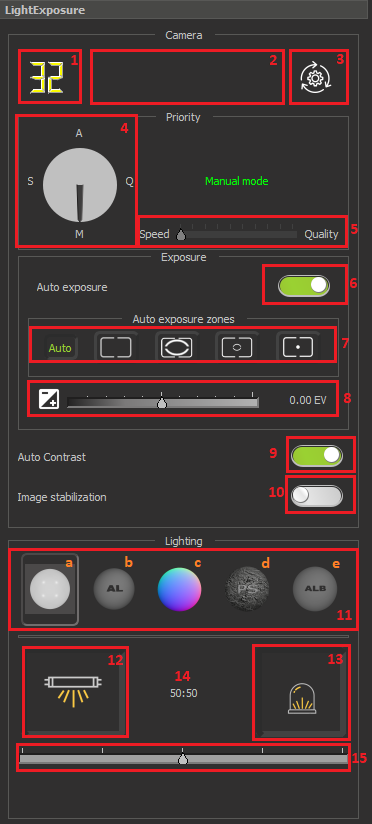
Starting from version 1.0.4.9, the lighting panel has changed and instead of the Multilight toggle button, there are 4 buttons for controlling lighting modes:
| a. Conventional lighting mode. b. Adaptive Light mode. c. Adaptive Light with normal map mode. d. Adaptive Light photometric stereo shape mode. e. Adaptive Light Albedo mode. See details. |

Priority modes
Starting from version 1.0.3.8, the Camera panel has changed. Added a new Priority panel with the ability to adjust the balance between quality and speed of stream from the microscope.
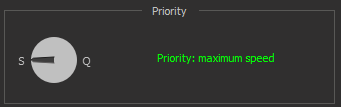
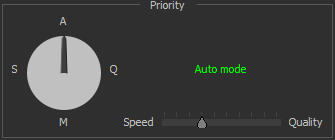
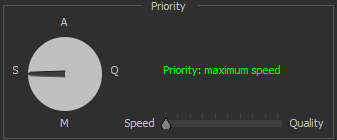
Since 1.0.5.11 version Priority panel has 4 modes
| Auto mode (default) |
| The mode automatically adjusts to the recommended settings with a balance between speed and quality. Sets the frame averaging parameter to 4. |
| Max Speed priority mode |
| The mode automatically adjusts settings to maximize microscope stream FPS and minimize its latency. This option guarantees a minimum FPS of 20 with the recommended hardware configuration for all lighting modes. Sets the frame averaging parameter to 1. |
| Max Quality priority mode |
| The mode automatically adjusts settings to maximize quality. The priority Quality gives the best image, but does not guarantee an acceptable FPS. Sets the frame averaging parameter to 10. |
| Manual mode |
| The mode allows you to manually change all settings. In this mode, you may change the frame averaging parameter (see image stabilization) from 1 to 10 by changing the Speed-Quality slider. Changing this parameter allows you to set the desired balance between speed and image quality. |
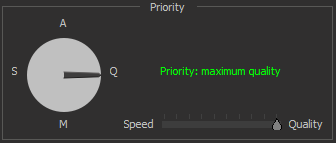

To change the priority, you can either hold down the mouse button over the arrow pointing to the priority symbol and rotate either clockwise or counterclockwise.
Below is an example of the priority modes changing:
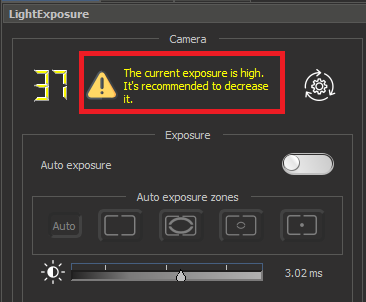
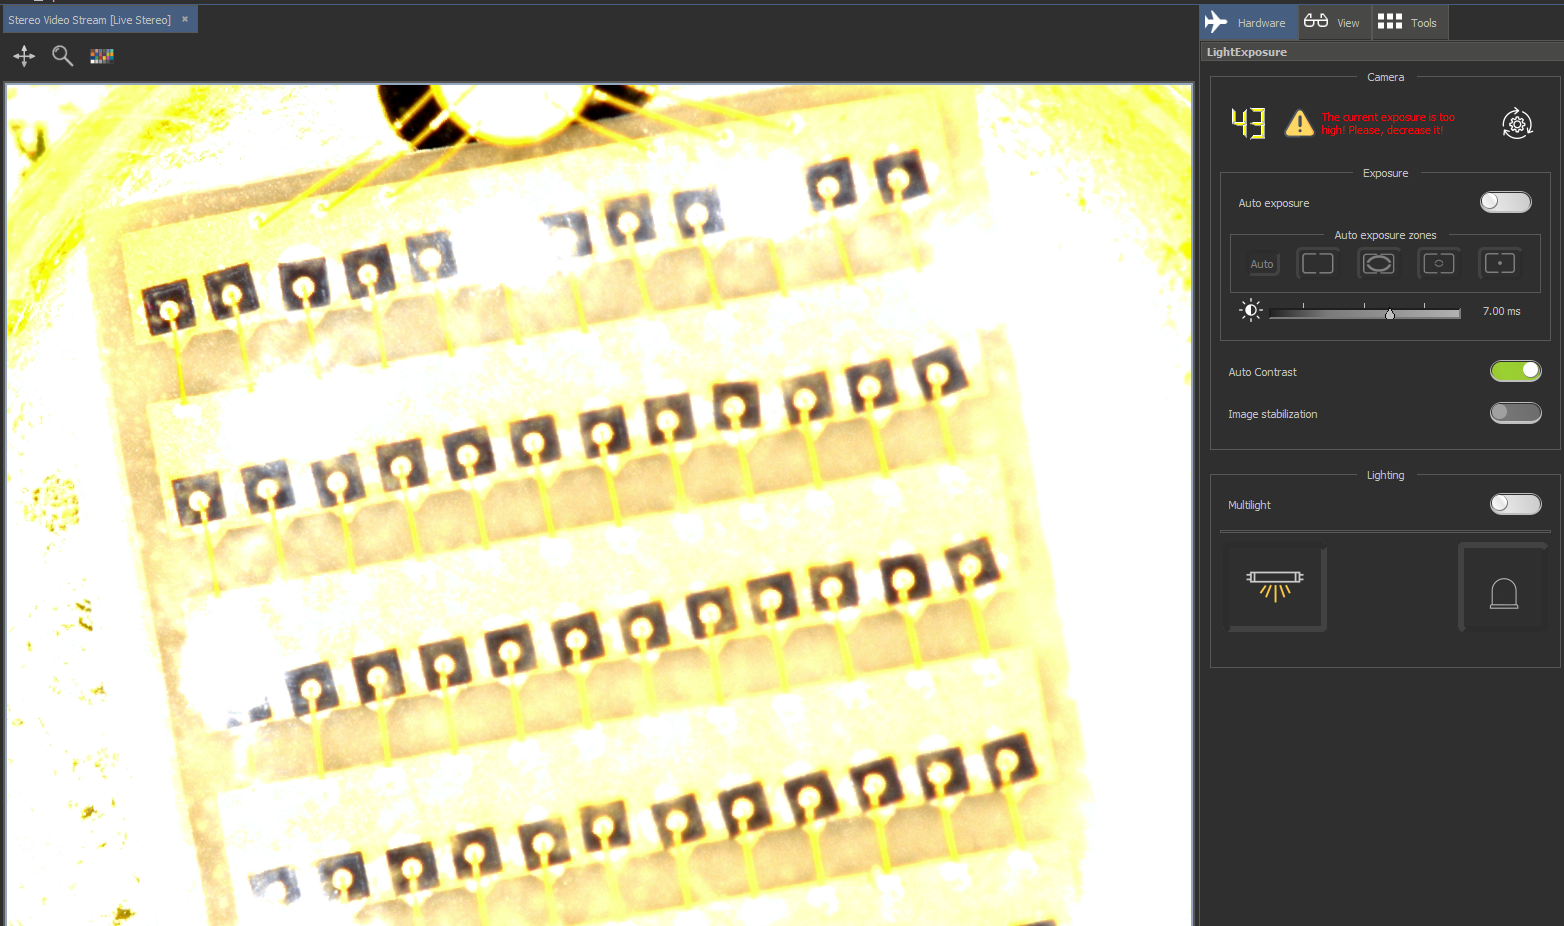
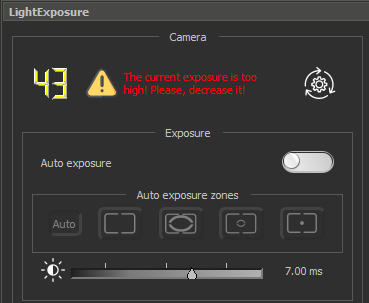
User Recommendation zone
Exposure is low |
|
|
| Exposure is high |
|
|
| Overexposured image |
|
|
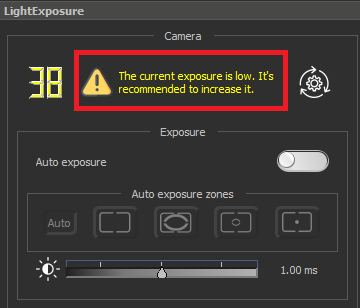
Exposure correction controls
If Automatic Exposure is active, but the brightness of the image does not reflect the subject well enough, then you can correct it relative to the optimal exposure value (EV) up or down. The slider shows values in an interval [-5.6 EV; 1.0 EV], where “–1.0” is one step darker than the optimal exposure value selected by the camera. To increase the EV, you need to move the slider to the right, to decrease it to the left.
If Auto Exposure is disabled, a slider appears for manual exposure correction:
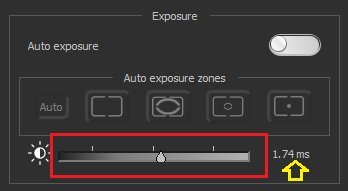
To specify the most accurate exposure in microseconds or milliseconds, click on the text exposure value. In the dialog that appears, you can specify the exact exposure value in the required units:
|
|
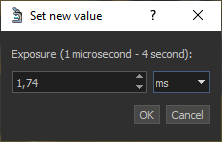
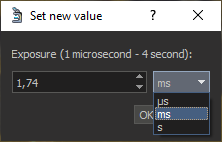
The acceptable exposure range depends on the installed equipment.
Auto Contrast control
The Auto Contrast button is designed to adjust the overall contrast in an image without adjusting its color.
Comparison of using auto contrast is given below:
| Auto Contrast ON | Auto Contrast OFF |
|
|

Lightings modes
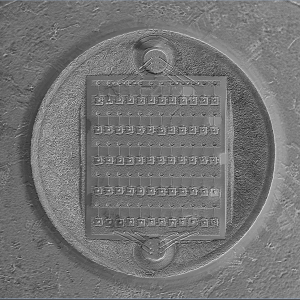
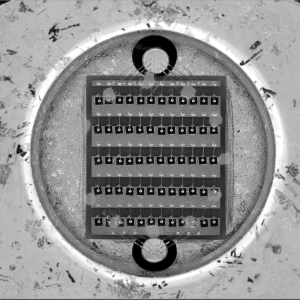
Using the Multi-light mode allows to get rid of a number of drawbacks inherent in conventional lighting. This mode reduces overexposure and eliminates glare. See Multilight features on the website Digital Microscope by Octonus.
Normal map and Photometric stereo shape modes are suitable for analysing microstructure defects, engraving, embossing, etc. (See Phtotometric stereo features).
Note: In Normal Map,Photometric Stereo, Albedo modes, Darkfield lighting will be automatically disabled. Also Auto contrast is disabled for Normal Map mode.
Comparison of using multilight is given below:
| Conventional lighting | Adaptive Light | Adaptive Light with normal map | Adaptive Light with photometric stereo shape | Adaptive Light with Albedo |
|
|
|
|
|
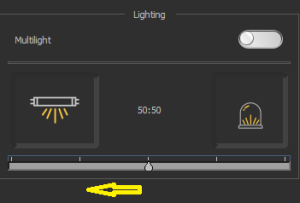
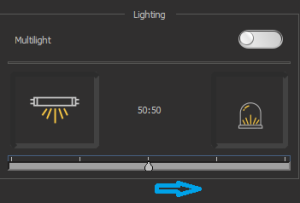
Light sources balancing
For better illumination of the subject on the scene, you can adjust the brightness ratio between the two lighting sources: Top Light and Darkfield. For this, both lights must be active.
Next, you can move the slider to the left to shift the lighting balance towards Top-Light.
Or by moving the slider to the right, change the lighting balance towards Darkfield.
Examples of lighting with different balance:
Top Light + Darkfield (Coaxial) Balance 50:50 | Balance tilted in favor of Top Light as 91:9 | Balance tilted in favor of Darkfield as 91:9 |
|
|
|
Image stabilization
Starting from DALS 1.4.0.9 a new image stabilization algorithm was integrated. When it is turned on, the algorithm prevents possible microvibrations of the object in a static position. Here you can see the examples, how it works:
When you use this option, the FPS of stream may drop to 15-20 FPS (for adaptive light and PS modes) in a maximize speed mode when the object is in static position. When the object is moving, the FPS increases.
And image stabilization now works not only for adaptive light and PS modes, but also for conventional lighting modes.
Image stabilization with noise suppression
Starting from DALS 1.0.5.11 an image stabilization feature has been improved. Besides compensations of microvibrations, the noise of stream for a static object is suppressed. It is done by averaging several consecutive compensated frames of stream.
Here you can see, how DALS 1.0.5.11 works with the finger-print on IPhone display glass in various lighting modes and how new image stabilization with averaging of 10 frames improves the resulting picture:
Another video shows the difference for adaptive lighting (AL) between three modes:
- AL without any image stabilization
- AL with image stabilization but without frame averaging
- AL with image stabilization and 10 frame incremental averaging
Image stabilization and incremental averaging always works in progressive mode:
- When the object moves - we show a noise picture, but it has minimal latency
- When the object becames stable - frames are stabilized and averaged more and more, suppressing noise
- When the object moves again - we see again a picture with minimal latency
See the example, how it works in dynamic:
NOTE: This feature works in a real time (giving at least 20 FPS stream for RTX 3080). Anyway, depending on the selected priority mode of DALS, the settings of image stabilization and averaging can be different.