This option is available only for Dibox 360 hardware. Stacking is available for Dibox 360 with liquid lens.
Brief description of UI elements
In DiBox360 (with automatic Rx-motor) it is possible to get a set of frames taken when the observed object rotates around the vertical axis along the selected trajectory using the Rotation scanning tool.
The UI panel locates on the right panel in the Tools plugins tab. The controls described below are the same for all trajectories.
Common controls
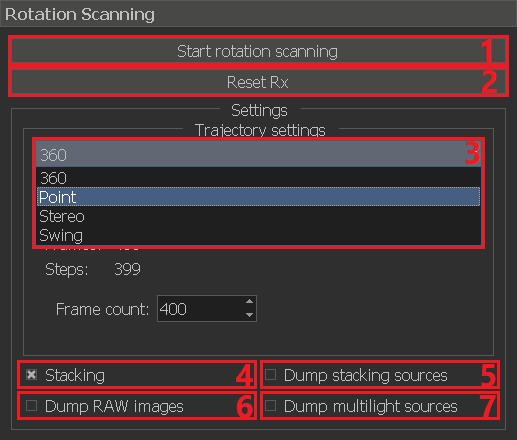
- Button to start scanning along the selected trajectory
- Button for reset Rx-motor to zero position
- List for selecting available rotation trajectories around the vertical axis. You can choose one of the following values:
- 360 - getting the specified number of frames taken when the observed object rotates 360° around the vertical axis
- Point - getting a frame at the current position of the Rx-motor
- Stereo - getting frames at two different positions of the Rx-motor with the specified angle between them
- Swing - getting the specified number of frames taken when the observed object swings around the vertical axis with the specified amplitude (in both directions) relative to the current position of the Rx-motor
- Flag to enable stacking (expanding the depth of field) at each point of a given trajectory
- Flag to enable saving source data for stacking to disk. Available only when stacking (flag 4) is activated
- Flag to enable saving RAW data of camera to disk. Available only when stacking (flag 4) is not activated
- Flag to enable saving source data for multilight to disk. Available only if multilight mode is activated, but stacking is not activated
Trajectory controls
360
When you select 360 trajectory, you will get the specified number of frames taken when the observed object rotates 360° around the vertical axis

- The range of the Rx-motor in which the scan will be performed
- The scan step in degrees
- The number of frames that will be taken as a result. This value can be change in field 5
- The number of scanning steps
- The number of frames that will be taken as a result
Point
When you select Point trajectory, you will get a frame at the current position of the Rx-motor
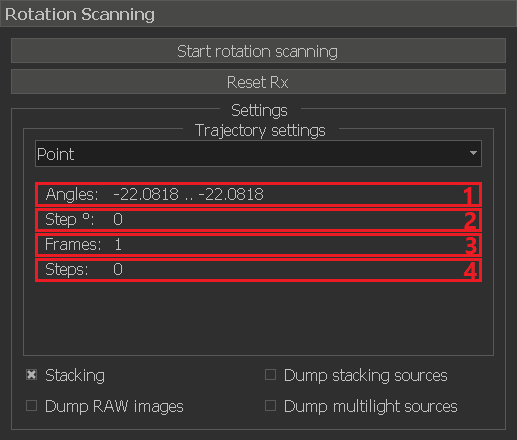
- The range of the Rx-motor in which the scan will be performed
- The scan step in degrees
- The number of frames that will be taken as a result
- The number of scanning steps
Stereo
When you select Stereo trajectory, you will get frames at two different positions of the Rx-motor with the specified angle between them
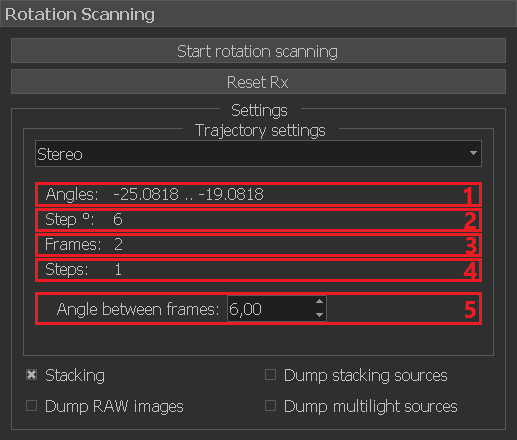
- The range of the Rx-motor in which the scan will be performed
- The scan step in degrees
- The number of frames that will be taken as a result
- The number of scanning steps
- The angle between the captured frames in degrees
Swing
When you select Swing trajectory, you will get the specified number of frames taken when the observed object swings around the vertical axis with the specified amplitude (in both directions) relative to the current position of the Rx-motor
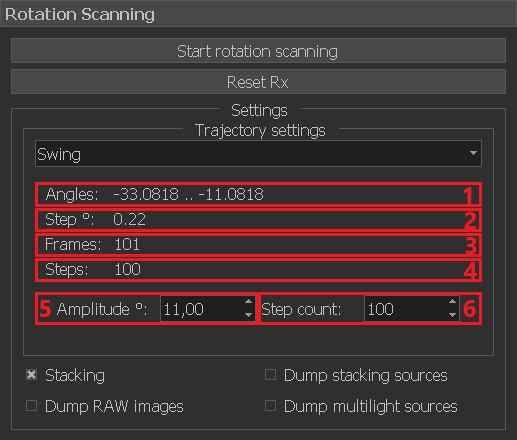
- The range of the Rx-motor in which the scan will be performed
- The scan step in degrees
- The number of frames that will be taken as a result
- The number of scanning steps. This value can be change in field 6
- The swing amplitude in degrees
- The number of scanning steps
Step-by-step guide
Reset the Rx-motor to zero position if you want the first image in the set to correspond to the zero motor position. Just click the corresponding button 2 (see the section Common controls).
Select in the list 3 the target trajectory along which you want to scan and adjust the trajectory (for details, see the section Trajectory controls)
Check flag 4 if you want to enable stacking (expanding the depth of field) at each point of a given trajectory. After that, check flag 5 if you want to enable saving source data to disk. Also check flags 6 and 7 as needed.
After all this, start the rotation scan by clicking on the corresponding button 1.
Wait for the end of the active scanning process. While scanning and saving data, the GUI of the application will be unavailable. You can track the progress of the scanning process using the progress bar.

To terminate the active scanning process early, you can click on the Cancel button.
At the end of the process, the resulting data will automatically be opened in a separate tab where you can play them like a video. All saved image sets can be found in the Scan folder, which is located in the root folder of the application.