Hardware
- Connect 3D Global´s autostereoscopic 3D display device via HDMI or DP cable to the PC
- Connect the tracking camera via USB cable to the PC
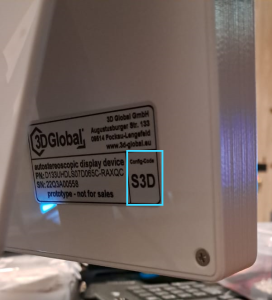
- Find the Autostereoscopic Display ID. It should be on the display's back side and looks like 05F, 05D, S1D, 05G or something similar.
Software
3D Global View Optimizer installation
Install the latest version of the 3D Global View Optimizer software and allow the installation of the camera driver.
DALS application installation
Install DALS for stereo configuration:
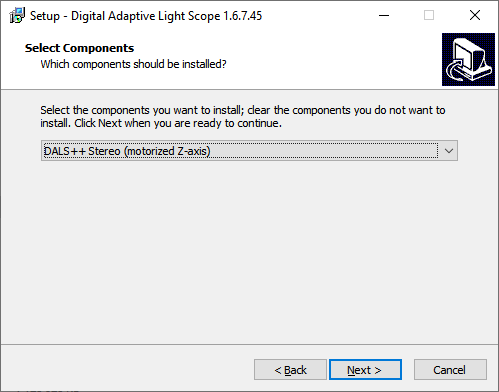
- Run the DALS installer
- Select one of DALS stereo configurations to install. Then, press Next button:
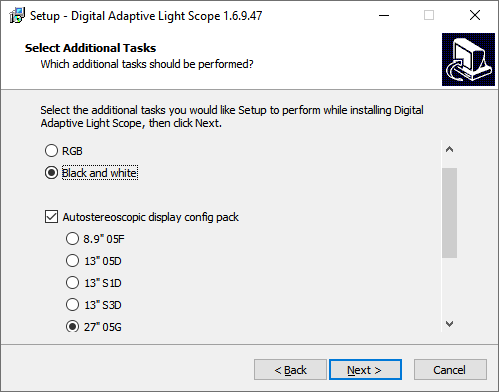
- Select your Autostereoscopic Display ID in the "Autostereoscopic display config pack" list of the next page. If you don't see your ID, uncheck the "Autostereoscopic display config pack" checkbox. Then, press Next button.
- Proceed DALS installation.
Manual configuration files setup for displays which ID are not included to the installer
If you did not find your Autostereoscopic Display ID in the list of IDs included to the installer:
- Find the folder with config files for the Autostereoscopic Display ID here: https://www.dropbox.com/sh/17bm9mt81gqbli5/AADJpreFmNRHmDayjVcZ2vava?dl=0. For example, for S1D it is "13 S1D".
- Copy all files from this folder to the '%PROGRAMDATA%\OctoNus Software\Digital Microscope' folder.
- Find a copied file with '.reg' extension. Run it and then press Yes. It will update the Windows Registry to add information about the autostereoscopic display.
Adjust autostereoscopic visualization to achieve best stereo quality
If the stereo on your workstation is configured incorrectly, you will not be able to see a stereo image via the DALS app: ghosting will be very noticeable, left and right pictures will not be combined into one 3D image etc.
Adjust stereo for displays with a head tracking camera
To configure autostereoscopic visualization with head tracking, you should do the following:
- Run DALS on regular display
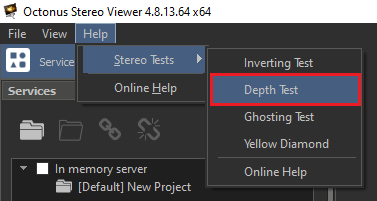
Open a stereo test, for example, the Depth Test (Main menu: Help → Stereo Tests → Depth Test)

if you don't see the right panel, just close the 'depth test' image and open it again
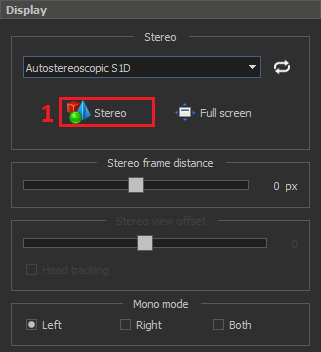
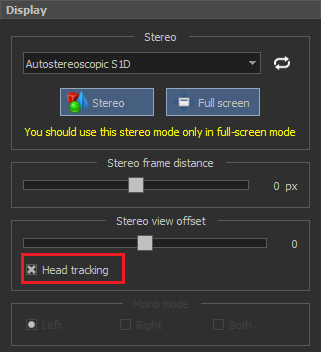
Activate AutostereoscopicS1D full screen mode with checked Head tracking flag:
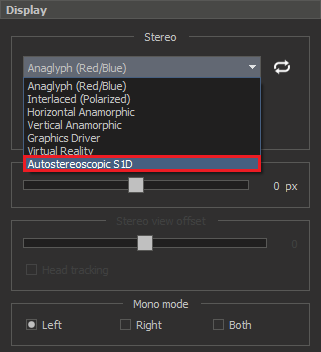
- Select the AutostereoscopicS1D mode in the list of available stereo modes
- Press the Stereo button and press the Full screen button:
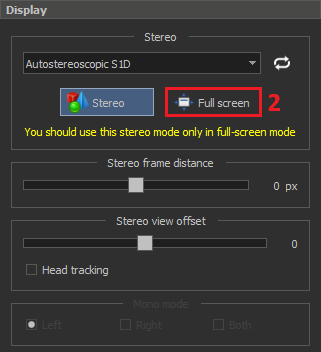
- The video data will be displayed on the second autostereoscopic display in full screen mode
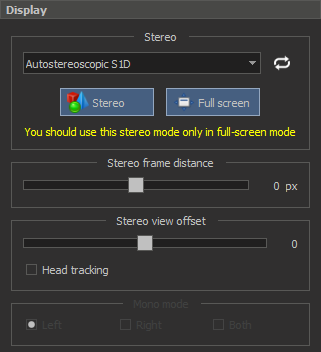
- Check the Head tracking checkbox:
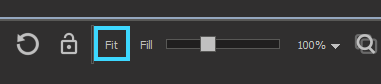
- Press 'Fit' to fit the 'Depth test' image to the autostereoscopic display:
- Open 3D Global View Optimizer. Check if head tracking works when position of your head is inside the shaded area:
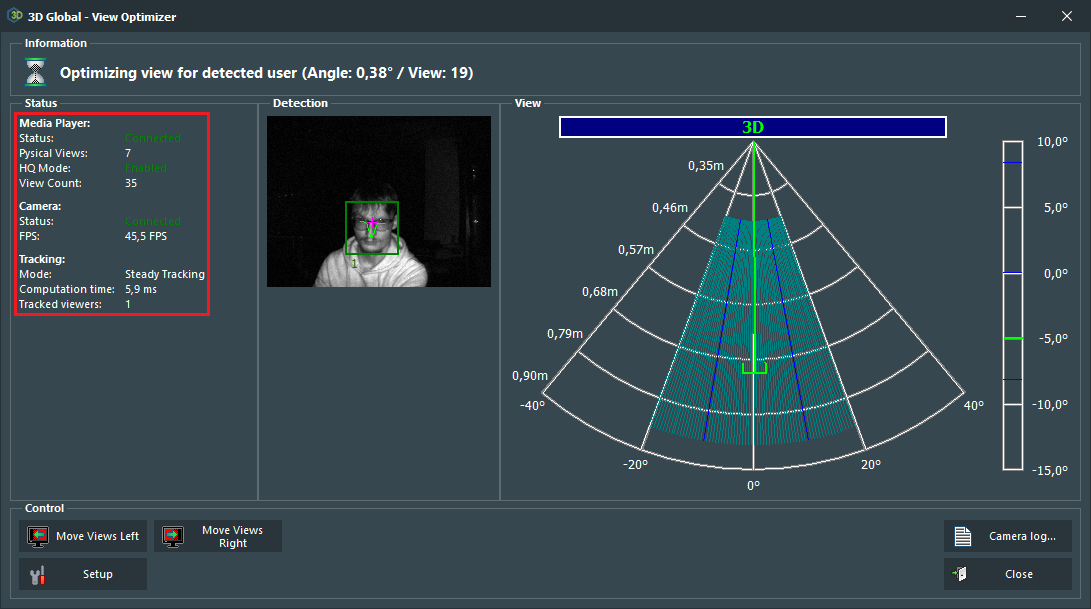
Also, please check these parameters:- Media Player status is connected
- HQ mode is enabled
- Camera is connected
- FPS ≥ 35
- Tracking mode is steady tracking
- If another tracking mode is selected, please follow these additional steps:
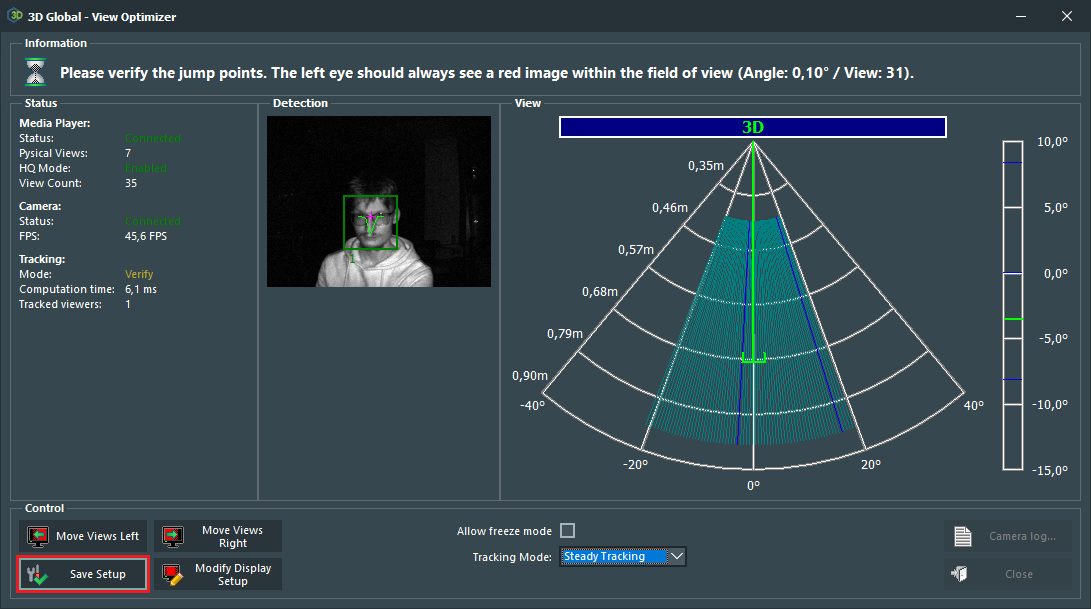
- Click the Setup button
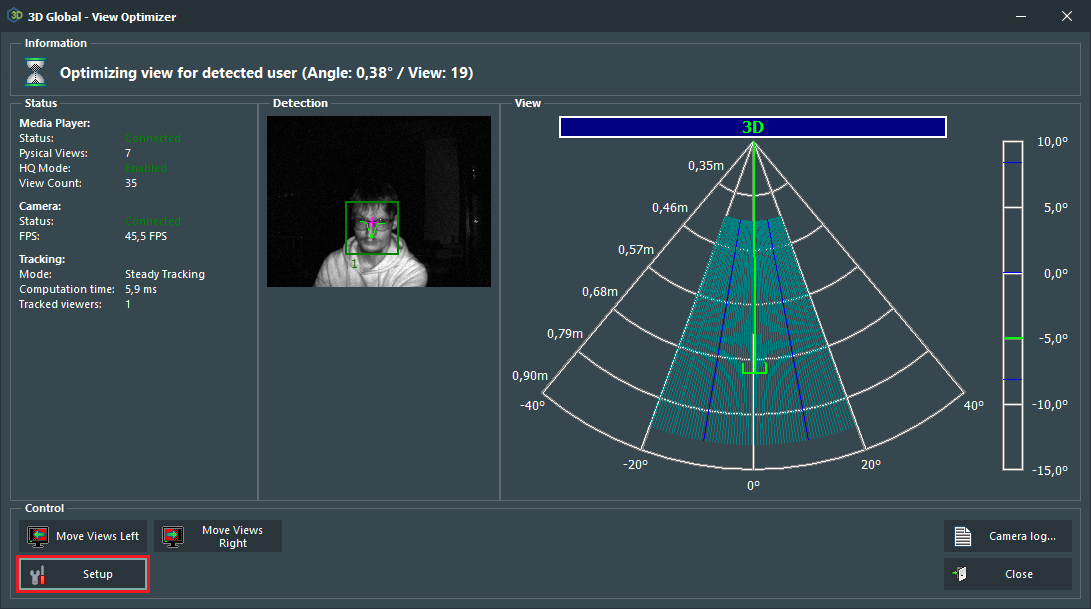
- Select the Steady Tracking item from the list of available tracking modes

- After that click the Save Setup button
- Adjust the View offset to see the right stereo using the Move Views Left and Move Views Right buttons:
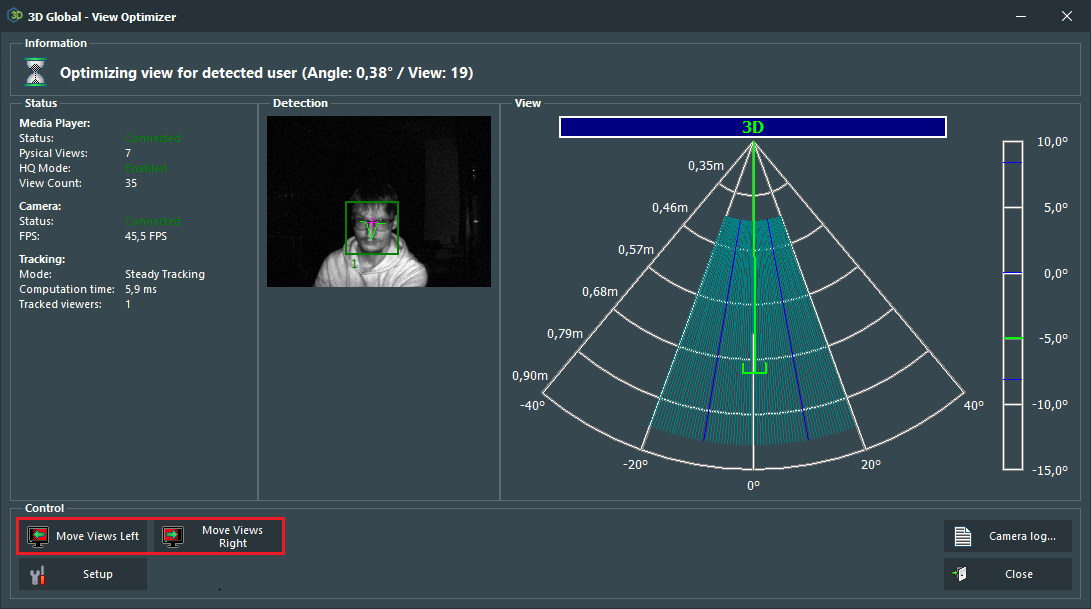
- Click the Setup button
Adjust stereo for displays without a head tracking camera
Procedure is the same, but:
- Uncheck "Head tracking" checkbox in the OSV
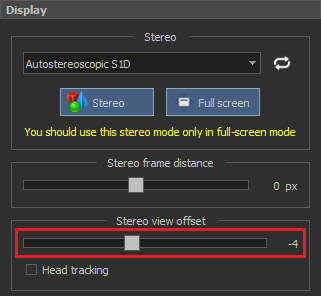
- Adjust stereo view using the appropriate slider in the DALS or Ctrl+Alt+Left / Ctrl+Alt+Right shortcuts:
Configure 2 and more autostereoscopic displays with different IDs connected to one computer
Because of different '.reg' files for different IDs of autostereoscopic displays we have to create several Windows Users: one Windows user account for each unique Autostereoscopic Display ID.
Also it is necessary to separate DALS configuration folders for these users. So, got each Windows user account where you want to setup autostereoscopic display configuration:
- Log in to the Windows User
- Copy already configured DALS configuration folder to new DALS configuration folder.
- For example, copy whole "%PROGRAMDATA%\OctoNus Software\Digital Microscope" folder the to the folder "%PROGRAMDATA%\OctoNus Software\Digital Microscope S3D".
- Find necessary display configuration files corresponding to the autostereoscopic display for this Windows User as written in section above and copy them to new DALS configuration folder.
- Open 'Environment Variables' in the Windows settings
- Add 'DMCONFIGS' variable into the User variables section and set its value to new DALS configuration folder:

In case of problems with setup 2 or more autostereoscopic display, ask developers for help.