You can capture video and images from the microscope cameras. The 'Capture' panel ('Data' tab, left panel) is designed for this.
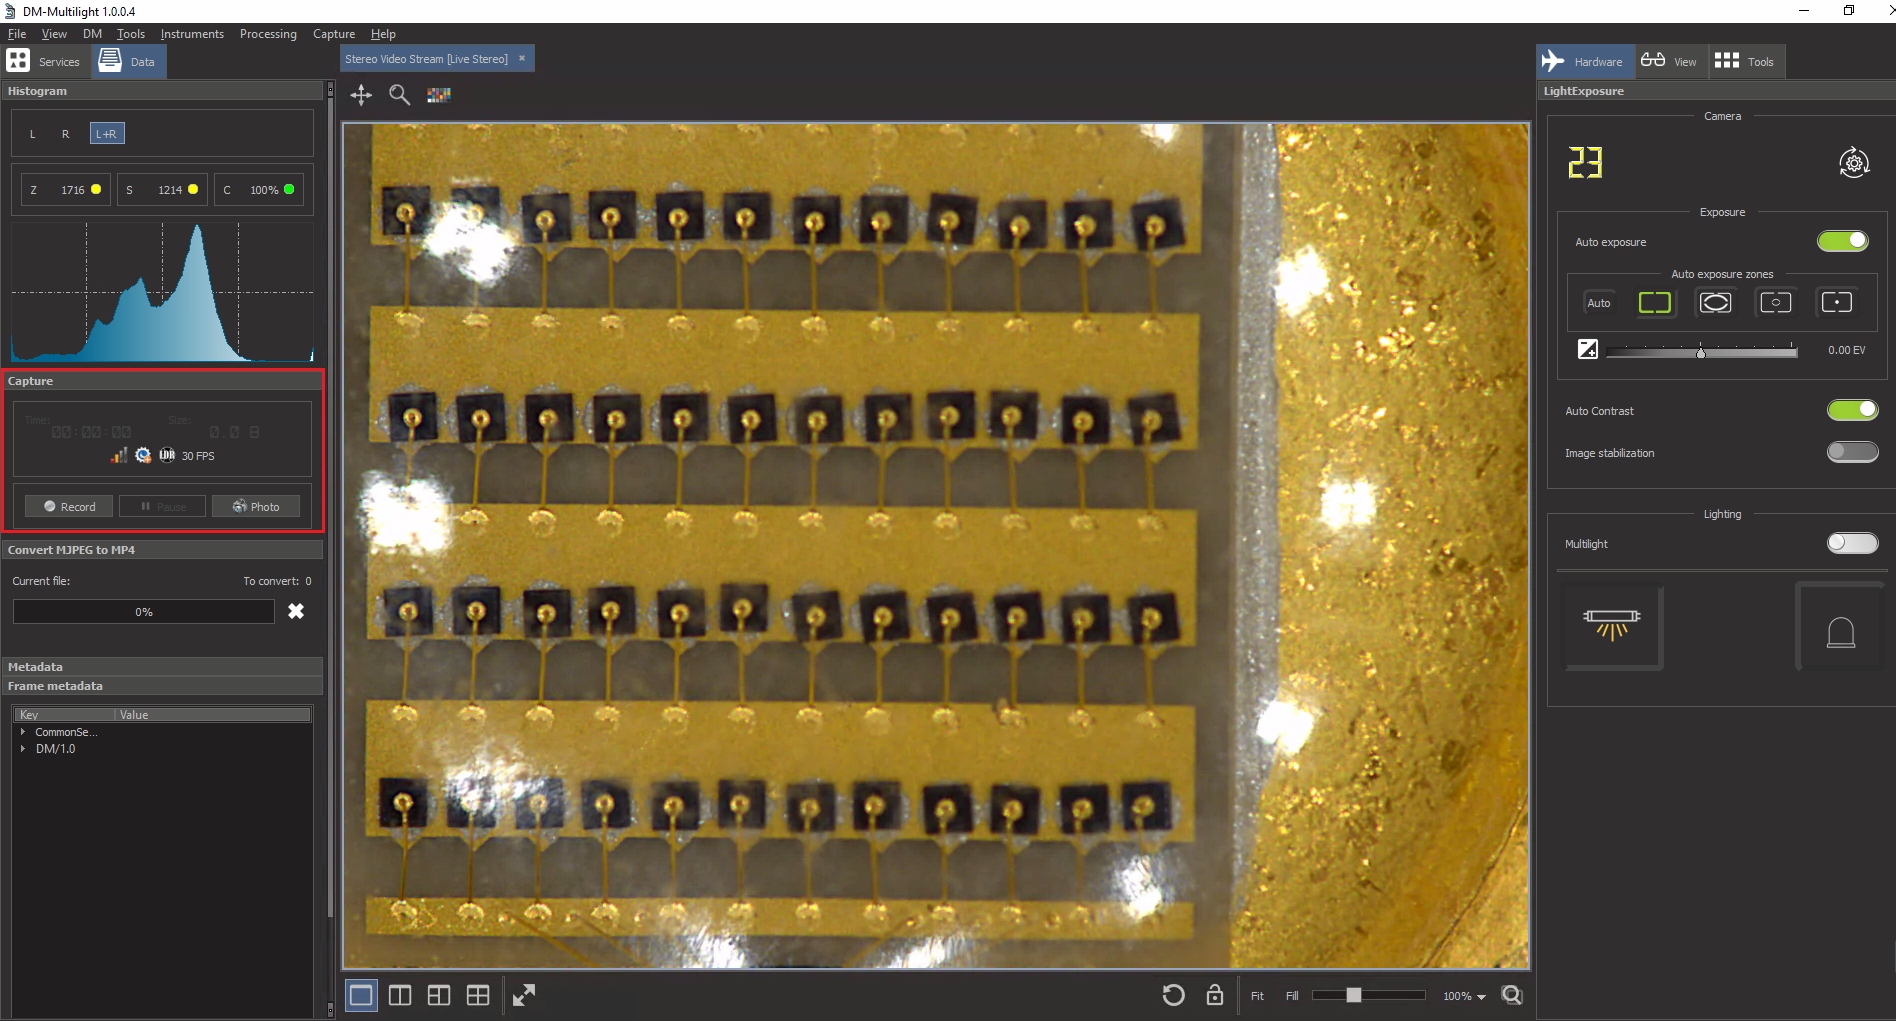
The panel for managing recording settings and process is presented below:
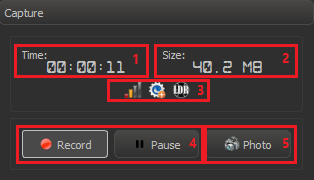
- The duration of the recorded video. Timer will be stopped, while recording is paused.
- The approximate size of the recorded video (value may be slightly inaccurate).
Icons for display the parameters of the recorded video.
Buttons for recording video.
Button for capturing the current frame with metadata.
Recording Video
Button | Description |
|---|---|
 / / | Start / stop video recording |
 | Pause / continue video recording |
Recording Parameters
| Recording Quality | |
|---|---|
| Icon | Parameter |
 | Low quality / Smal file |
 | Normal quality / Medium file (default) |
 | Reference quality / Large file |
 | Highest quality / Very large file |
| Metadata | |
| Icon | Parameter |
 | Recording without metadata |
 | Recording with built-in metadata (default) |
| Dynamic Range | |
| Icon | Parameter |
 | Recording LDR video (default) |
 | Recording HDR video |
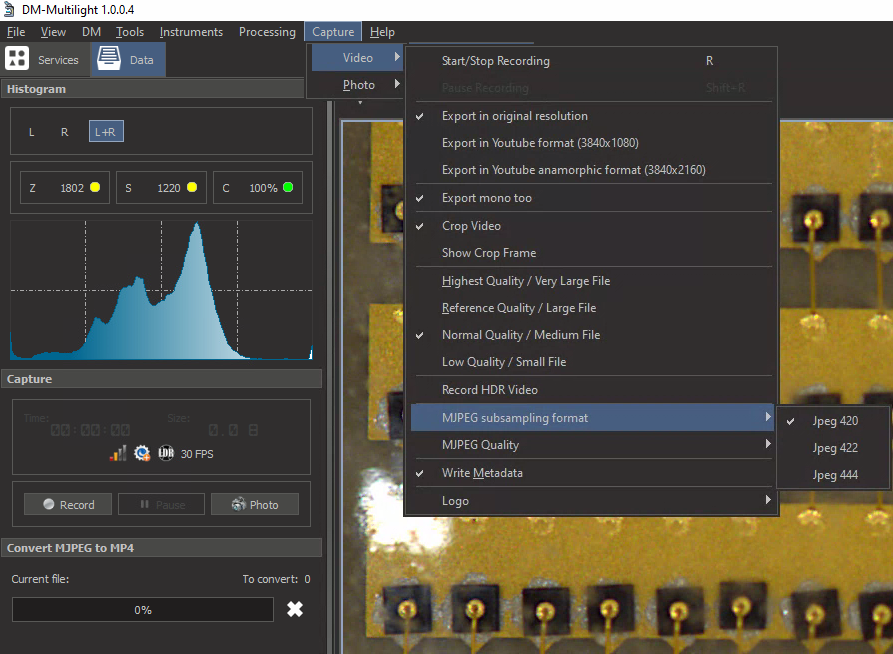
The recording parameters can be changed via the application menu: Capture → Video:
The recorded video is first captured into fast internal format and then this internal format is converted into final video in a background process.
After you finished capture of video the process of video convertion starts and you can see the progress-bar of convertion process:
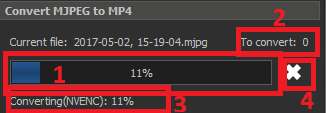
- Main progress-bar
- Files for convertion in queue (maximum one file is converted at a time)
- Status of convertion of the file
- Cross for aborting convertion.
Convertion of the file does not block the start of new recording.
The resulting video can be found in the DM Multilight Application installation directory in the "Movies" subfolder.
For example, for the default path it will be "C:\Users\user\AppData\Local\OctoNus Software\OctoNus DM-Multilight 1.0.0.4\Movies\".
Capturing Frames
When you press the 'Photo'  button (or shortcut "Ctrl-P"), a dialog box will open asking you to save the image to a specific folder.
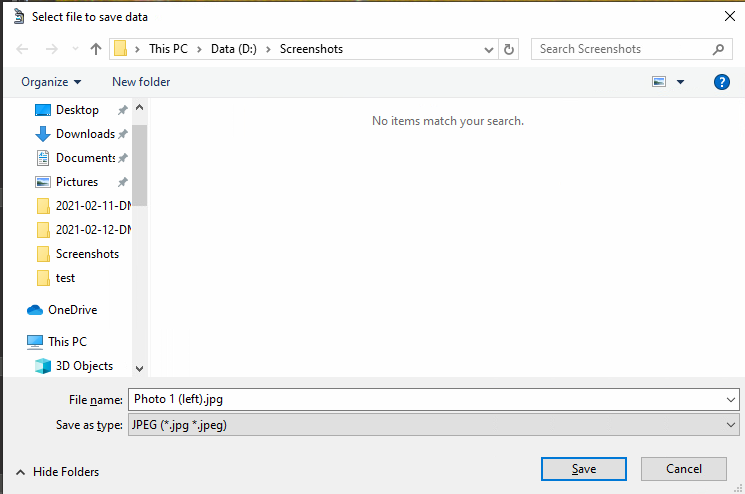
Next, the directory is indicated and the Save button is pressed.
New in 1.5.0 version
- Audio recording
- Screen capturing
- Presets for recording
- Recording several videos with different parameters as same time
New controls
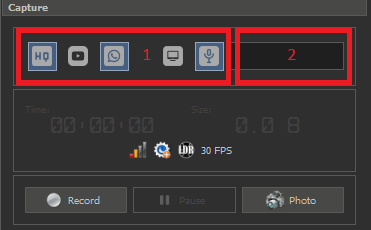
Buttons in 1 block:
Presets:
 - record in original resolution, quality can be chosen from Capture -> Video menu
 - record for YouTube upload (full HD resolution 1920x1080, 3mbs, video will be cropped to fit full HD resolution)
 - record for sharing in messengers like WhatsApp (HDReady resolution 1280x720, 1mbs, video will be scaled to fit HDReady resolution)
Several presets can be chosen before recording starts, it will result in several files with same content but with different resolutions, bitrates and etc. as stated above.
 - switch to the screen recording, if recording is in progress new files will be created
 - record audio from Windows default audio capture device, UV meter in block 2 will show audio oscillations while recording