Below is the step-by-step description of a simple scanning process both in HP Pacor and HPO.
The workflow consists of the following operations:
- Scanning a stone.
- Adjusting holder position (performed every ~15 min).
- Making initial settings (performed once for a series of similar stones, probably once in a lifetime).
Scanning a polished stone
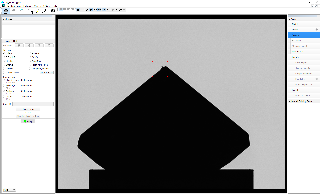
Cleaning before scanning, ID entered manually
| Action | Total clicks | Activate the camera. Mount and center the stone on the holder. | Activate the pump to fasten the stone to the holder, so that it would not move during the subsequent operations. | Rotate the stone manually by dragging the mouse in the view area, and observe the possible visible signs of dirt, dust, fibers, etc. If found, stop the rotation and clean the stone. | Start the scanning process. | After the scanning finishes, a report pops up. Read the report, then close it to look at the model. | Investigate the Model Building Info. | Export the model as *.dmc, *.gem, *. stl, and/or *.asc, if needed. | Export the model in the program's native format, if needed. | Create and view the reports, if needed. | Save the report(s), if needed. | Export report data, if needed. | |
|---|---|---|---|---|---|---|---|---|---|---|---|---|---|
| HPP | 7 |  |
Alternatively, press Ctrl-F9. |  |
After pressing Start, a popup window appears prompting you to enter the Stone ID. |
Enter the Stone ID and click OK. |
To close the report, click |
| Model in a variety of formats is exported automatically, according to the initial settings. | Model is saved in *.mmd format according to the initial settings. |
Reports are prepared and then printed and/or opened for viewing automatically, according to the initial settings. |
To save a report opened in MS Word or Wordpad, click File - Save. | Reports data are exported automatically, according to the initial settings. |
| Clicks | 1 | 2 | - | 3 | 4 | 5 | - | - | - | - | 6,7 | - | |
| HPO | 6 |  | No action required.
|  |
After clicking Shadow scan, a popup window appears prompting you to enter the Stone ID. |  Enter the Stone ID and click OK. |
To close the report, click Standard report in the right menu. |
| Model in a variety of formats is exported automatically, according to the initial settings. | Model is saved in *.oxgz format according to the initial settings. |
Reports are prepared and then printed and/or opened for viewing automatically, according to the initial settings. |
To save a report opened in MS Word or Wordpad, click File - Save. | Reports data are exported automatically, according to the initial settings. |
| Clicks | 1 | - | - | 2 | 3 | 4 | - | - | - | - | 5,6 | - | |


Keystrokes during typing the Stone ID and file names and dragging the model (which are supposedly identical in both programs) are not counted in the number of clicks.
Cleaning after scanning, ID entered manually
| Action | Total clicks | Activate the camera. Mount and center the stone on the holder. | Activate the pump to fasten the stone to the holder, so that it would not move during the subsequent operations. | Start the scanning process. | After the scanning finishes, a report pops up. Read the report, then close it to look at the model. | Investigate the Model Building Info. If there are significant inconsistencies, click on the corresponding line so as to orient the stone for inspection. | To have a clear view of the photos, you may switch off the model. | If there are visible signs of dirt on the stone, clean it and run the scan again. Note that the current scanned contours and the model would be erased. | Export the model as *.dmc, *.gem, *. stl, and/or *.asc, if needed. | Export the model in the program's native format, if needed. | Create and view the reports, if needed. | Save the report(s), if needed. | Export report data, if needed. | |
|---|---|---|---|---|---|---|---|---|---|---|---|---|---|---|
| HPP | 6 - 10 | | No action required. The pump activates automatically as you initiate the scanning. |
After pressing Start, a popup window appears prompting you to enter the Stone ID. |
Enter the Stone ID and click OK. |
To close the report, click |
Check the Move motor per side selection checkbox, so that the stone on the scanner would move synchronously with the model on the screen. Note that the camera view turns off automatically during scanning, but then turns on when you click on any line in Model Building Info. |
Click the
|
Click Start, then click OK in the popup window to keep the previously entered Stone ID. | Model in a variety of formats is exported automatically, according to the initial settings. | Model is saved in *.mmd format according to the initial settings. |
Reports are prepared and then printed and/or opened for viewing automatically, according to the initial settings. |
To save a report opened in MS Word or Wordpad, click File - Save. | Reports data are exported automatically, according to the initial settings. |
| Clicks | 1 | - | 2 | 3 | 4 | 5 | 6 | 7,8 | - | - | - | 9,10 | - | |
| HPO | 6 - 10 | | No action required. The pump activates automatically as you initiate the scanning. |
After clicking Shadow scan, a popup window appears prompting you to enter the Stone ID. |
Enter the Stone ID and click OK. |
To close the report, click Standard report in the right menu. |
Check the Sync Stone with Model checkbox on the right panel, so that the stone on the scanner would move synchronously with the model on the screen. |
Uncheck the Show Model on Photo checkbox on the right panel. |
Click Shadow scan, enter again the same Stone ID, then click OK. | Model in a variety of formats is exported automatically, according to the initial settings. | Model is saved in *.oxgz format according to the initial settings. |
Reports are prepared and then printed and/or opened for viewing automatically, according to the initial settings. |
To save a report opened in MS Word or Wordpad, click File - Save. | Reports data are exported automatically, according to the initial settings. |
| Clicks | 1 | - | 2 | 3 | 4 | 5 | 6 | 7,8 | - | - | - | 9,10 | - | |


Keystrokes during typing the Stone ID (which is done once in HPP and probably more than once in HPO) and file names are not counted in the number of clicks. The resulting total depends on whether or not the model was rescanned.
Cleaning before scanning, ID entered by the barcode scanner
| Action | Total clicks | Activate the camera. Mount and center the stone on the holder. | Activate the pump to fasten the stone to the holder, so that it would not move during the subsequent operations. | Rotate the stone manually by dragging the mouse in the view area, and observe the possible visible signs of dirt, dust, fibers, etc. If found, stop the rotation and clean the stone. | Start the scanning process. | After the scanning finishes, a report pops up. Read the report, then close it to look at the model. | Investigate the Model Building Info. | Export the model as *.dmc, *.gem, *. stl, and/or *.asc, if needed. | Export the model in the program's native format, if needed. | Create and the reports, if needed. | Save the report(s), if needed. | Export report data, if needed. | |
|---|---|---|---|---|---|---|---|---|---|---|---|---|---|
| HPP | 7 | |
Alternatively, press Ctrl-F9. | |
After pressing Start, a popup window appears prompting you to enter the Stone ID. |
Erase the previous Stone ID and scan the barcode. The code will be entered and the scanning will start automatically. |
To close the report, click |
| Model in a variety of formats is exported automatically, according to the initial settings. | Model is saved in *.mmd format according to the initial settings. |
Reports are prepared and then printed and/or opened for viewing automatically, according to the initial settings. |
To save a report opened in MS Word or Wordpad, click File - Save. | Reports data are exported automatically, according to the initial settings. |
| Clicks | 1 | 2 | - | 3 | 4 | 5 | - | - | - | - | 6,7 | - | |
| HPO | 5 | | No action required.
| |
After clicking Shadow scan, a popup window appears prompting you to enter the Stone ID. |
Scan the barcode. The previous Stone ID will be erased, the new one entered, and the scanning will start automatically. |
To close the report, click Standard report in the right menu. |
| Model in a variety of formats is exported automatically, according to the initial settings. | Model is saved in *.oxgz format according to the initial settings. |
Reports are prepared and then printed and/or opened for viewing automatically, according to the initial settings. |
To save a report opened in MS Word or Wordpad, click File - Save. | Reports data are exported automatically, according to the initial settings. |
| Clicks | 1 | - | - | 2 | - | 3 | - | - | - | - | 4,5 | - | |
Keystrokes during operating the barcode scanner, typing the file names and dragging the model (which are supposedly identical in both programs) are not counted in the number of clicks.
Cleaning before scanning, ID auto-incremented
| Action | Total clicks | Activate the camera. Mount and center the stone on the holder. | Activate the pump to fasten the stone to the holder, so that it would not move during the subsequent operations. | Rotate the stone manually by dragging the mouse in the view area, and observe the possible visible signs of dirt, dust, fibers, etc. If found, stop the rotation and clean the stone. | Start the scanning process. | After the scanning finishes, a report pops up. Read the report, then close it to look at the model. | Investigate the Model Building Info. | Export the model as *.dmc, *.gem, *. stl, and/or *.asc, if needed. | Export the model in the program's native format, if needed. | Create and view the reports, if needed. | Save the report(s), if needed. | Export report data, if needed. | |
|---|---|---|---|---|---|---|---|---|---|---|---|---|---|
| HPP | 7 | |
Alternatively, press Ctrl-F9. | |
After pressing Start, a popup window with the new (auto-incremented) Stone ID appears. |
Click OK to accept the auto-incremented Stone ID and start the scanning. |
To close the report, click |
| Model in a variety of formats is exported automatically, according to the initial settings. | Model is saved in *.mmd format according to the initial settings. |
Reports are prepared and then printed and/or opened for viewing automatically, according to the initial settings. |
To save a report opened in MS Word or Wordpad, click File - Save. | Reports data are exported automatically, according to the initial settings. |
| Clicks | 1 | 2 | - | 3 | 4 | 5 | - | - | - | - | 6,7 | - | |
| HPO | 6 | | No action required.
| |
After clicking Shadow scan, a popup window with the new (auto-incremented) Stone ID appears. |
Click OK to accept the auto-incremented Stone ID and start the scanning. |
To close the report, click Standard report in the right menu. |
| Model in a variety of formats is exported automatically, according to the initial settings. | Model is saved in *.oxgz format according to the initial settings. |
Reports are prepared and then printed and/or opened for viewing automatically, according to the initial settings. |
To save a report opened in MS Word or Wordpad, click File - Save. | Reports data are exported automatically, according to the initial settings. |
| Clicks | 1 | - | - | 2 | 3 | 4 | - | - | - | - | 5,6 | - | |

Keystrokes during typing the file names and dragging the model (which are supposedly identical in both programs) are not counted in the number of clicks.
Scanning a semicut stone (cleaning before scanning, ID entered manually)
| Action | Total clicks | Activate the camera. Mount and center the stone on the holder. | Activate the pump to fasten the stone to the holder, so that it would not move during the subsequent operations. | Rotate the stone manually by dragging the mouse in the view area, and observe the possible visible signs of dirt, dust, fibers, etc. If found, stop the rotation and clean the stone. | Start the scanning process. | After the scanning finishes, a report pops up. Read the report, then close it to look at the model. | Investigate the Model Building Info. | Rotate the first facet to the door so it can be marked. | Export the model as *.dmc, *.gem, *. stl, and/or *.asc, if needed. | Export the model in the program's native format, if needed. | Create and view the reports, if needed. | Save the report(s), if needed. | Export report data, if needed. | |
|---|---|---|---|---|---|---|---|---|---|---|---|---|---|---|
| HPP | 9 |  |
Alternatively, press Ctrl-F9. |  |
After pressing Start, a popup window appears prompting you to enter the Stone ID. |
Enter the Stone ID and click OK. |
To close the report, click |
|
Right-click at any face of the model. A list of alignment options will pop up, together with the corresponding rotation angles in brackets. Click Align First Facet to Door. | Model in a variety of formats is exported automatically, according to the initial settings. | Model is saved in *.mmd format according to the initial settings. |
Reports are prepared and then printed and/or opened for viewing automatically, according to the initial settings. |
To save a report opened in MS Word or Wordpad, click File - Save. | Reports data are exported automatically, according to the initial settings. |
| Clicks | 1 | 2 | - | 3 | 4 | 5 | - | 6,7 | - | - | - | 8,9 | - | |
| HPO | 7 |  | No action required. |  |
After clicking Shadow scan, a popup window appears prompting you to enter the Stone ID. |
Enter the Stone ID and click OK. |
To close the report, click Standard report in the right menu. |
|
Click Align First Facet to Door on the Scan & Build panel. | Model in a variety of formats is exported automatically, according to the initial settings. | Model is saved in *.oxgz format according to the initial settings. |
Reports are prepared and then printed and/or opened for viewing automatically, according to the initial settings. |
To save a report opened in MS Word or Wordpad, click File - Save. | Reports data are exported automatically, according to the initial settings. |
| Clicks | 1 | - | - | 2 | 3 | 4 | - | 5 | - | - | - | 6,7 | - | |


Keystrokes during typing the Stone ID, file names, and dragging the model (which are supposedly identical in both programs) are not counted in the number of clicks.
Adjusting holder position
| Action | Total clicks | The system tries to make the holder position adjustment automatically. If this fails, a message prompting for manual adjustment pops up (once in ~15 min). | If the first manual adjustment fails, another attempt is made. | If the second attempt fails, an error message pops up. | After the holder position adjustment failed twice, scanning functionality is disabled. The system remains in this state until the holder is cleaned and checked. | After a successful check, a popup message appears. | |
|---|---|---|---|---|---|---|---|
HPP | 2 - 8 |
Note that you can ignore the message and proceed to the scanning anyway. |
|
| An attempt to start scanning produces the following error message:
| To run the check, go to Start - Main - Check vertical holder offset:
|
Click Set or OK, depending on the results. |
| Clicks | 1 | 2 | 3 | 4 | 5,6,7 | 8 | |
| HPO | 2 - 5 |
Note that it is a modal pop-up window, so you can't ignore the message and proceed to the scanning. |
|
| The Shadow scan button changes to Check holder offset:
| To run the check, click Check holder offset. |
Click Yes. |
| Clicks | 1 | 2 | 3 | - | 4 | 5 | |


Total number of clicks depends on whether or not the stone was removed after the first message.
Making initial settings
| Action | Total clicks | Start the program. | Open the settings window. | Set the options of entering the stone ID and weight, if needed. | Set up the options for saving the model in various formats after scanning (program's native format, *.dmc, *.gem, *.stl text, *.stl binary, *asc in original basis, *.asc in report basis). | Set up the options for viewing and/or printing the reports after scanning. | Save the settings and close the window. | |||||||||||
|---|---|---|---|---|---|---|---|---|---|---|---|---|---|---|---|---|---|---|
| HPP | 19 |  |  |  |  |  |
Proceeding with the native format (*.mmd). |
Proceeding with *.dmc. |
Proceeding with *.gem. |
Proceeding with *.stl (text). |
Proceeding with *.stl (binary). Note that *.stl (text) and *.stl (binary) cannot be saved simultaneously, unless they are saved to different locations. |
Proceeding with *.asc (original basis). |
Proceeding with *.asc (report basis). Note that *.asc (original basis) and *.asc (report basis) cannot be saved simultaneously, unless they are saved to different locations. |
Selecting a report to view. |
Selecting a report to print. |
Selecting a report to save. |
Selecting more reports to view. |  |
| Clicks | 1 | 2,3 | 4 | 5 | 6 | 7 | 8 | 9 | 10 | 11 | 12 | 13 | 14 | 15 | 16 | 17 | 18,19 | |
| HPO | 19 |  |  |  |  |  |
Proceeding with the native format (*.oxgz). |
Proceeding with *.dmc. |
Proceeding with *.gem. |
Proceeding with *.stl (text). |
Proceeding with *.stl (binary). Note that *.stl (text) and *.stl (binary) cannot be saved simultaneously. |
Proceeding with *.asc (original basis). |
Proceeding with *.asc (report basis). Note that *.asc (original basis) and *.asc (report basis) cannot be saved simultaneously. |
Selecting a report to view. |
Selecting a report to print. |
Selecting a report to save. |
Selecting more reports to view. |
Click OK. |
| Clicks | 1 | 2,3 | 4 | 5 | 6 | 7 | 8 | 9 | 10 | 11 | 12 | 13 | 14 | 15,16 | 17 | 18 | 19 | |


Total number of clicks depends on the particular settings.
Add Comment