3D TV option
The 3D TV feature displays the camera image and model (together with the inclusions, if any) for stereo viewing. To use the feature, a display with 3D capability must be attached to the computer as second monitor.
The TV set must have native resolution of 3840×2160 px or higher. Check the manual of your TV to find out which stereo mode it uses, and set up Oxygen Server accordingly by starting it with the corresponding command line key, see Command Line Switches.
The preferred TV models are:
- LG 55UB950V
- LG 49UB850V
- LG 49UH850V
- LG 49UF8537
- LG 49UF8507
Oxygen Server window contains a new panel with the following functionality:

 opens a new window on second monitor, always maximized, containing the camera view with overlaid model.
 toggles 3D view on the second monitor (see below).
Off On 
 changes the scale of the image on the second monitor.
 toggles the display of crosshair and pear pointer on the second monitor.
Off On 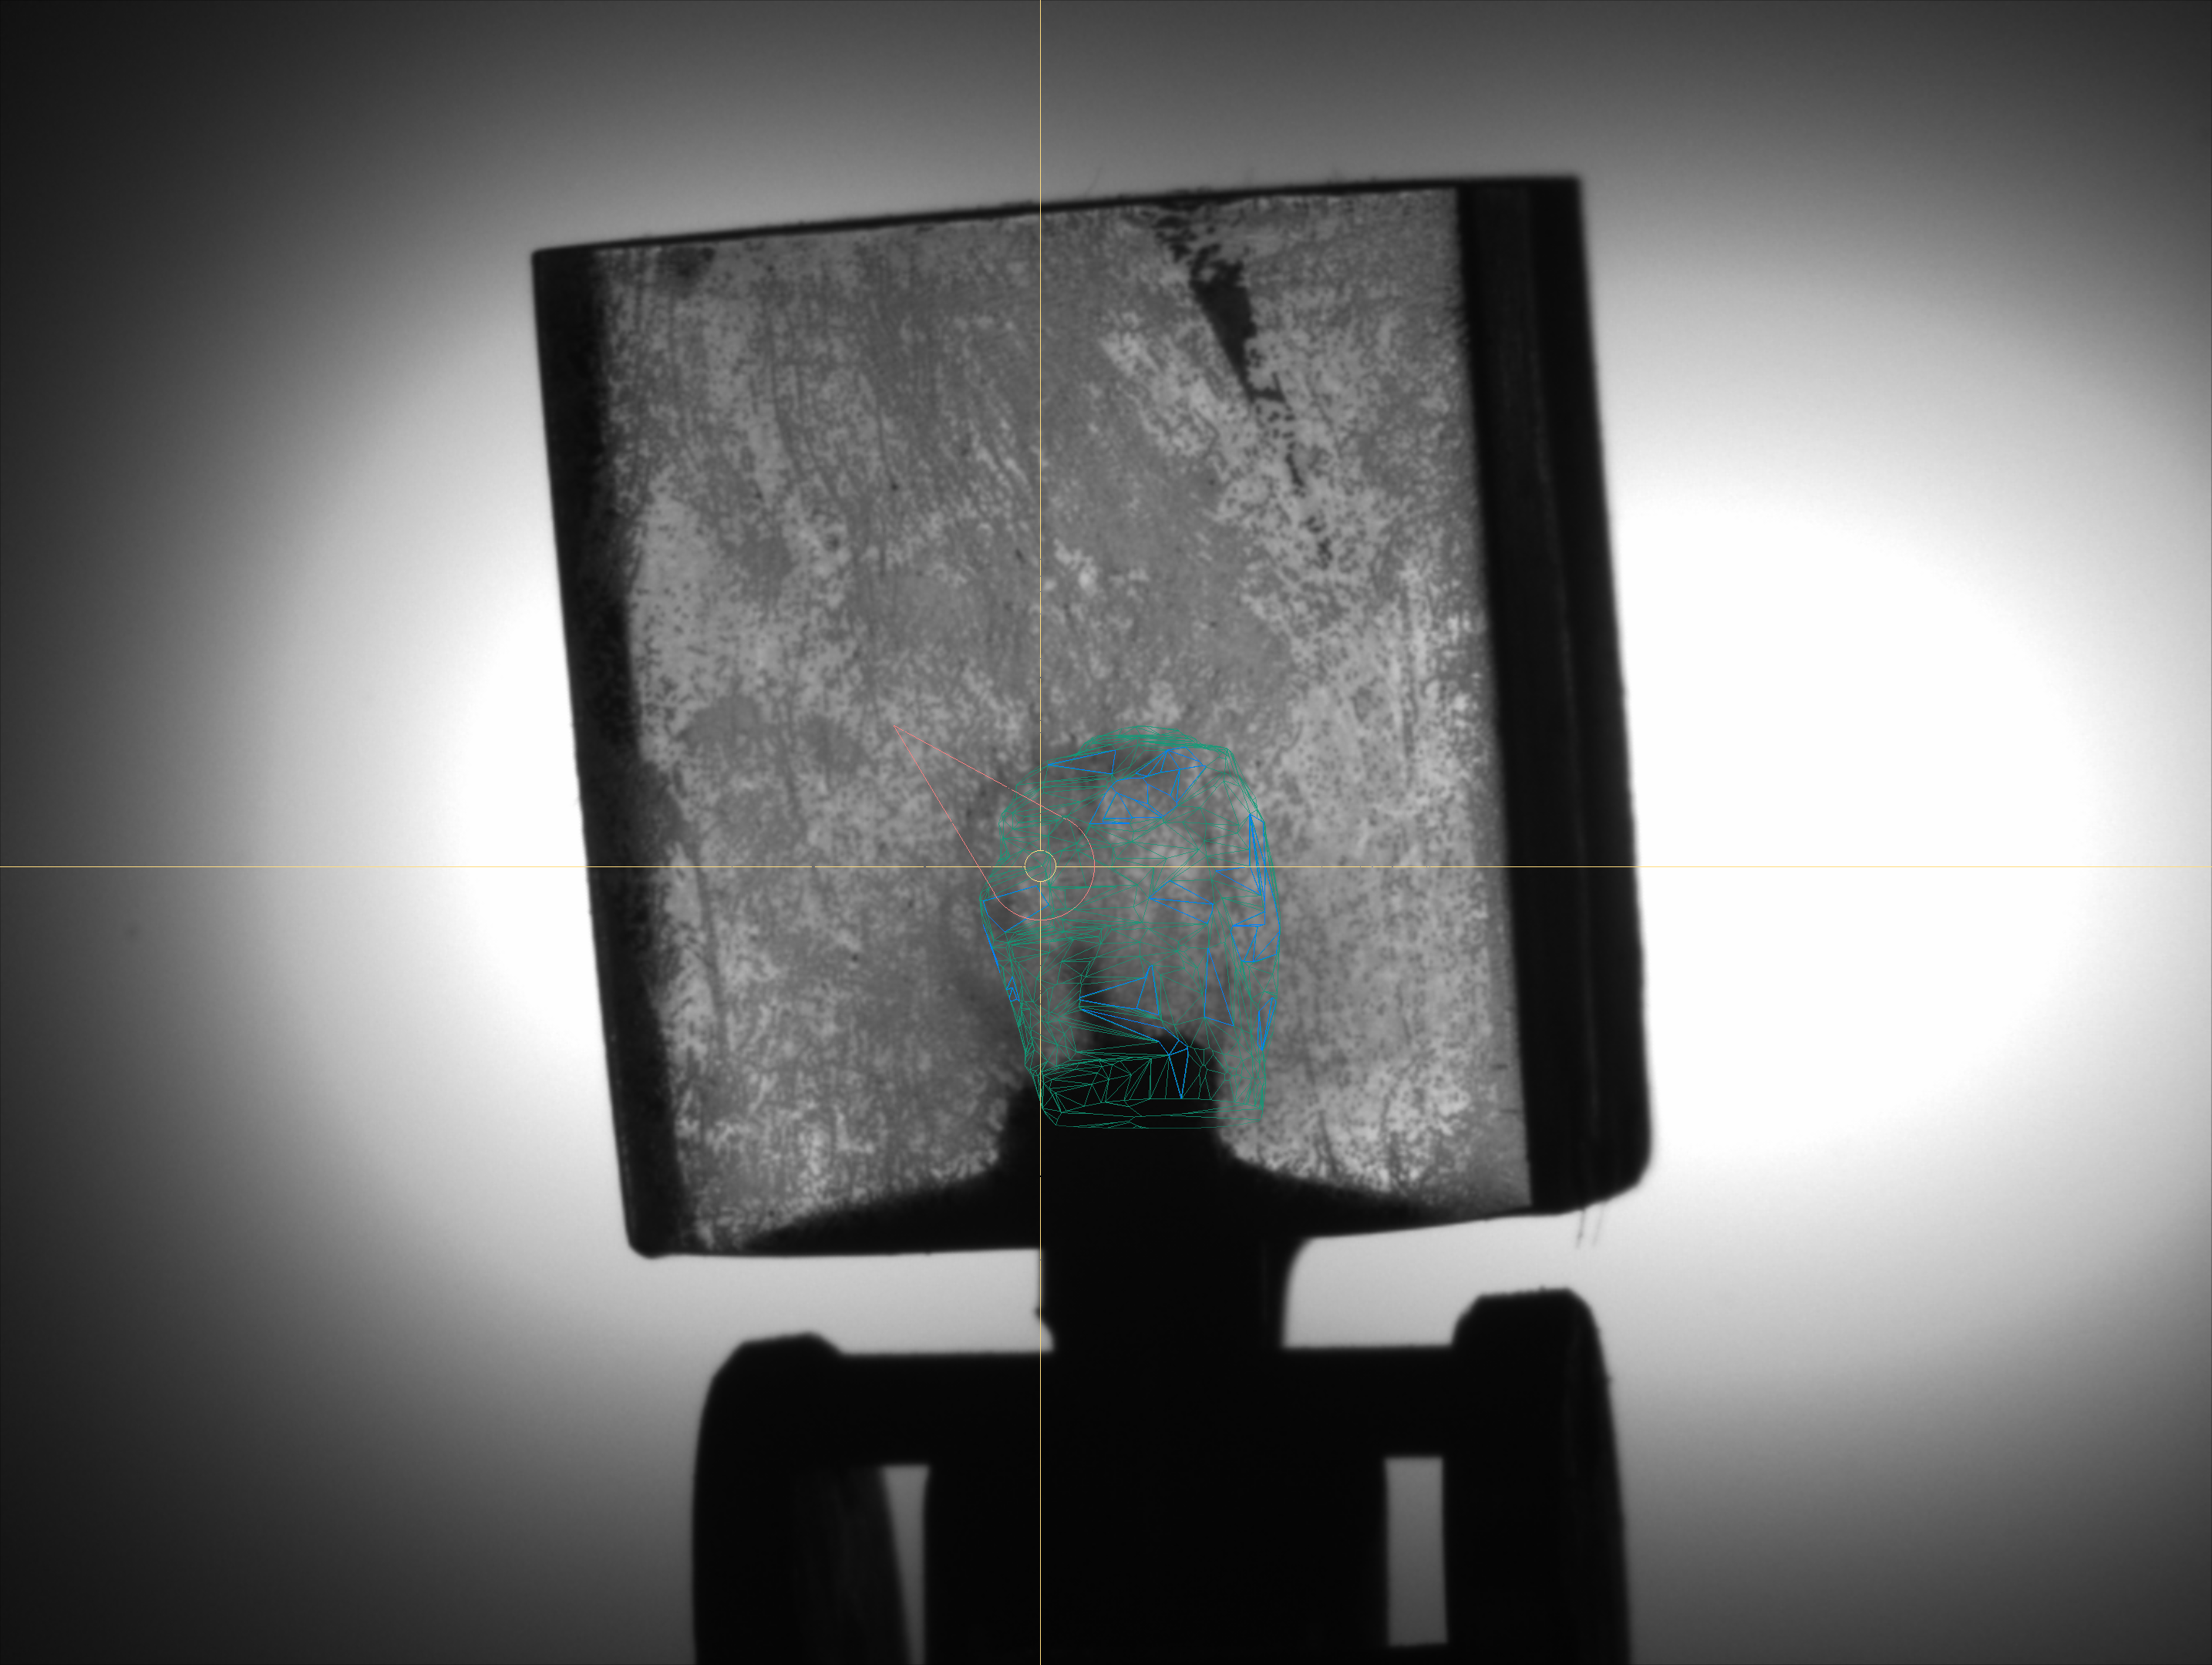
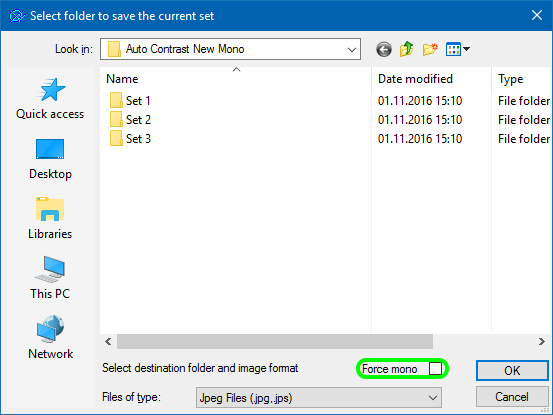
Note that the photosets are saved as stereo (*.jps, *.pns) by default, unless forced to be mono. This ensures that they can later be viewed as 3D TV too.
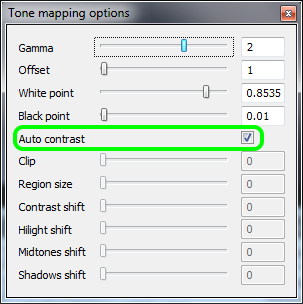
Tone Mapping and Autocontrast option
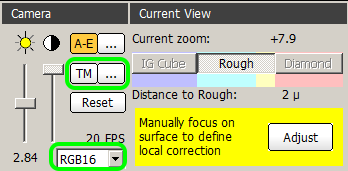
Tone mapping is a method to convert data with greater color depth (12 or 16 bit) to 8 bit. The method is applied only if the camera is set up to work in Mono16 or RGB16 mode.
The method offers a variety of options which may be tuned for the best visibility of inclusions. See Tone mapping for more details.
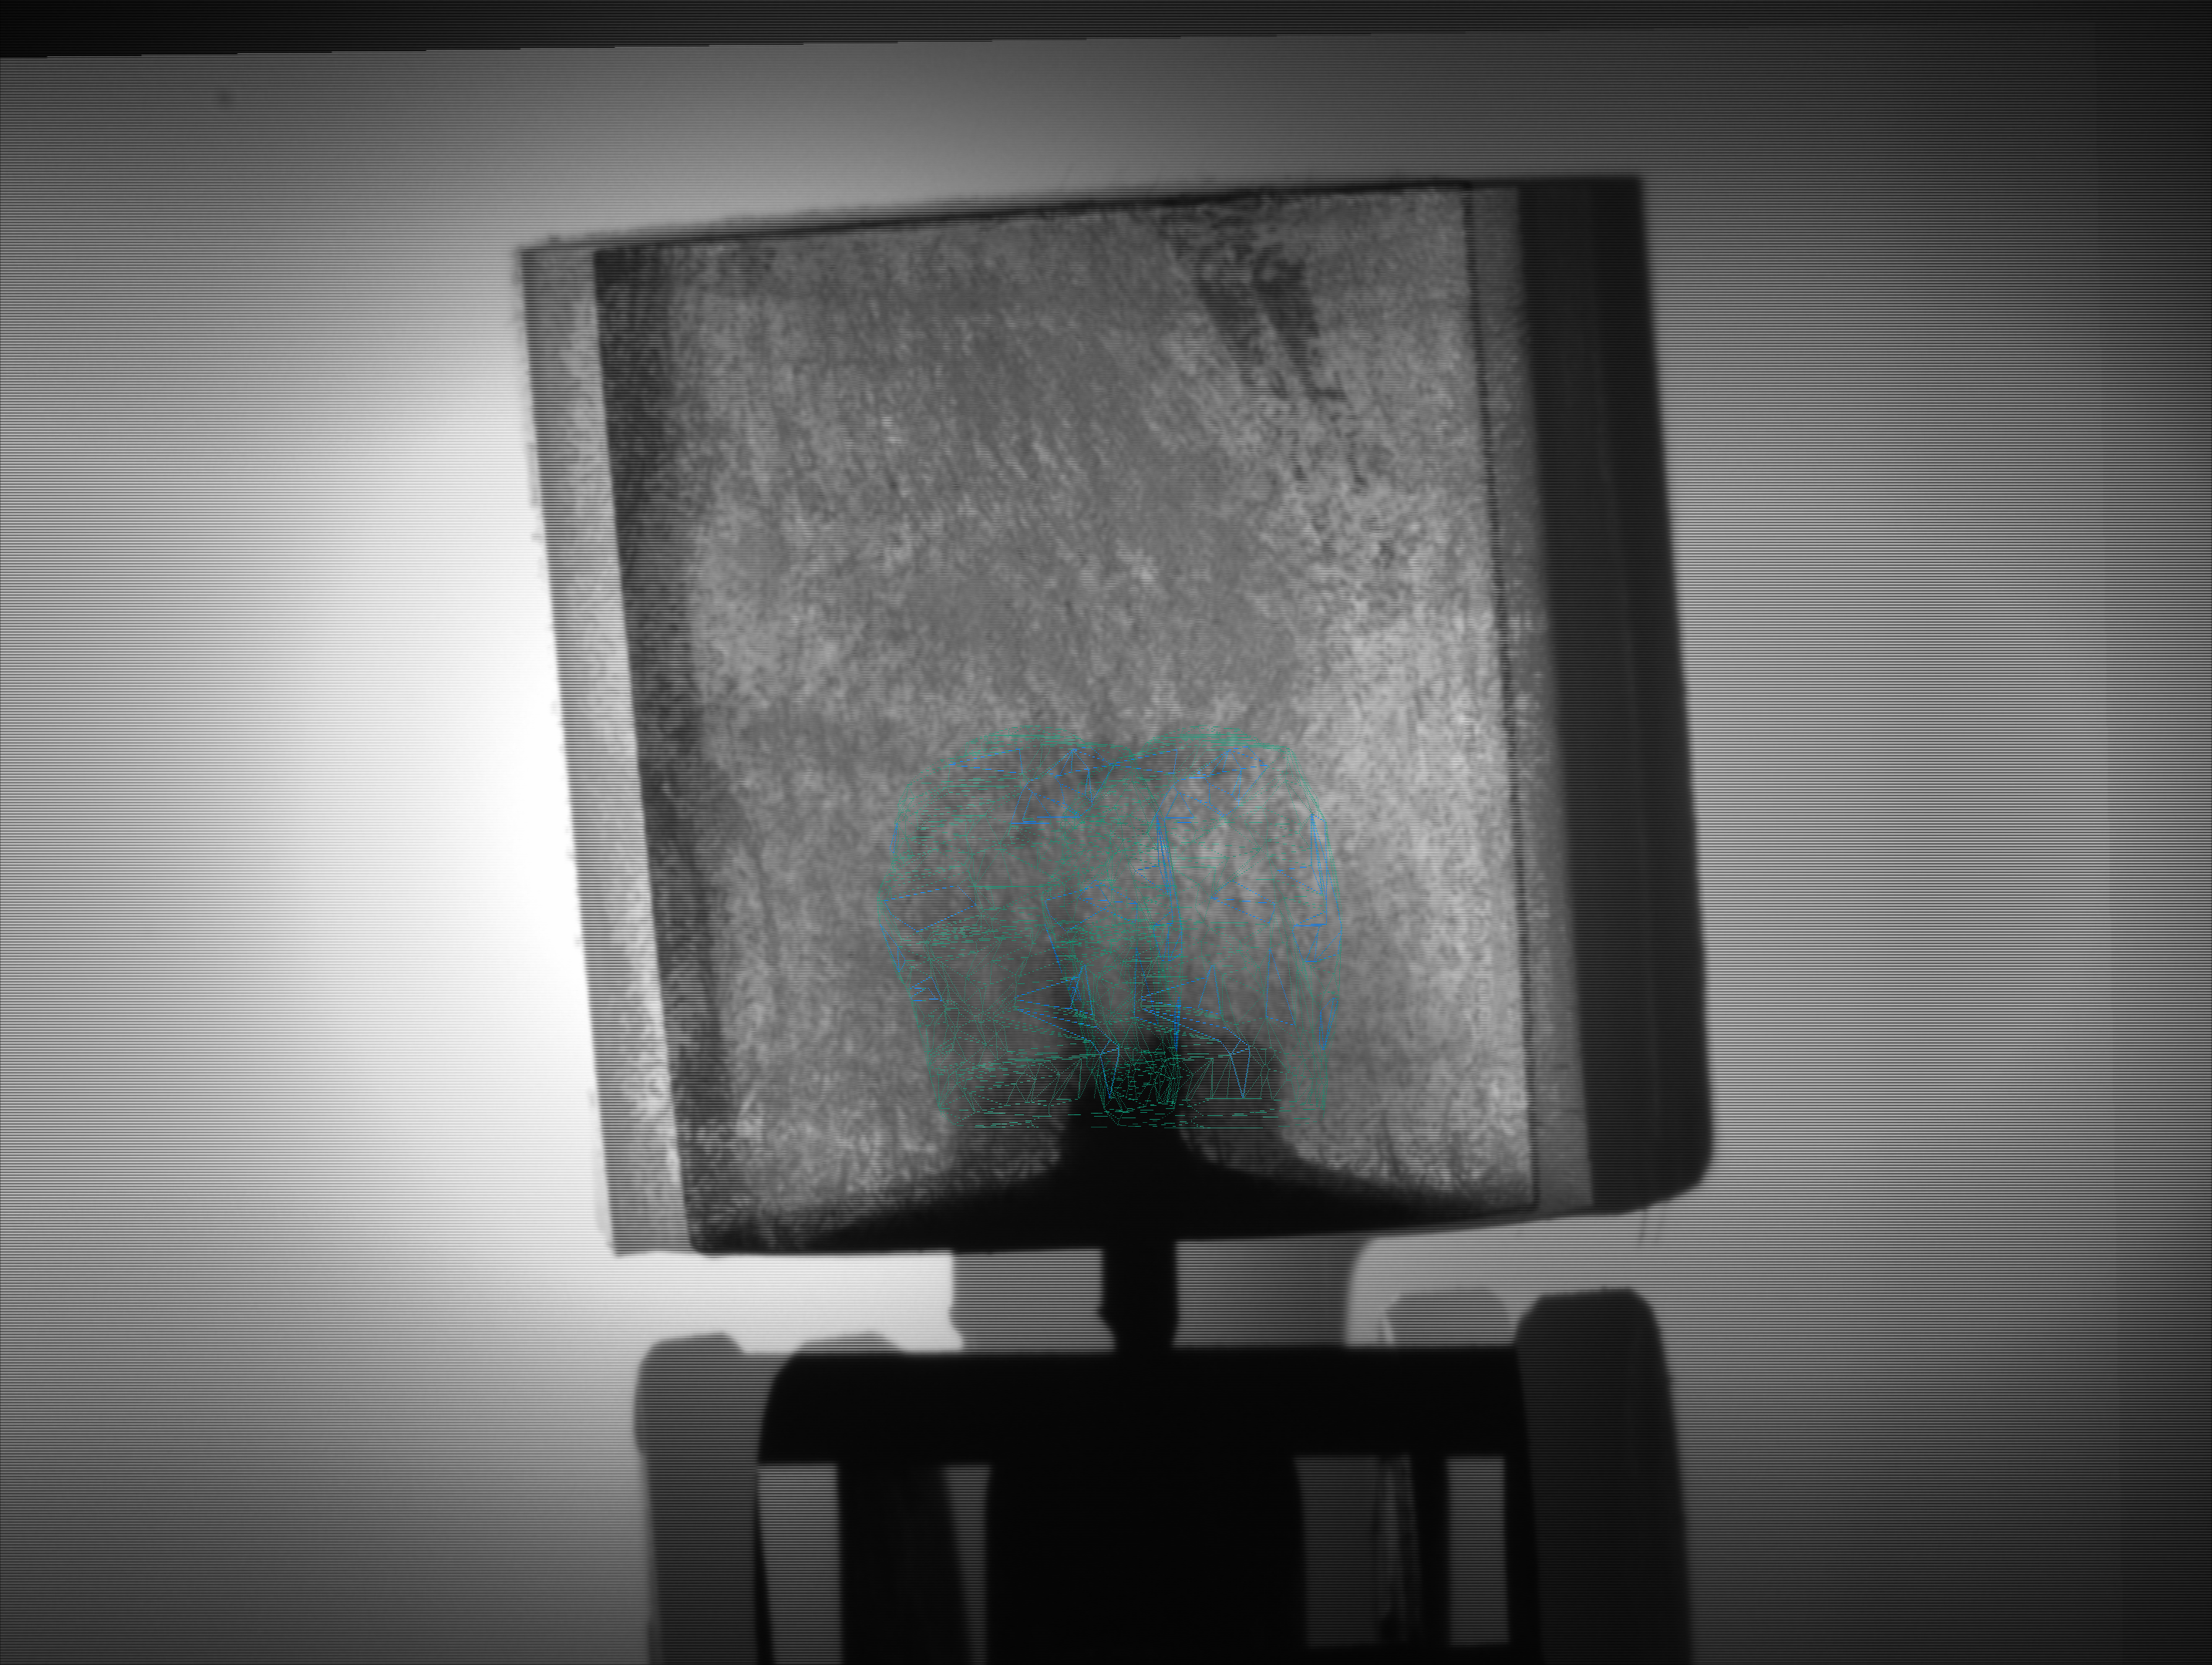
Autocontrast is one of the Tone Mapping options. When switched on, it automatically adjusts contrast of the image.
Below is the series of similar photos taken with and without Autocontrast.
Method: Gamma AutoContrast off | Method: Gamma AutoContrast on | |
|---|---|---|
| 50x - feather |  |  |
| 50x - cloud - 1st direction |  |  |
| 80x - cloud - 1st direction |  |  |
| 160x - cloud - 1st direction |  |  |
| 50x - cloud - 2nd direction |  |  |
| 80x - cloud - 2nd direction |  |  |
| 160x - cloud - 2nd direction |  |  |
| 50x - cloud - 3rd direction |  |  |
| 80x - cloud - 3rd direction |  |  |
| 160x - cloud - 3rd direction |  |  |
Focus depth control
New interface for measuring and setting the focus depth is introduced.
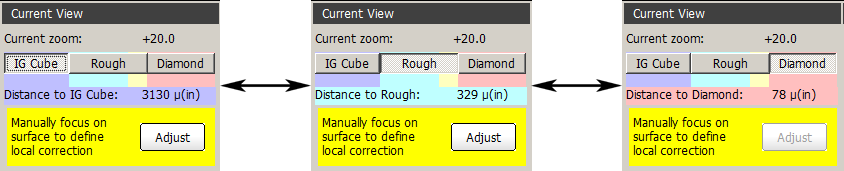
Buttons determine which object is used to measure the distance to:
| Button | Object |
|---|---|
| IG cube | Surface of the immersion cube |
| Rough | Surface of the rough diamond |
| Diamond | Surface of the selected polished diamond. |
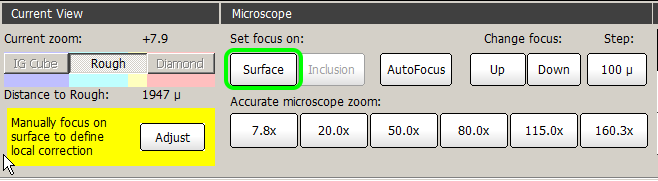
Surface button sets the focus to the surface of the object (IG cube, rough diamond, or polished diamond, depending on the selection).
If the model contains no allocated polished diamonds or none of them is selected, the Diamond button is disabled. Note also that the diamond itself is not shown in this mode.
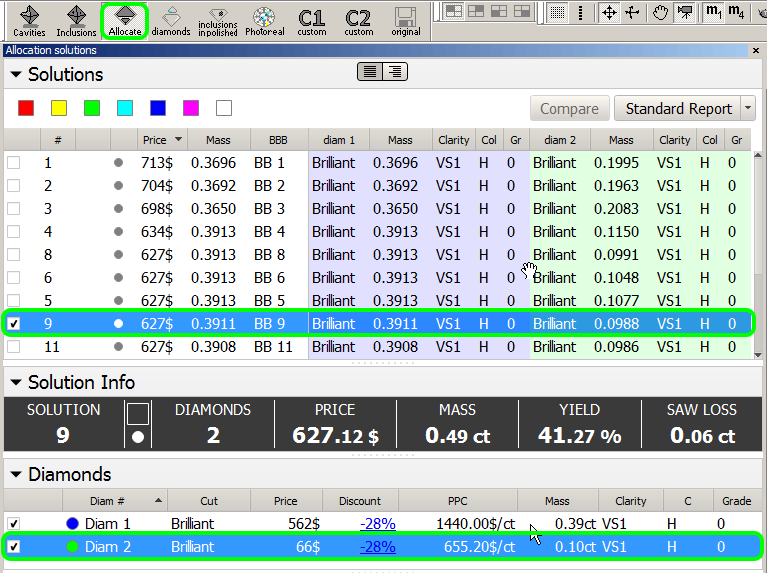
To select a diamond, switch to Allocate mode, click at one of the solutions on the Solutions panel, and then click one of the diamonds on the Diamonds panel.
The purpose of measuring the distance to diamond is mostly a quick check for a certain inclusion in photo view, without having to build it. By focusing on the diamond in the direction of the inclusion, you may clearly see whether or not the inclusion is inside the diamond.
The measured distance in micrometers is displayed in the caption below. Note the "(in)" postfix indicating that the focus is inside the object.
Color background behind the caption indicates the location of the focus:
| Color | Meaning |
|---|---|
| No color | Outside the immersion cube |
| Blue | Inside the immersion cube, but outside the stone |
| Cyan | Inside the rough stone, but more than 30 μ from the polished diamond |
| Yellow | Within 30 μ outside the polished diamond |
| Red | Inside the polished diamond |
Improved support of Active diamond during allocation
The following improvements are made to the IGAllocate panel:
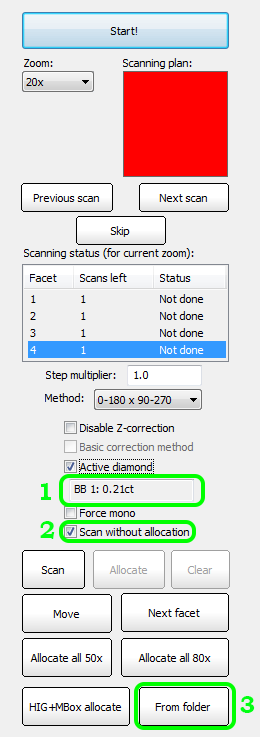
- Text field below the Active diamond check box displays the name of the active brilliant, that is, the one which is selected on the Diamonds panel. The name is composed of the solution method abbreviation, solution number, and diamond weight. If no diamond is selected, the text field remains empty, and the Active diamond check box is rendered inactive.
- The Scan without allocation check box, when checked, switches off the allocation of inclusions. Thus the scanning process would just take and save the photographs.
- The method of inclusions allocation based on previously saved photos (which is initiated by the From folder button) now considers the state of the Active diamond check box. If the latter is checked, the search for inclusions is now performed only inside the active diamond.
Interface
- Camera mode can now be selected from within the program, rather than set in the *.ini file.
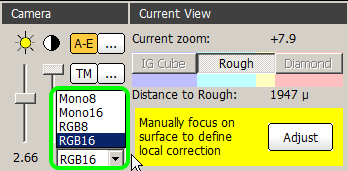
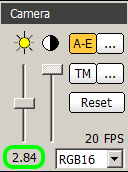
- Exposition length is now displayed beneath the slider.
- Rear lighting LEDs are now controlled separately.

Miscellaneous
- An option of saving photosets in PNG format is introduced.
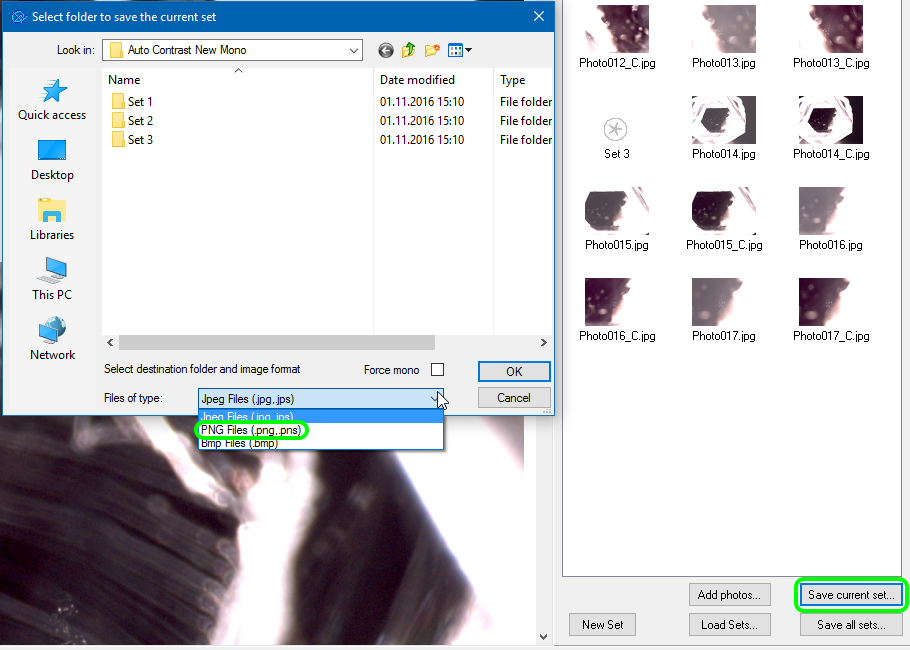
- Images can now be saved with 16 bits per channel.
Note that IG scanning must be done with 8-bit depth.
Bugfixes
- Occasional crashing upon selecting inclusions with BBox.
- Loading of color photos of enhanced bit depth is fixed.
- Occasional crashing of the program upon autosave when working with models having excessively numerous inclusions is fixed.
- Live video feed failing to work in Cavities mode is fixed.
- Misplacing inclusions when saving model to *.dmc is fixed.
- Occasional instability of linear displacements is fixed.
- Incorrect zoom order change when pressing Ctrl + E in live mode for stereo microscope Leica M205A is fixed.
- Error message appearing while building AutoCavity is fixed.