Auto Advisor for stones without immersion
Overview
In this version of OxygenMicroscope we have implemented several features that are critical for working without immersion using MBox2.0. Here's a list of improvements:
- Updated light control panel to allow flexible light setup configuration just like with MBox1.0
- Automated adviser that searches new view directions for allocated inclusions through a set of predefined windows on the surface of rough
- Cross + pear are now available in stereo mode
- A number of bugs have also been fixed
- Workaround for Locate Inclusion panel frequent disappearing
- Mouse wheel strange behavoiur for small steps fixed
Improved light control
We have updated light control to make it more flexible. Images below illustrate new elements of this panel.
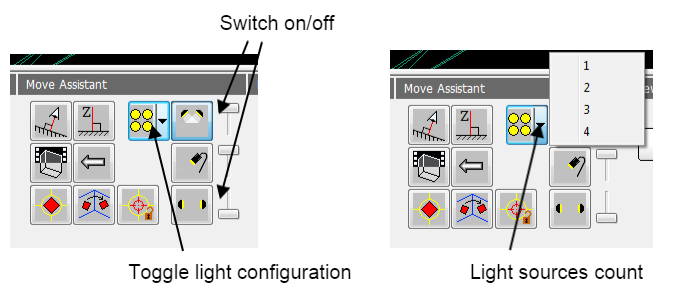
You can switch on/off different light sources. Also you can change light configuration and number of light sources involved using this panel. Also shortcuts Ctrl + 1/2/3/4 can be used to change number of light sources instead of the context menu.
AutoAdviser
We have upgraded Locate Inclusion and now it fully utilizes motorization available for MBox2.0. Also in this version Locate Inclusion uses user-defined set of windows on rough surface. User has to hand label all transparent windows on the surface of rough before using the adviser. This significantly reduces the probability of getting a facet that doesn't allow the operator to clearly see the inclusion that he want's to study.
Labeling window on rough surface is done with old window marking tool. This is a temporary solution and we are going to implement a new interface in the next update. To activate old window labeling tool use View -> Show windows on rough panel menu command.
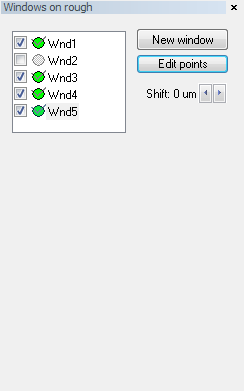
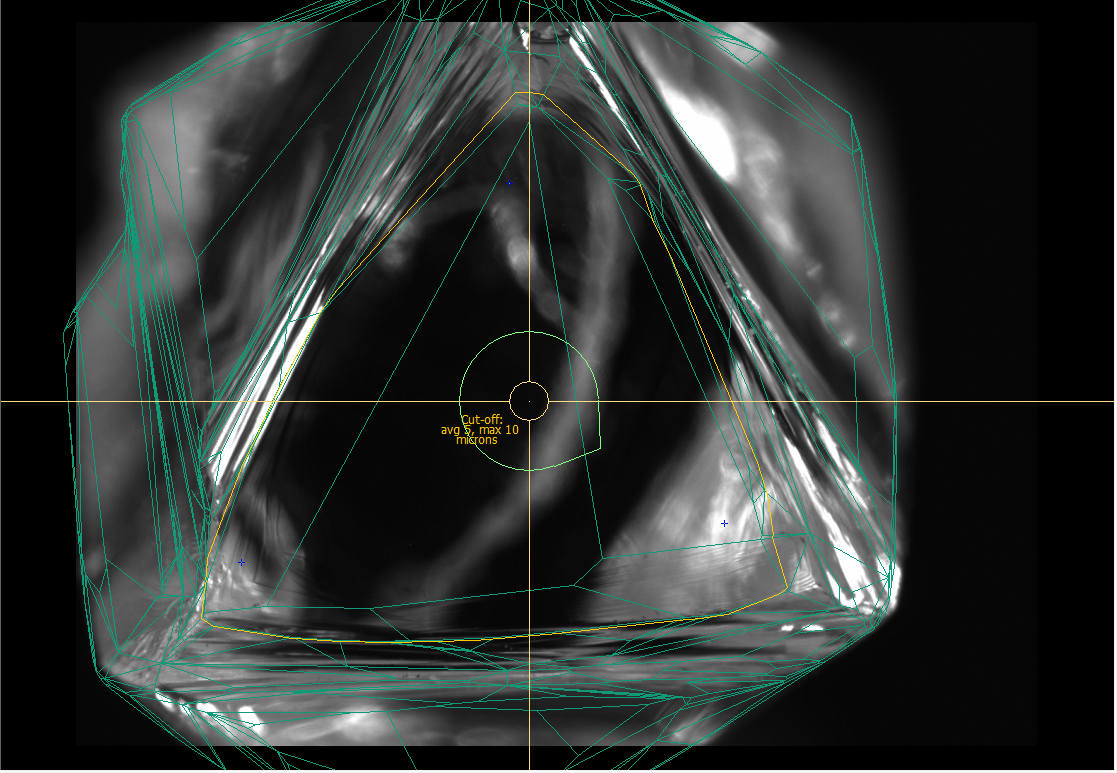
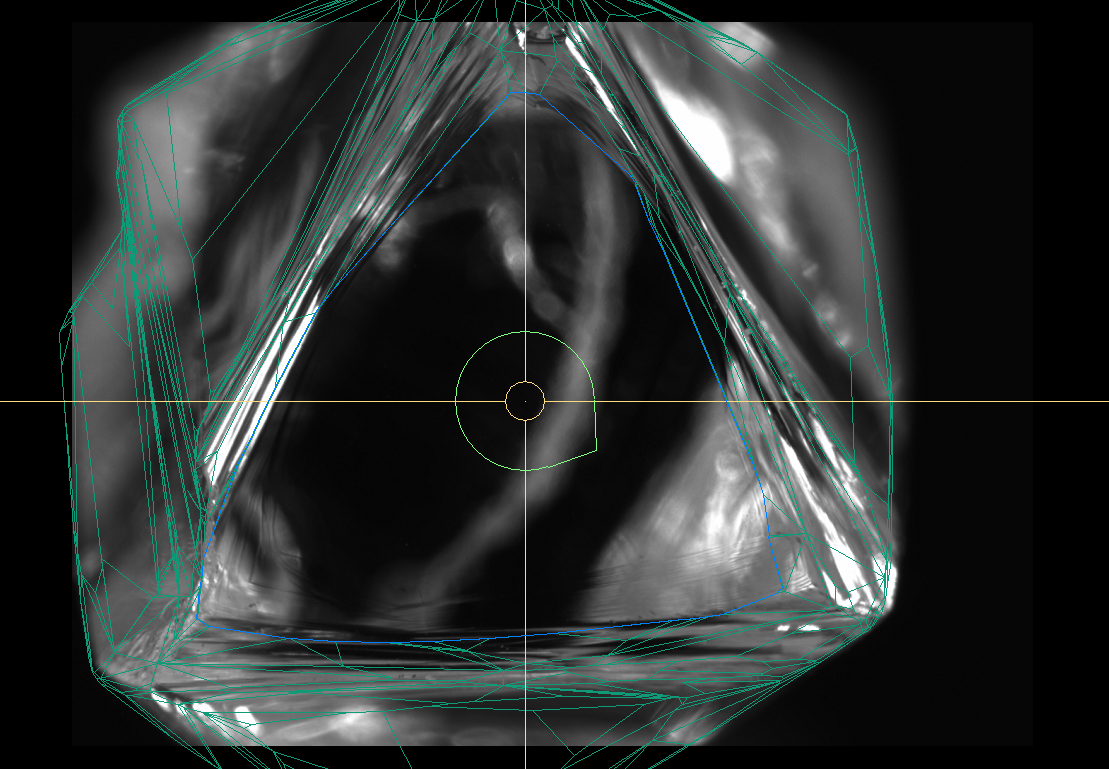
In addition to old windows labeling method that uses 3+ points on the rough surface we have implemented single-point windows labeling. You can see how it works in the complementary video with AutoAdviser demonstration. For both 3+/1 point methods press New window button on Windows on rough panel, then label window on rough surface and press Stop edit. The resulting window is highlighted on the model with light blue color as can be seen on the screenshot below.
After you have hand labeled windows on rough you can use Locate Inclusion panel. Whenever you click on a recommended view direction system automatically changes rough stone position and orientation. See complementary video for detailed demonstration.