...
- Top panel
- Left panel
- Scene
Right panel
Top Panel
The top panel includes several sub-panels:
...
| Note |
|---|
Working with reflections in the Scene is only available when the hardware is connected. If not, the usual model contour will be displayed. |
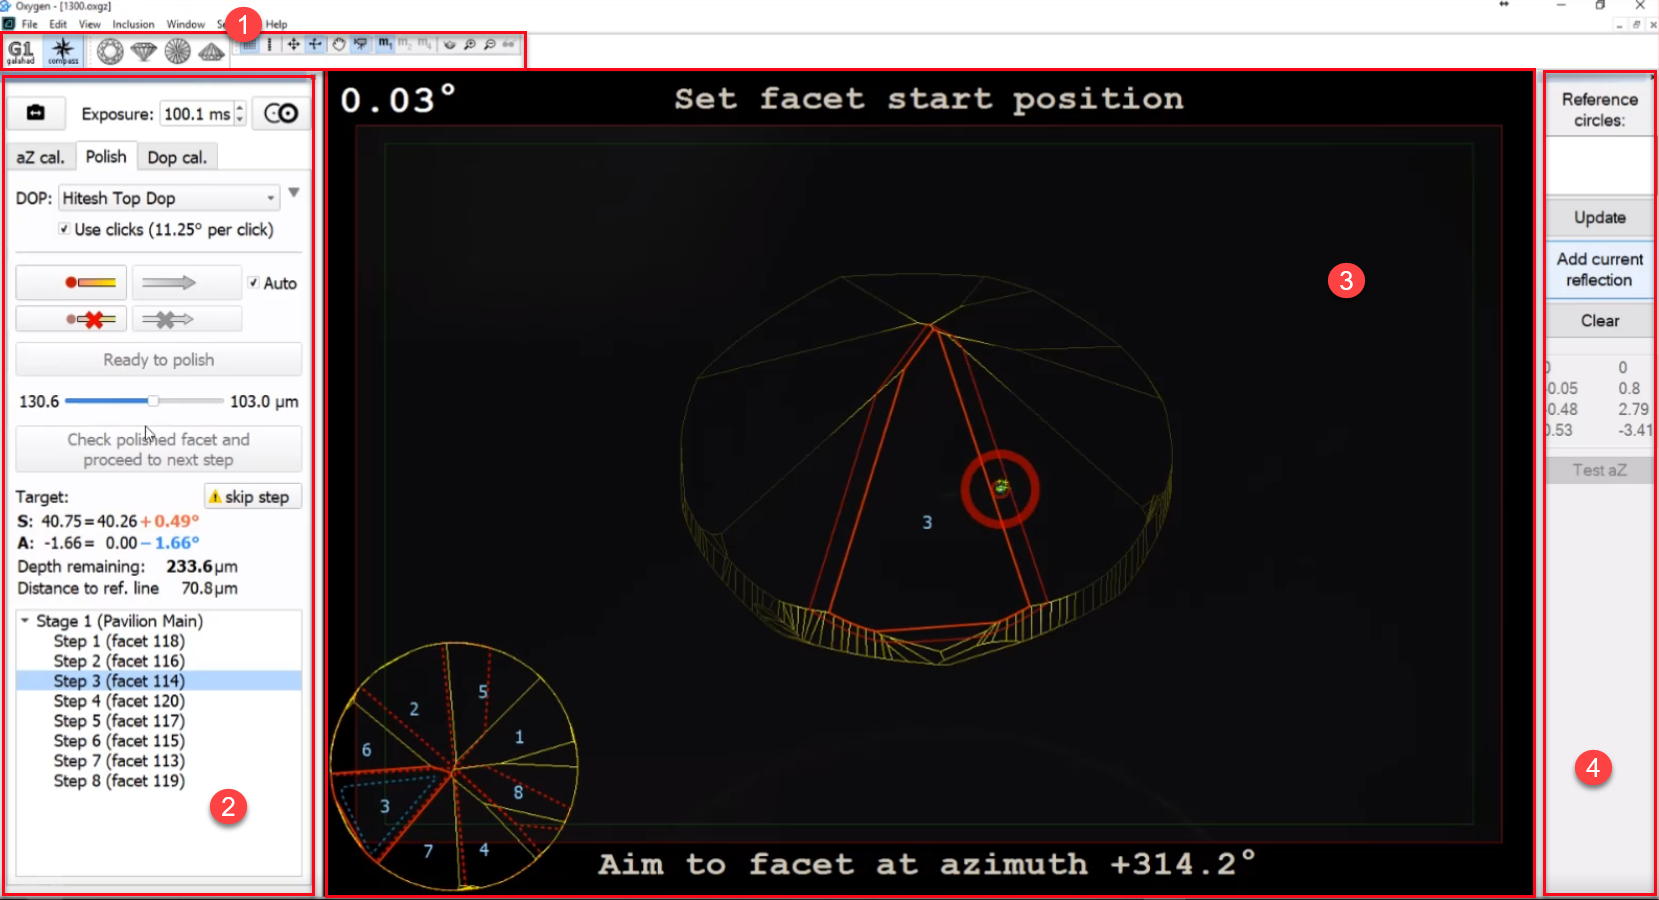
In the Compass mode, at the top of the left panel, you can find the  button for connecting to video in a multi-user configuration with the control to set the exposure in milliseconds, and also the
  Select next reflection button, described on the Switching Between Reflections page.
...
- DOP selection and mode.
- Showing slope and azimuth direction.
- The progress slider for the currently selected step.
- The full information about the currently selected step.
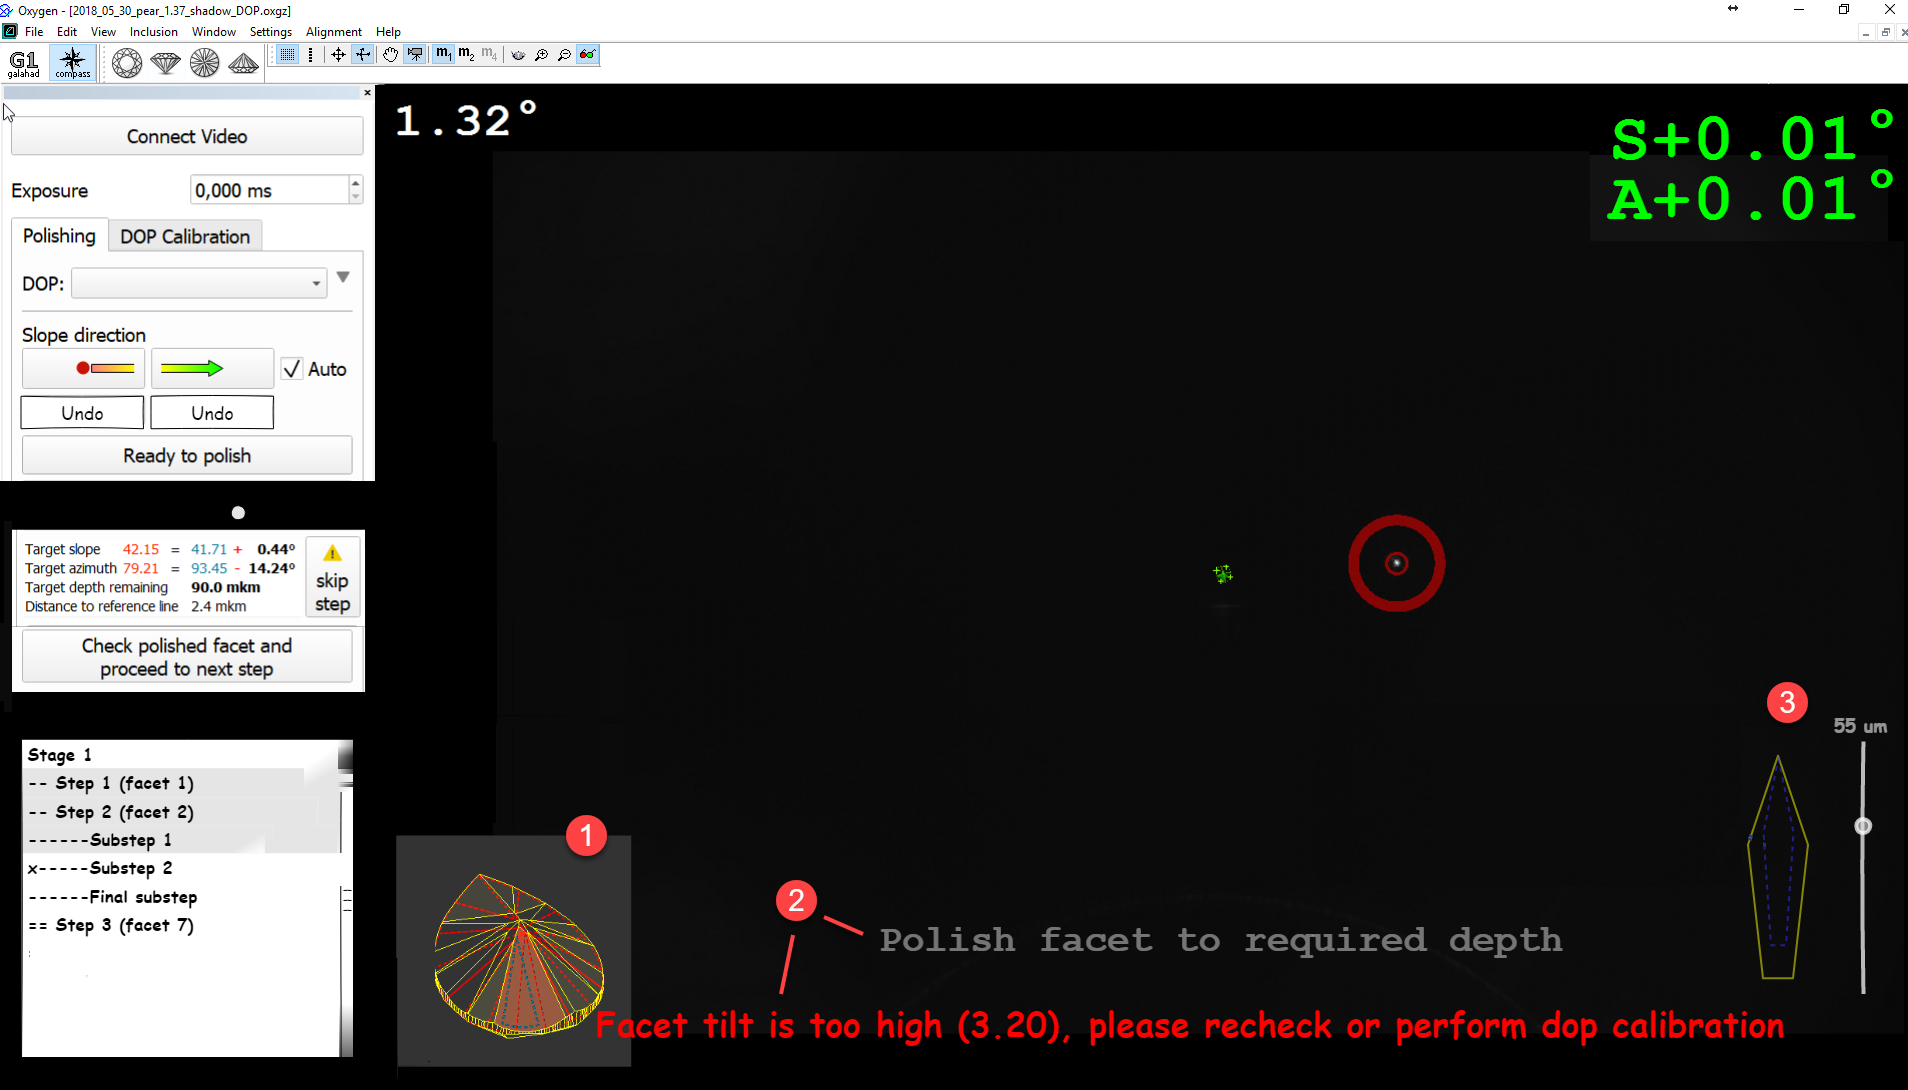
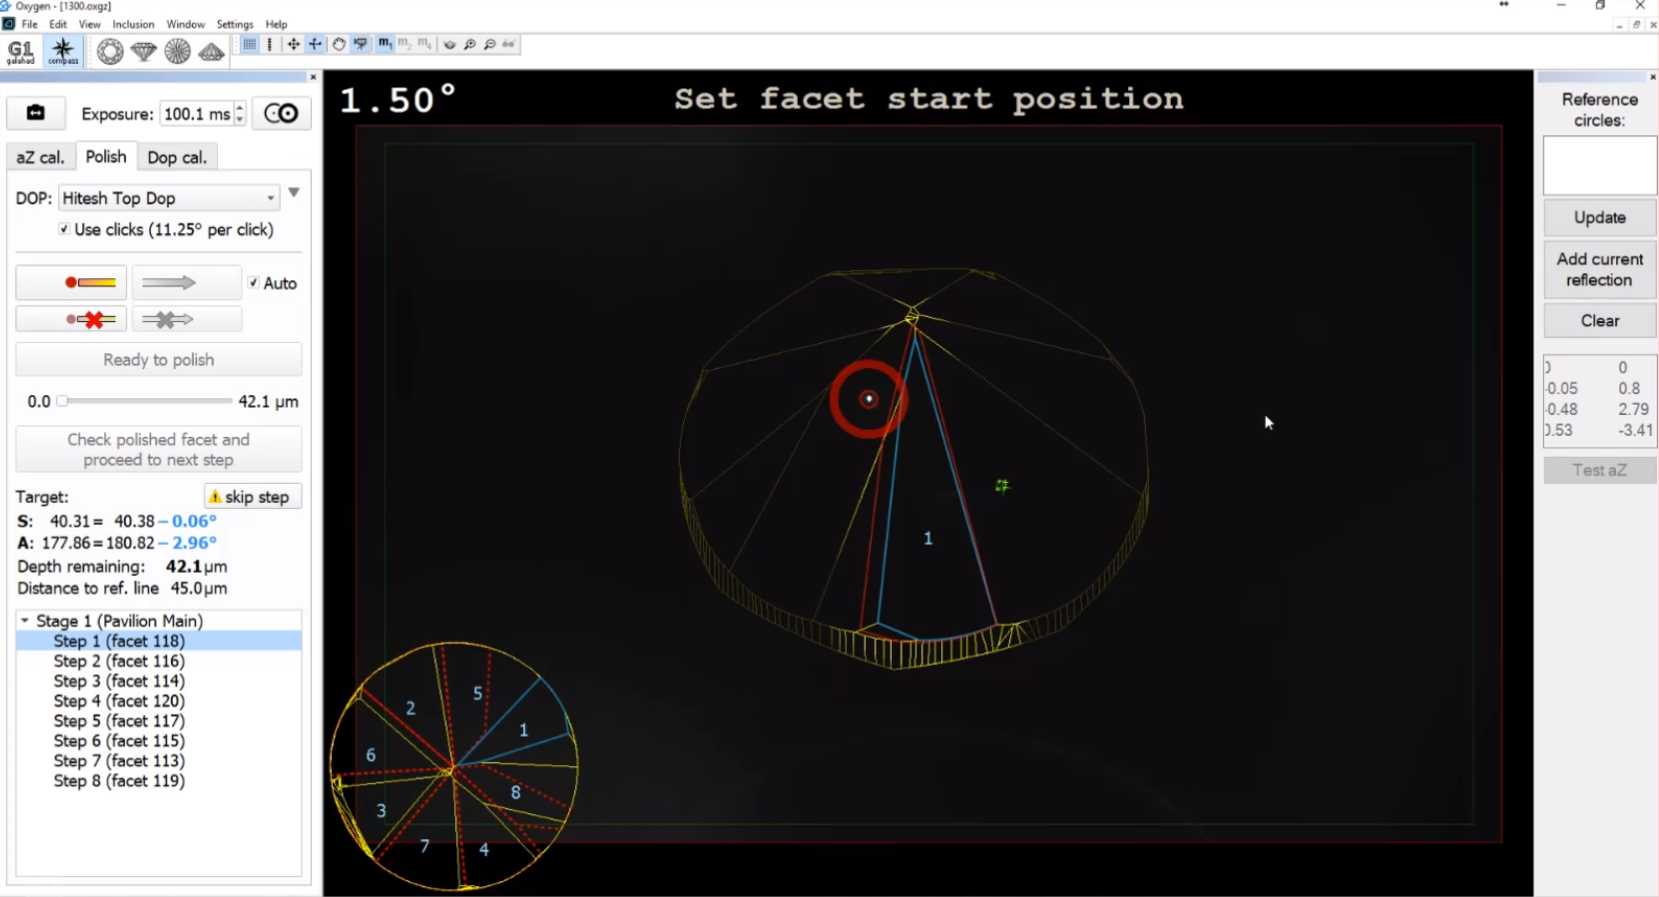
- The " Table of target is inclined " warning is displayed as a
 sign. On mouse over, the detailed tooltip is displayed.
 - Tree of stages and steps of polishing.
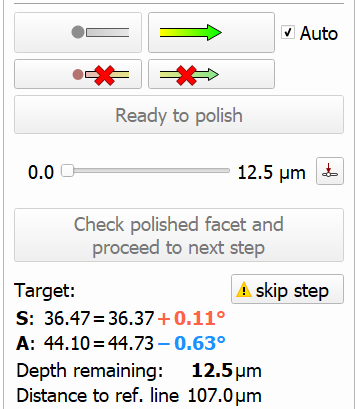
Main controls
| The current status indicator provides information about the current workflow step.
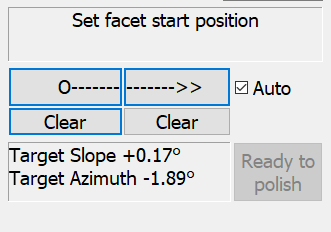
| Slope start "O----" and slope end "----->>" buttons - for selecting slope direction. "Auto" checkbox - allows registering slope direction automatically when the current angle value exceeds some threshold level. Corresponding "Clear" buttons - for clearing slope start and end points, in case they were set with an error. Also, the "Clear" button for slope zero should be used when the previous facet was finished, and the operator changing to the next facet.Target slope/azimuth indicator. "Ready to polish" button - to signal that facet alignment is finished The current status indicator provides information about the current workflow step. Target slope/azimuth indicator. |
Usage
| The main controls should be used as follows:
|
DOP Calibration
The tab contains controls for DOP calibration. Several DOPs can be calibrated and saved here. Detailed information is presented on the Compass DOP Calibration page.
...
In the Scene you can find:
- The model visualization.
- The model thumbnail visualization.
- Text messages and warnings.
- The current facet with the depth indicator (you can also switch to the mode representing the current facet larger in the middle of the Scene).