...
- Open project, containing your Reflect Scan model.
- On the top panel, click
 Developer. Developer mode is activated.
 - To open the Reflect photo set, on the right panel, use the Photo sets tab.
- Click Load Sets. Select the folder containing your Reflect photo set, then click OK.
- Switch to your facet photo.
Switch to the Reflect tab, Pavilion sub-tab.
Info From the Pavilion sub-tab, you can edit both pavilion and crown contours.
- In the Contour on Photo section, click Manually Click Contour.

- The editing mode is enabled.
- Use the editing tool as described in the sections below.
- When you are done, on the right panel, click Finish.
- To save changes, save the project via File > Save.
...
- To add a point,
in the Scene. Edges between points are added automatically.Status colour Blue title Click To move an existing point, mouse over it; when the point is targeted,
.Status colour Blue title drag and drop 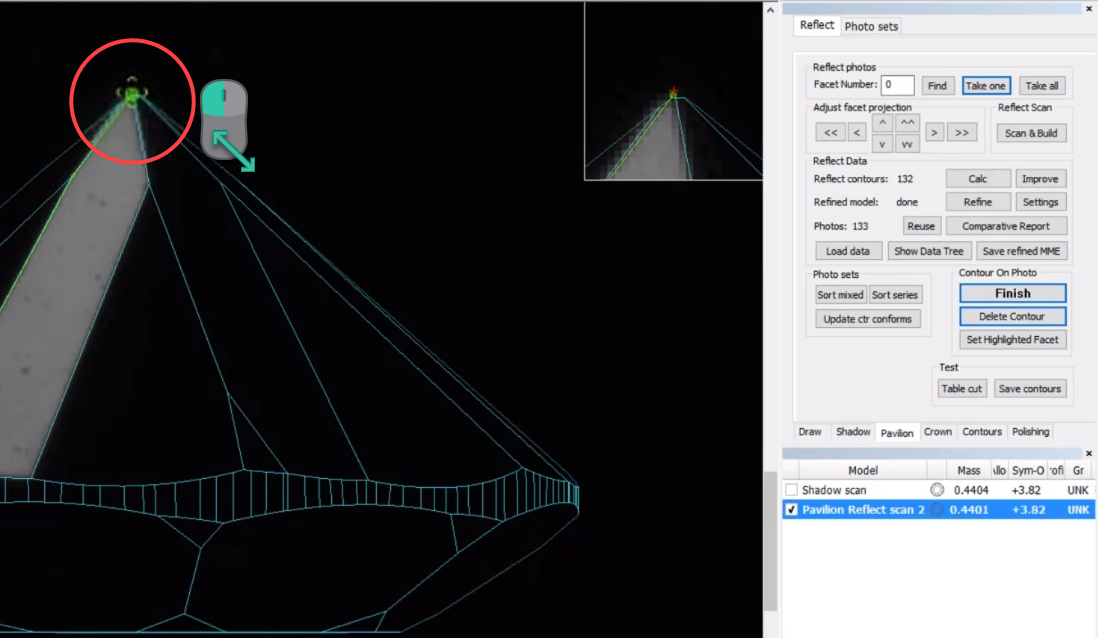
Note You can also move point using the cursor keys. To do so, mouse over the point; when the point is targeted, use
Status colour Blue title ← Status colour Blue title → Status colour Blue title ↑
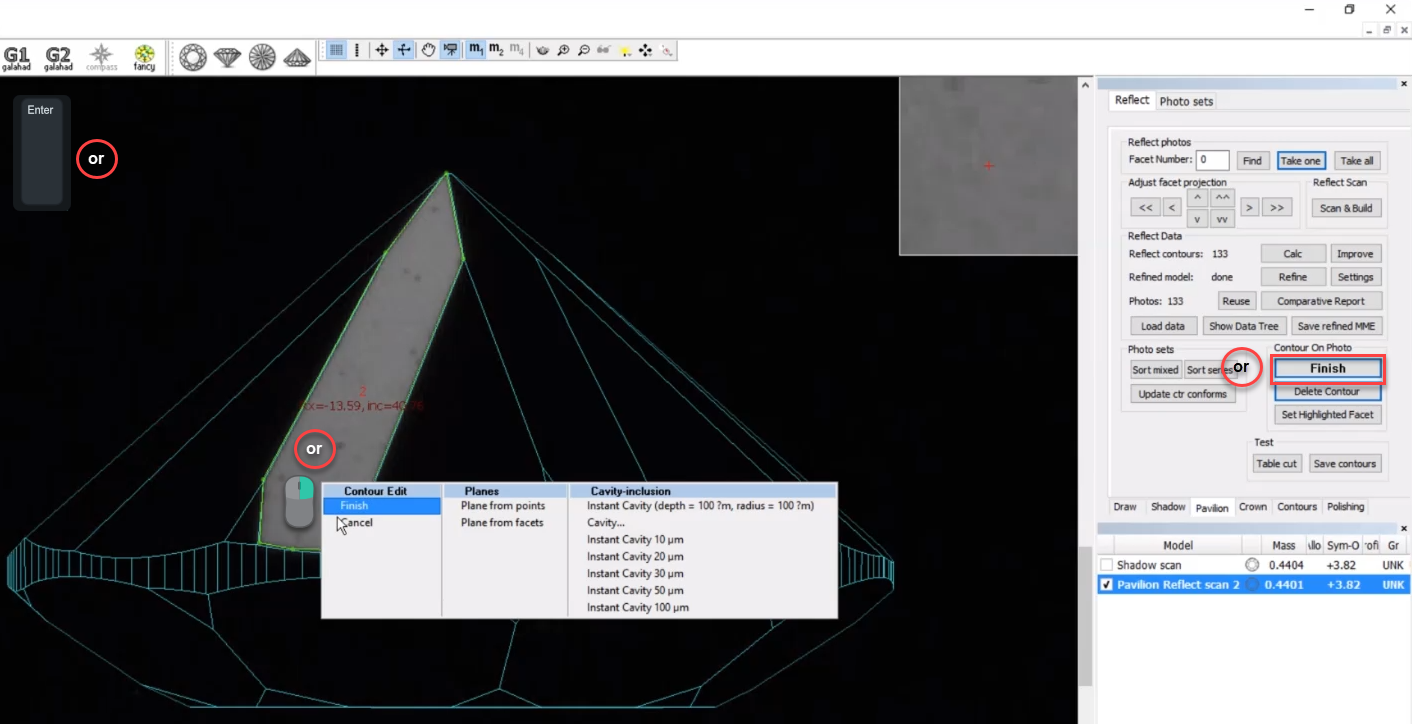
on the keyboard.Status colour Blue title ↓ - To close the contour, do one of the following:
the starting pointStatus colour Blue title Click 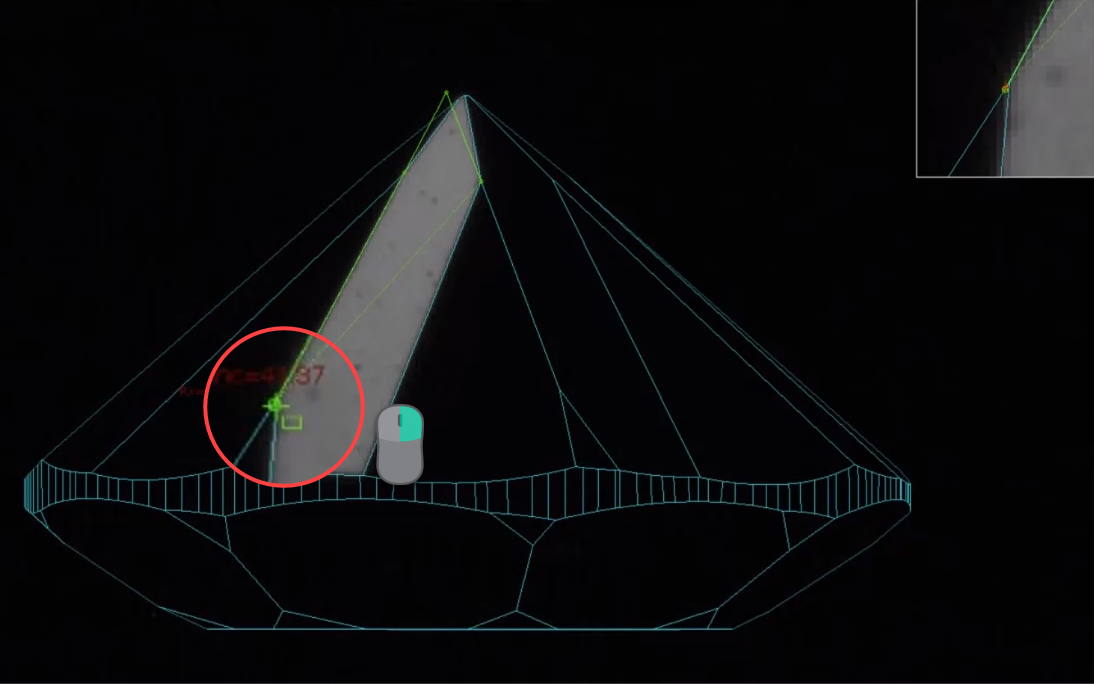
- Press
.Status colour Blue title CTRL+Enter
. This will add one more point and close the contour.Status colour Blue title Double-click
...
- On the right panel, click Finish.
- In the Scene,
inside the contour, then from the context menu, select Contour Edit > Finish.Status colour Blue title right-click - Press
Status colour Blue title enter
You can at any moment resume editing by clicking once again on the right panel, in the Contour on Photo section, the Manually Click Contour button.
...