Prepare head tracking utility
Install the latest version of the 3D Global View Optimizer software and allow the installation of the camera driver.
Prepare OctoNus Stereo Viewer program
- Run the latest OctoNus Stereo Viewer installer v4.8.22.73
- Select the corresponding display by its size and ID on the second page:
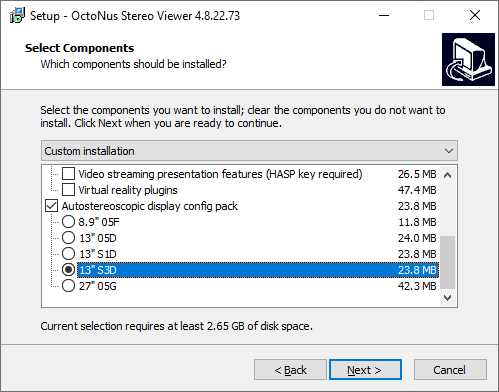
The display ID is located on the back side of the display. It looks like 05F, 05D, S1D or similar. - At the end of the installation process the installer will try to run the registry file that is necessary for autostereoscopic display. Press “Yes” to install the registry file and finish installation:

OSV installers have different lists of built-in config files for 3d displays:
| OSV version | IDs of 3d displays whose configuration files are built into the installer |
|---|---|
4.8.18.69 4.8.19.70 | 05F 05D S1D 05G |
| 4.8.22.73 | 05F 05D S1D 05G S3D |
Adjust autostereoscopic visualization to reach best stereo quality
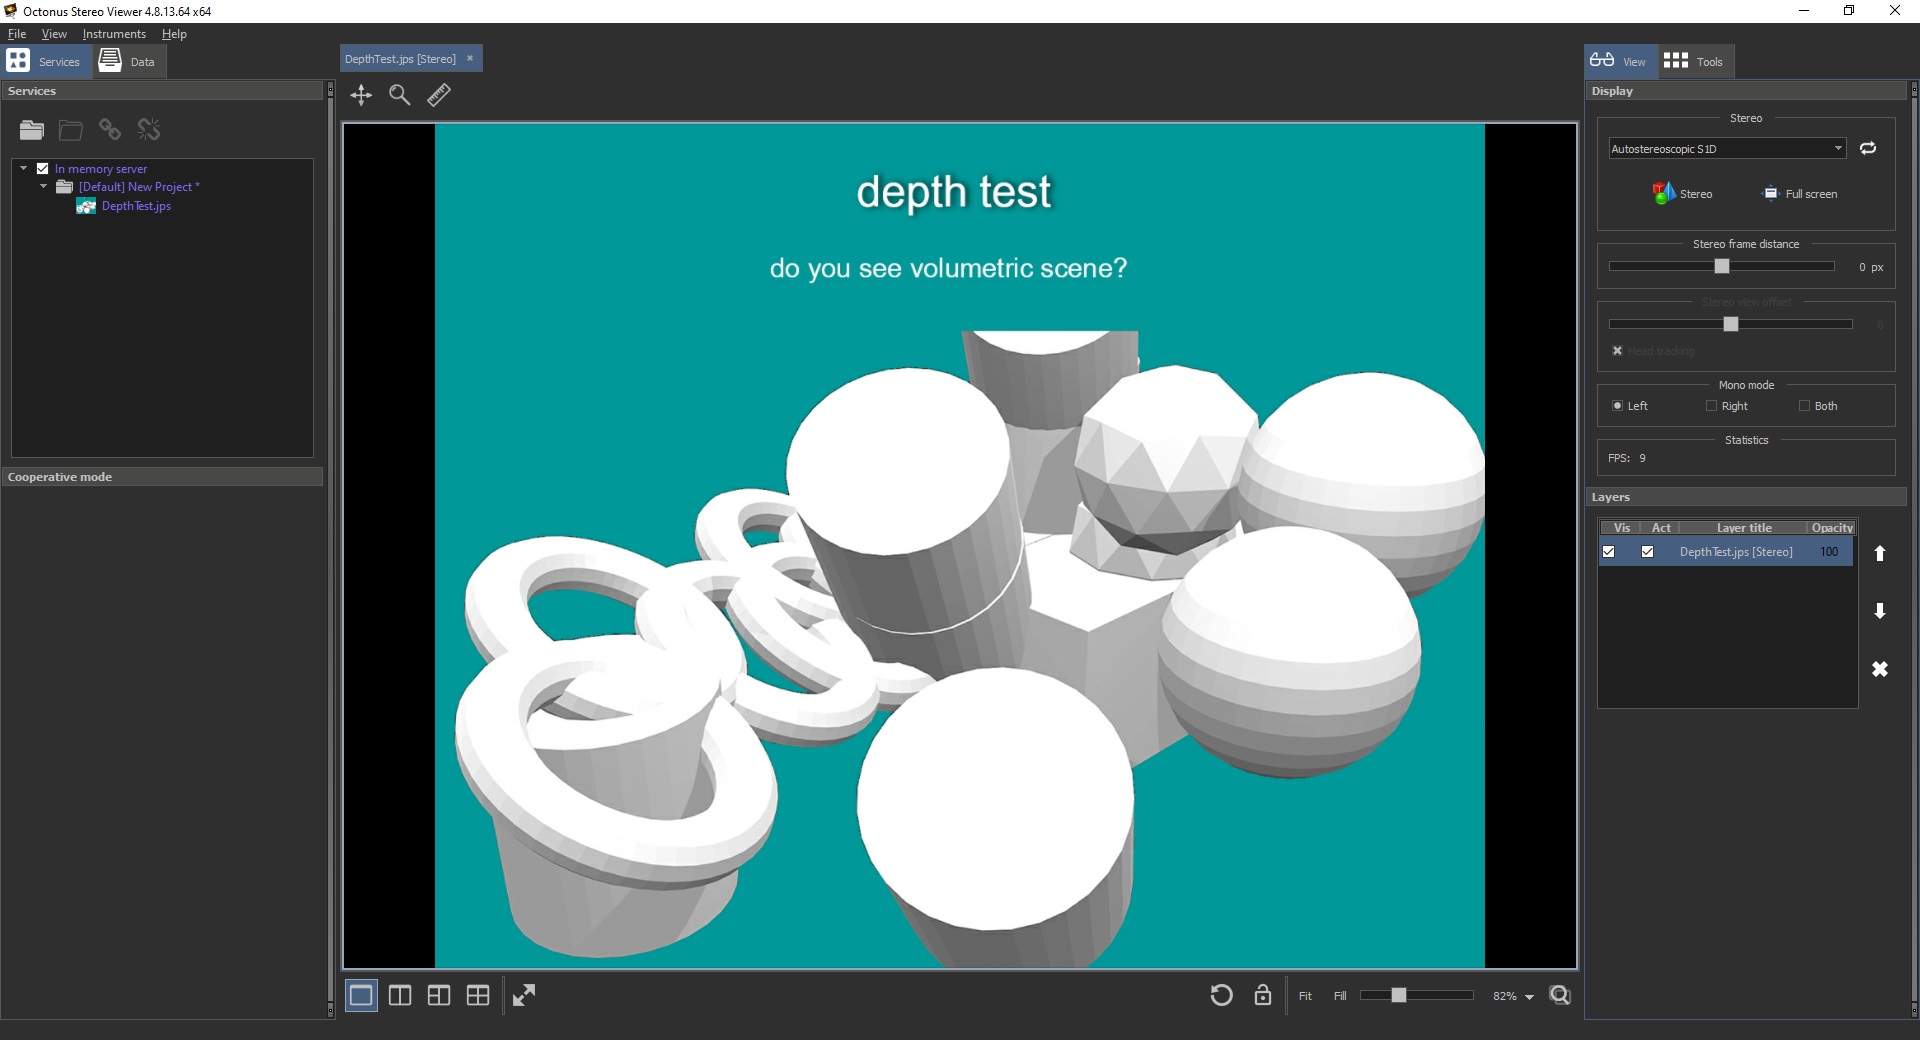
If the stereo on your workstation is configured incorrectly, you will not be able to see a volumetric image via the Oсtonus Stereo Viewer app: ghosting will be very noticeable, left and right pictures will not be combined into one 3D image etc.
Adjust stereo for displays with a head tracking camera
To configure autostereoscopic visualization with head tracking, you should do the following:
- Run Octonus Stereo Viewer on regular display
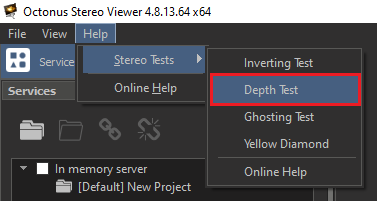
- Open a stereo test, for example, the Depth Test (Main menu: Help → Stereo Tests → Depth Test)
- Activate AutostereoscopicS1D full screen mode with checked Head tracking flag (how to do this, see here steps 3 to 6)
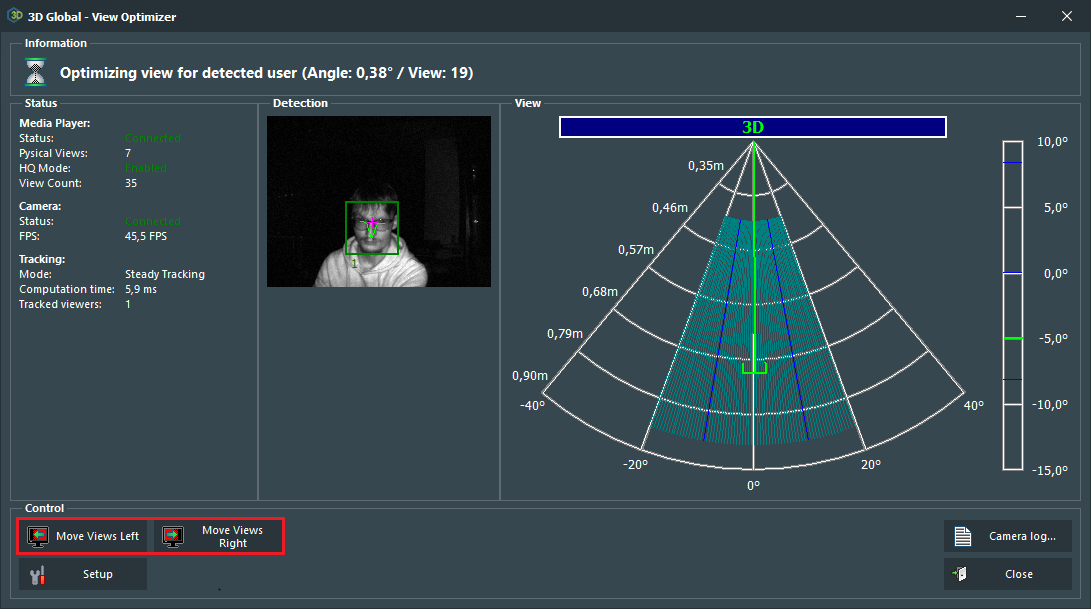
- Open 3D Global View Optimizer. Check with the app if there is head tracking when you are at the right distance from the autostereoscopic display (eyes about 70 cm from the screen):
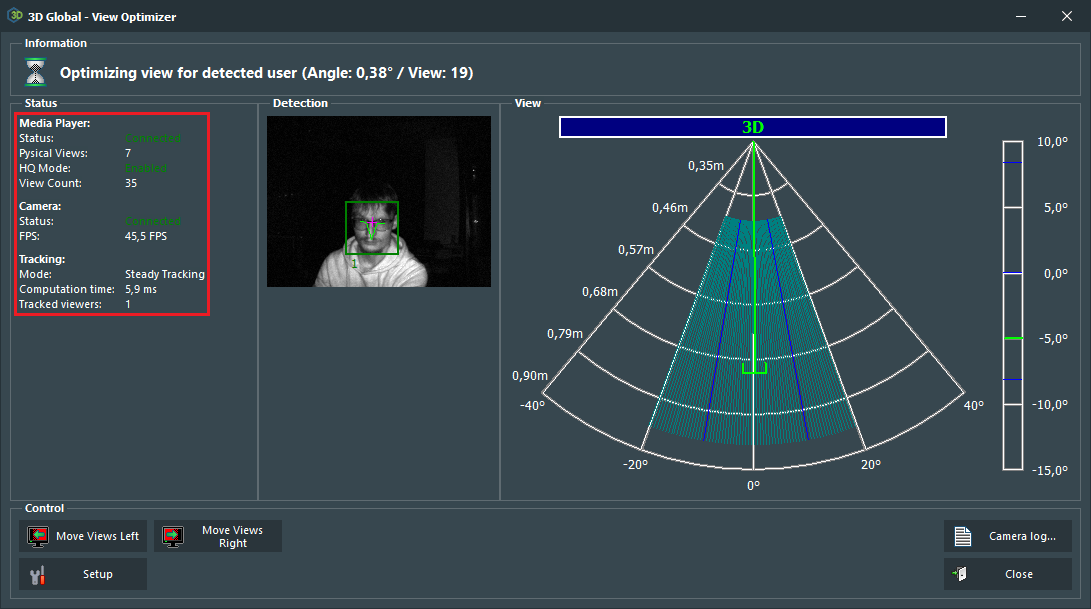
Also, please check these parameters:- Media Player status is connected
- HQ mode is enabled
- Camera is connected
- FPS ≥ 35
- Tracking mode is steady tracking
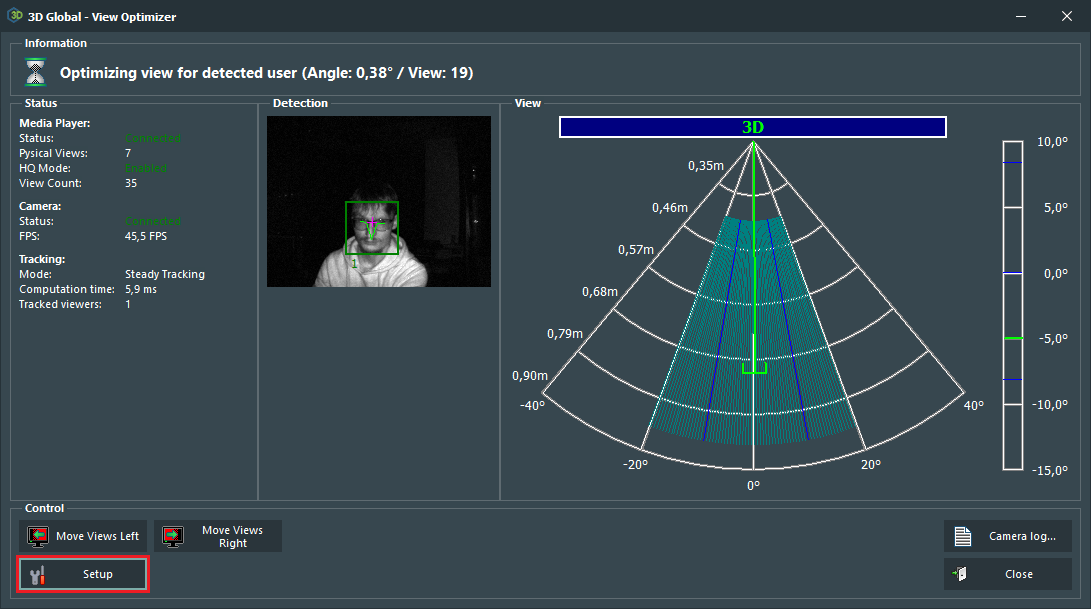
- If another tracking mode is selected, please follow these additional steps:
- Click the Setup button
- Select the Steady Tracking item from the list of available tracking modes
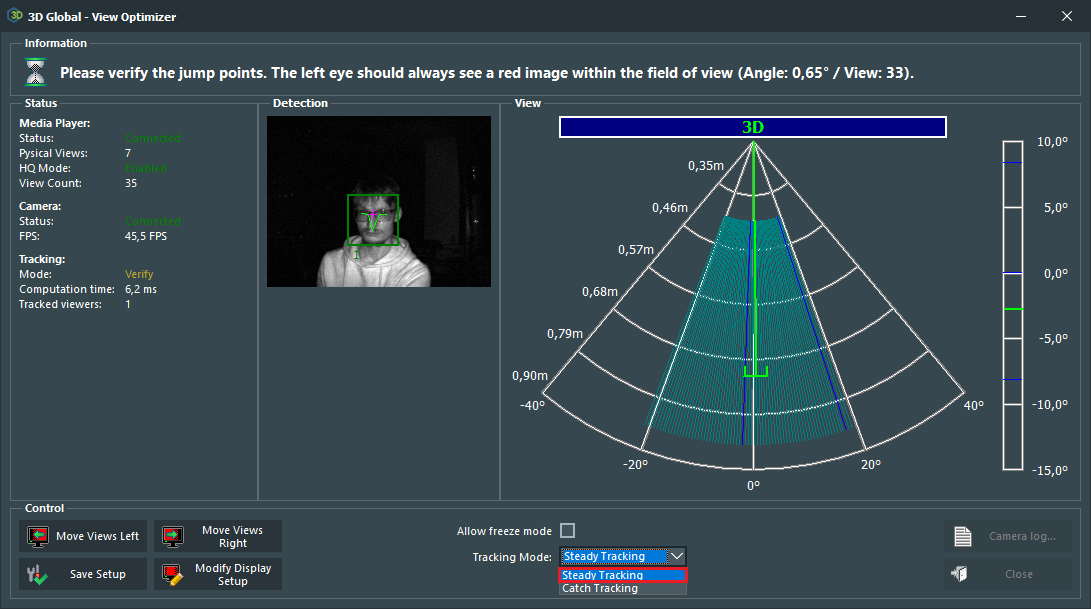
- After that click the Save Setup button
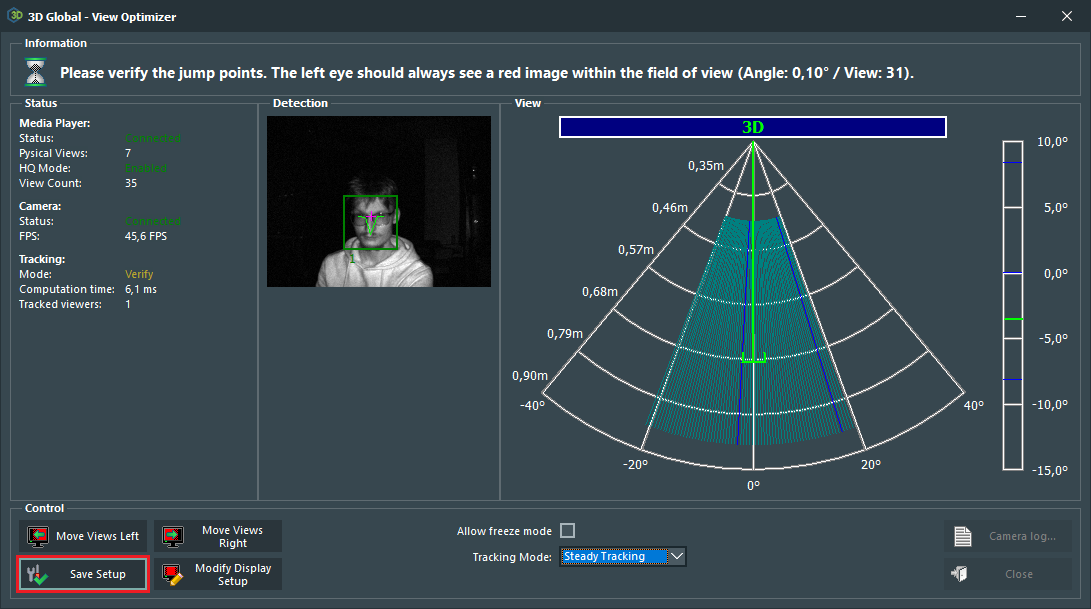
- Adjust the View offset to see the right stereo using the Move Views Left and Move Views Right buttons:
- Click the Setup button
Adjust stereo for displays without a head tracking camera
Procedure is the same, but:
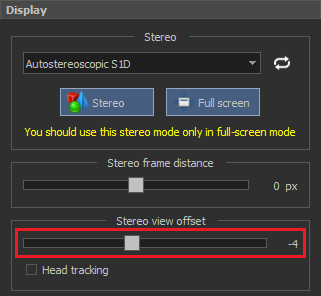
- Uncheck "Head tracking" checkbox in the OSV
- Adjust stereo view using the appropriate slider in the Octonus Stereo Viewer or Ctrl+Alt+Left / Ctrl+Alt+Right shortcuts: