...
As you drag the slider of current step progress, the thumbnail and the main view edge lines are updated dynamically.
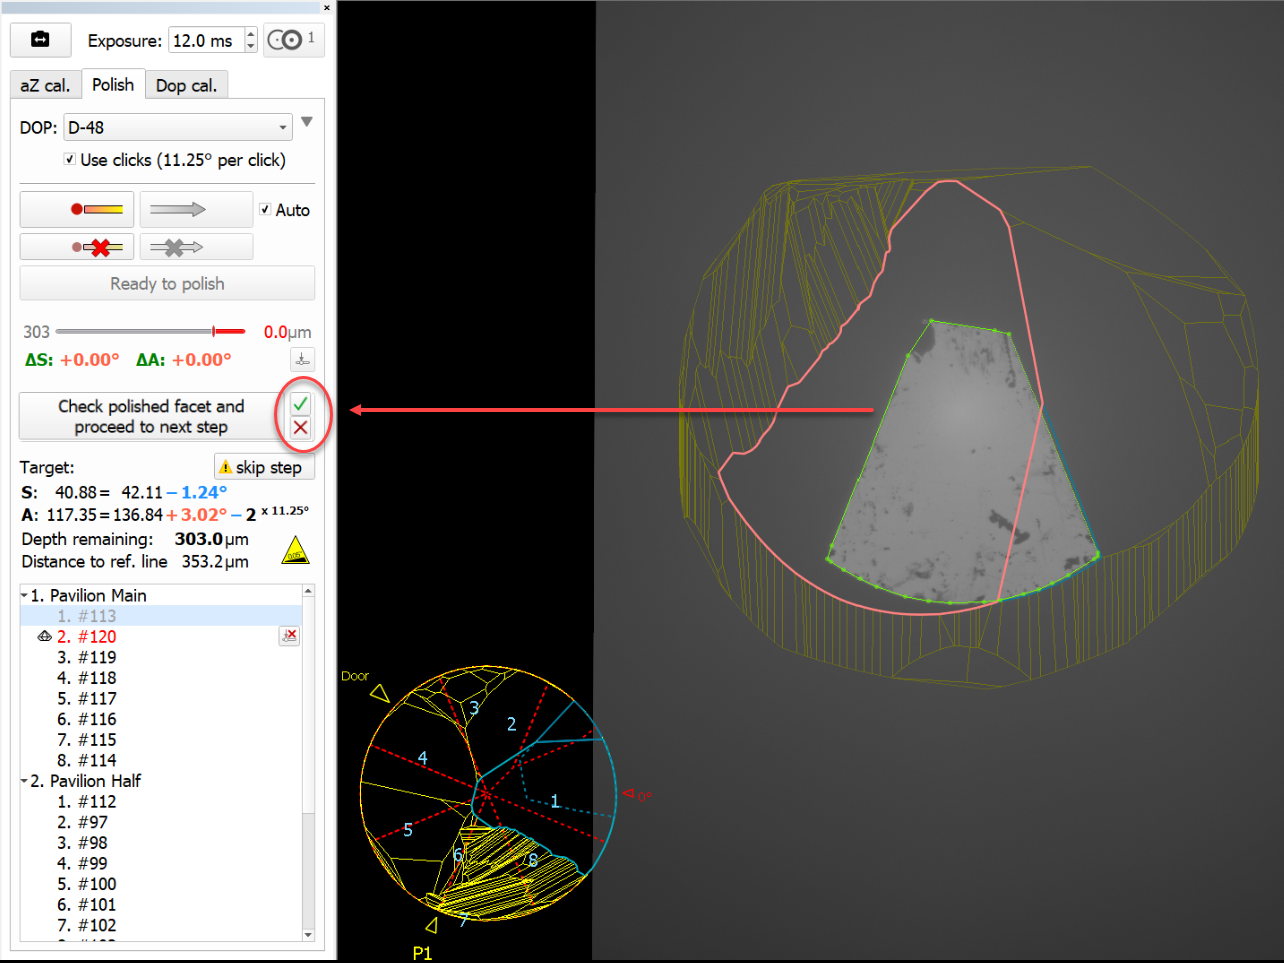
Axis Z Calibration Mode
Previously, the axis Z (axis of stone rotation) considered to be normal to the stone table. Testing in real life conditions demonstrated that it was not the right approach: the axis Z was not always normal to the stone table which is revealed on the large rotation azimuths. To eliminate this discrepancy, the Axis Z Calibration Mode has been added to the system. The mode refines the DOP Click Correction mode and therefore is only available when the Use clicks option is selected for the DOP. In that case, the additional aZ cal tab is displayed providing you with the controls for axis Z calibration.

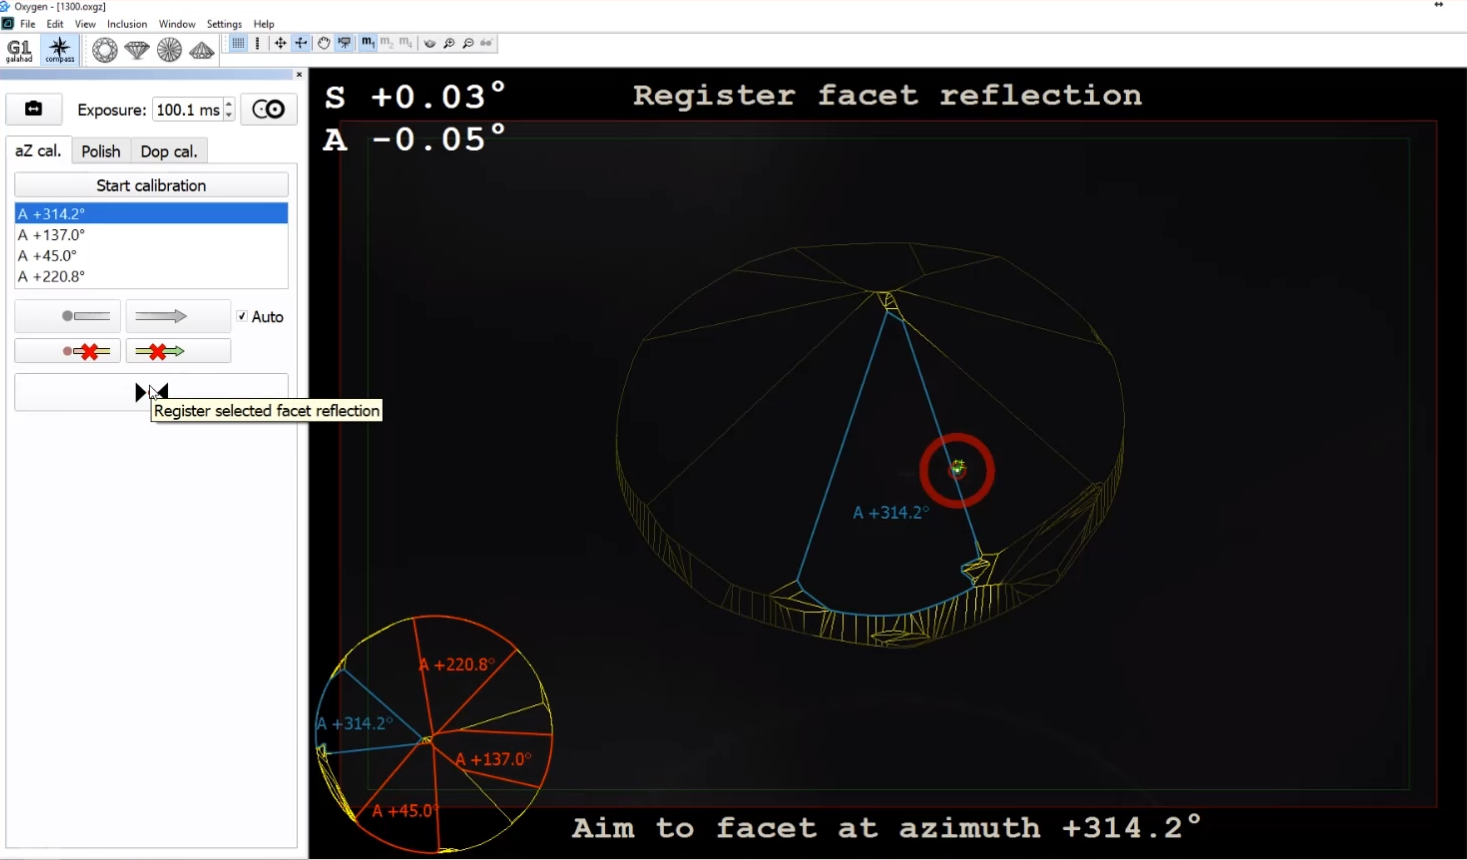
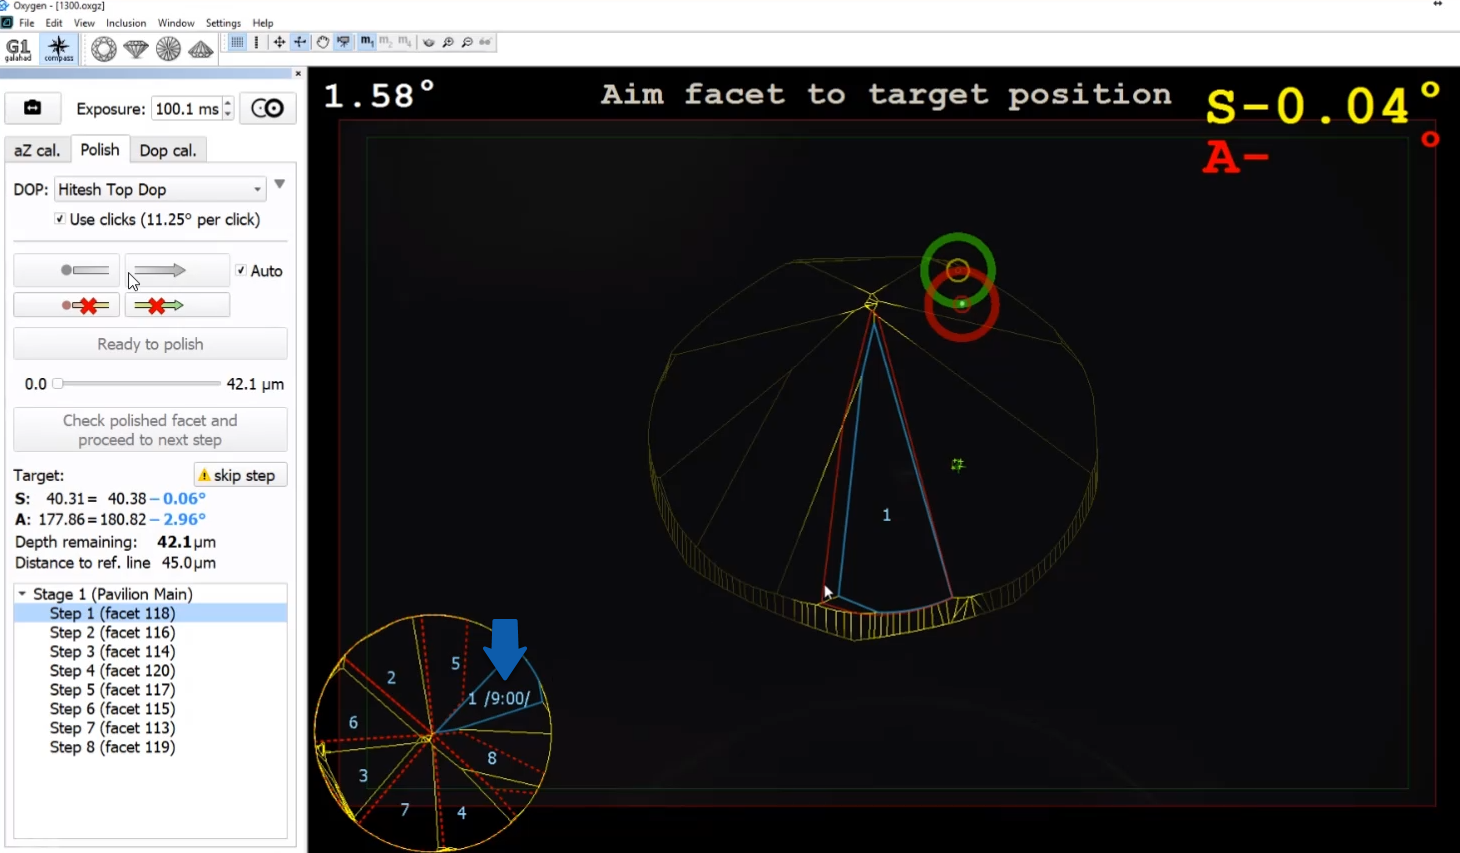
To use the feature, click Start calibration, the system will form the list of facets to take part in a calibration: select a facet from the list, aim to this facet, set facet start position, then  show slope direction, set facet back to start position, show azimuth direction, and then click
  Register selected facet reflection. The system will automatically select next facet to use for calibration and give an instruction on how to switch to it, for example: "Rotate DOP on +8 clicks". You do not need to show slope and azimuth directions again - for the remaining calibration facets only register the reflections.
| Info | |||||
|---|---|---|---|---|---|
The expected position of the reflection is displayed in the Scene with the blue ring
|

...
Detailed information about calibration results can be accessed via main menu View > Show logger (info) panel.
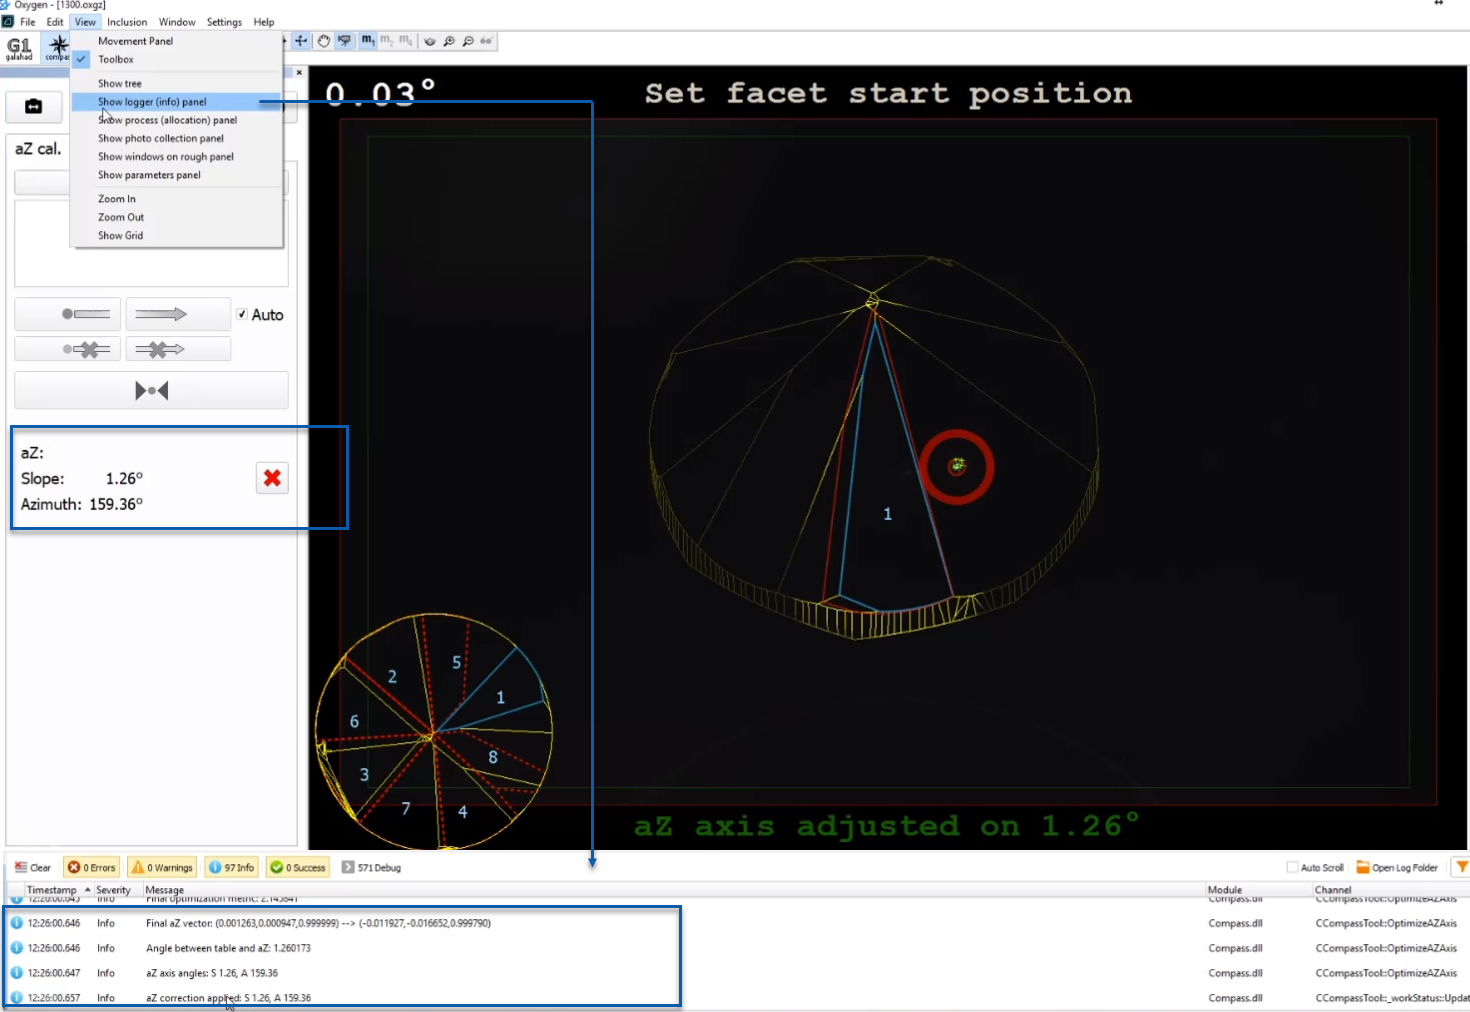
You can erase the calibration results by clicking the  button, displayed after calibration is finished.
...
Now, within the selected step, after you show slope and azimuth direction, the graining direction is detected and automatically displayed in the thumbnail view.
The graining direction is saved together with the project file and remains available on re-opening.
...
To switch between cameras, on the right panel, click Compass/GPS.
|
|
| Compass | GPS |
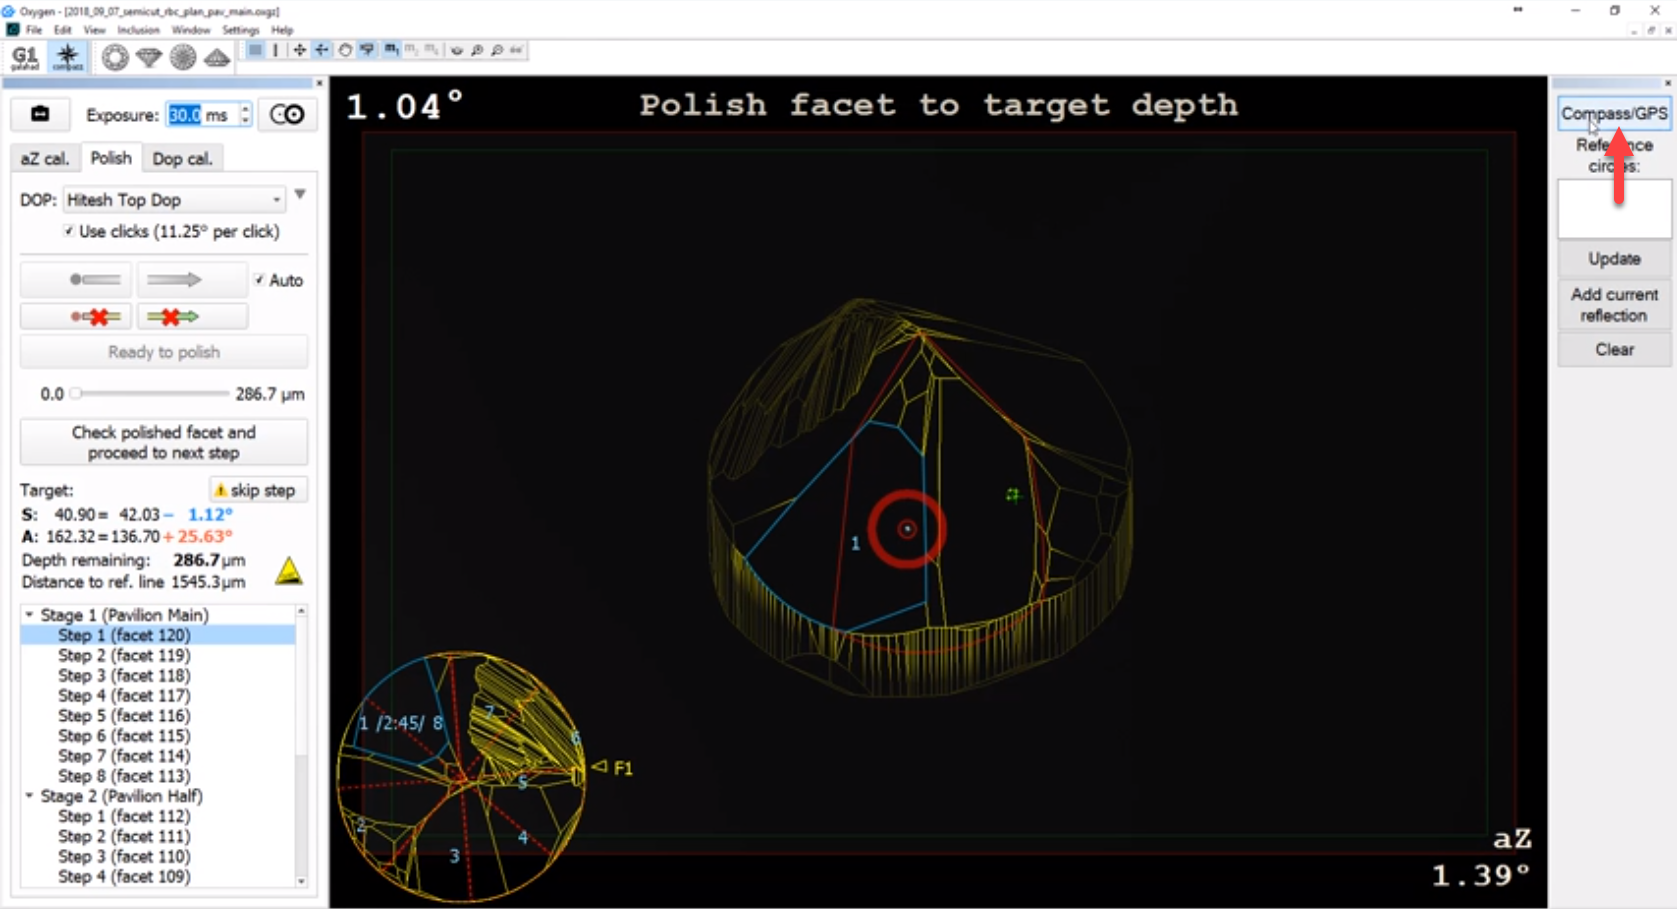
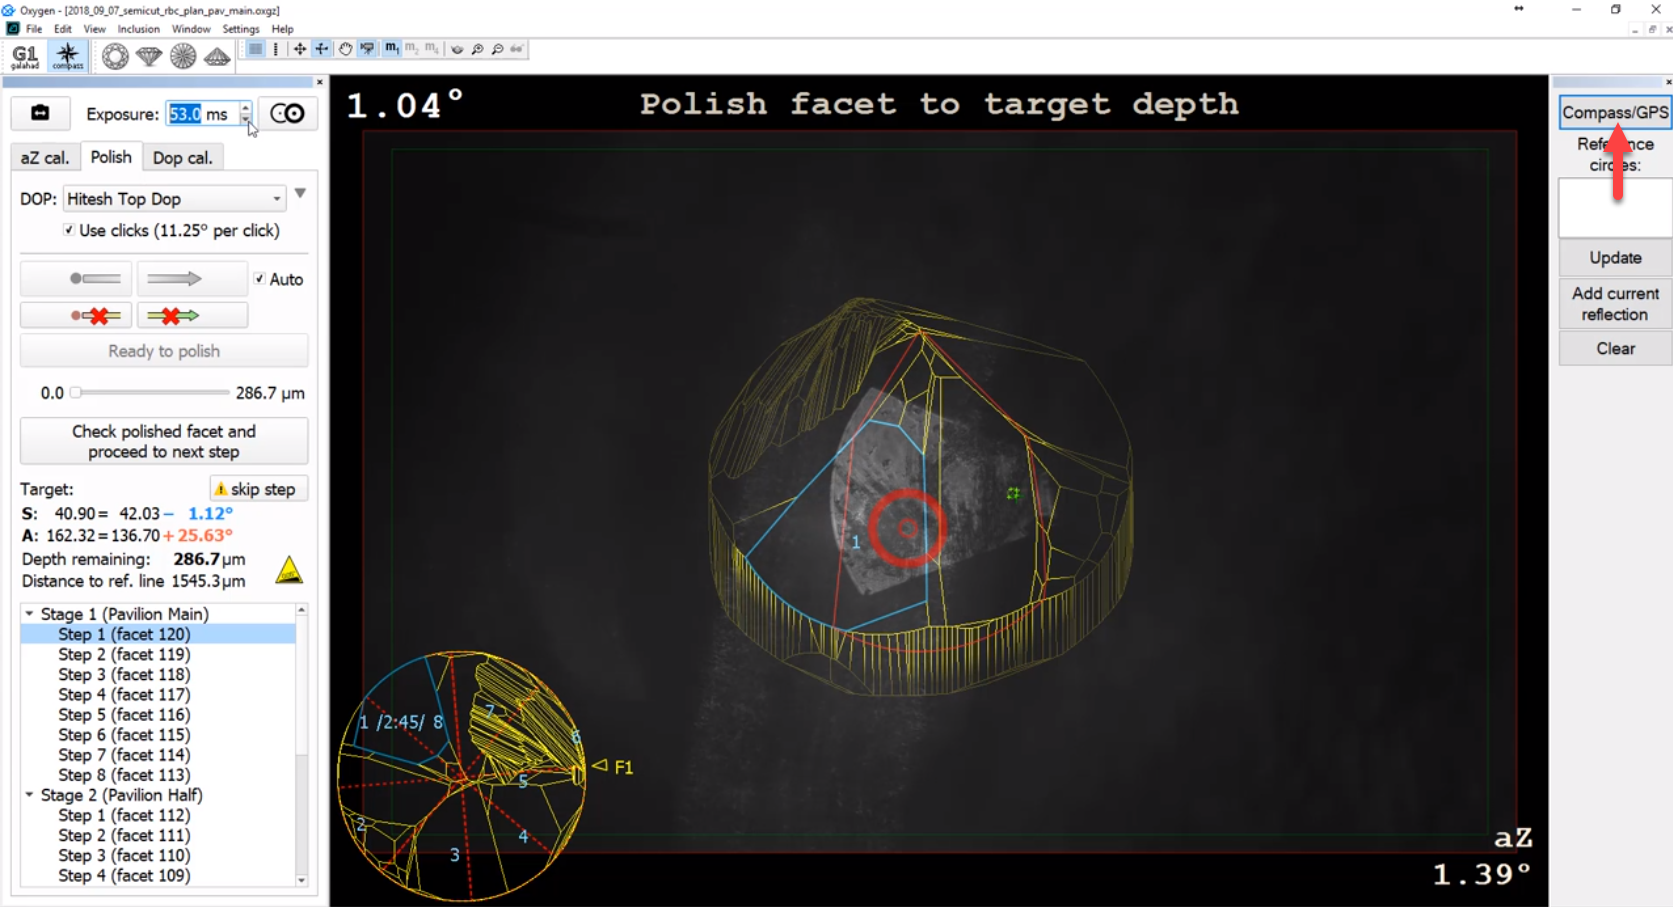
For each mode, you can set its Exposure parameter separately.
You can shoot photos from both cameras. To do so, start the system with the "/alignmentmenu" flag (see details here), then on the right panel, on the Compass tab, click the Shoot button.
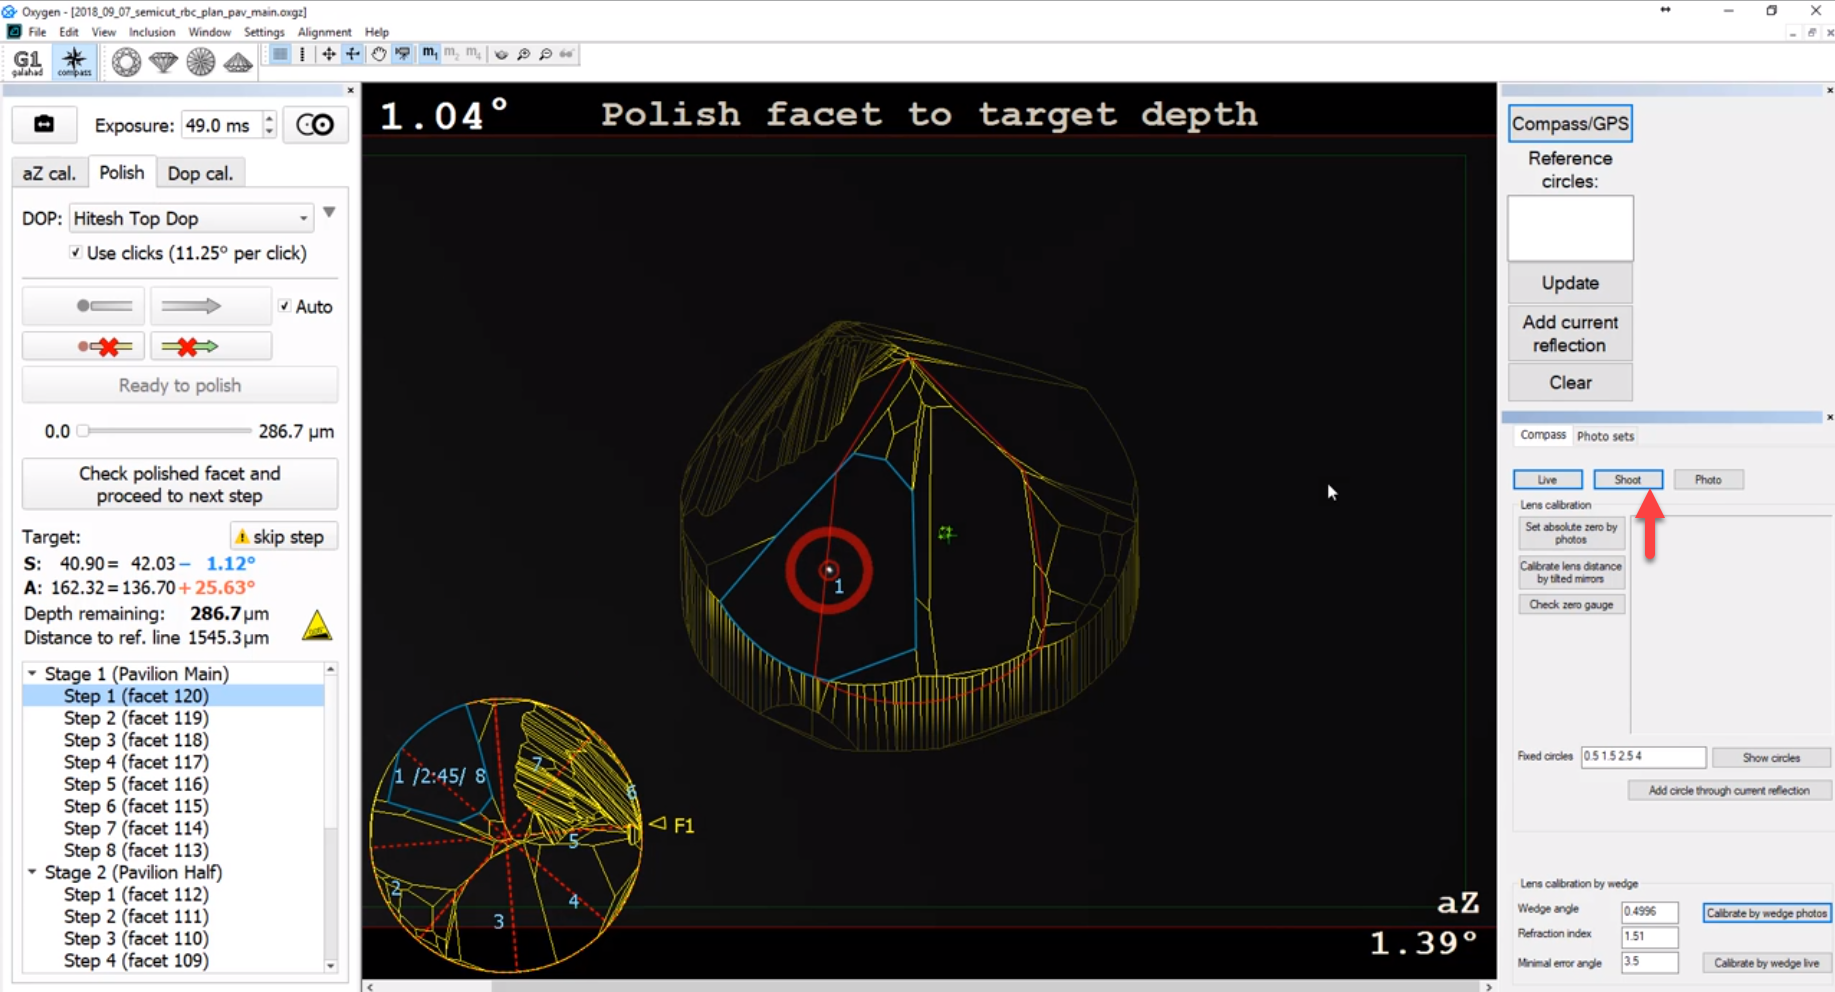
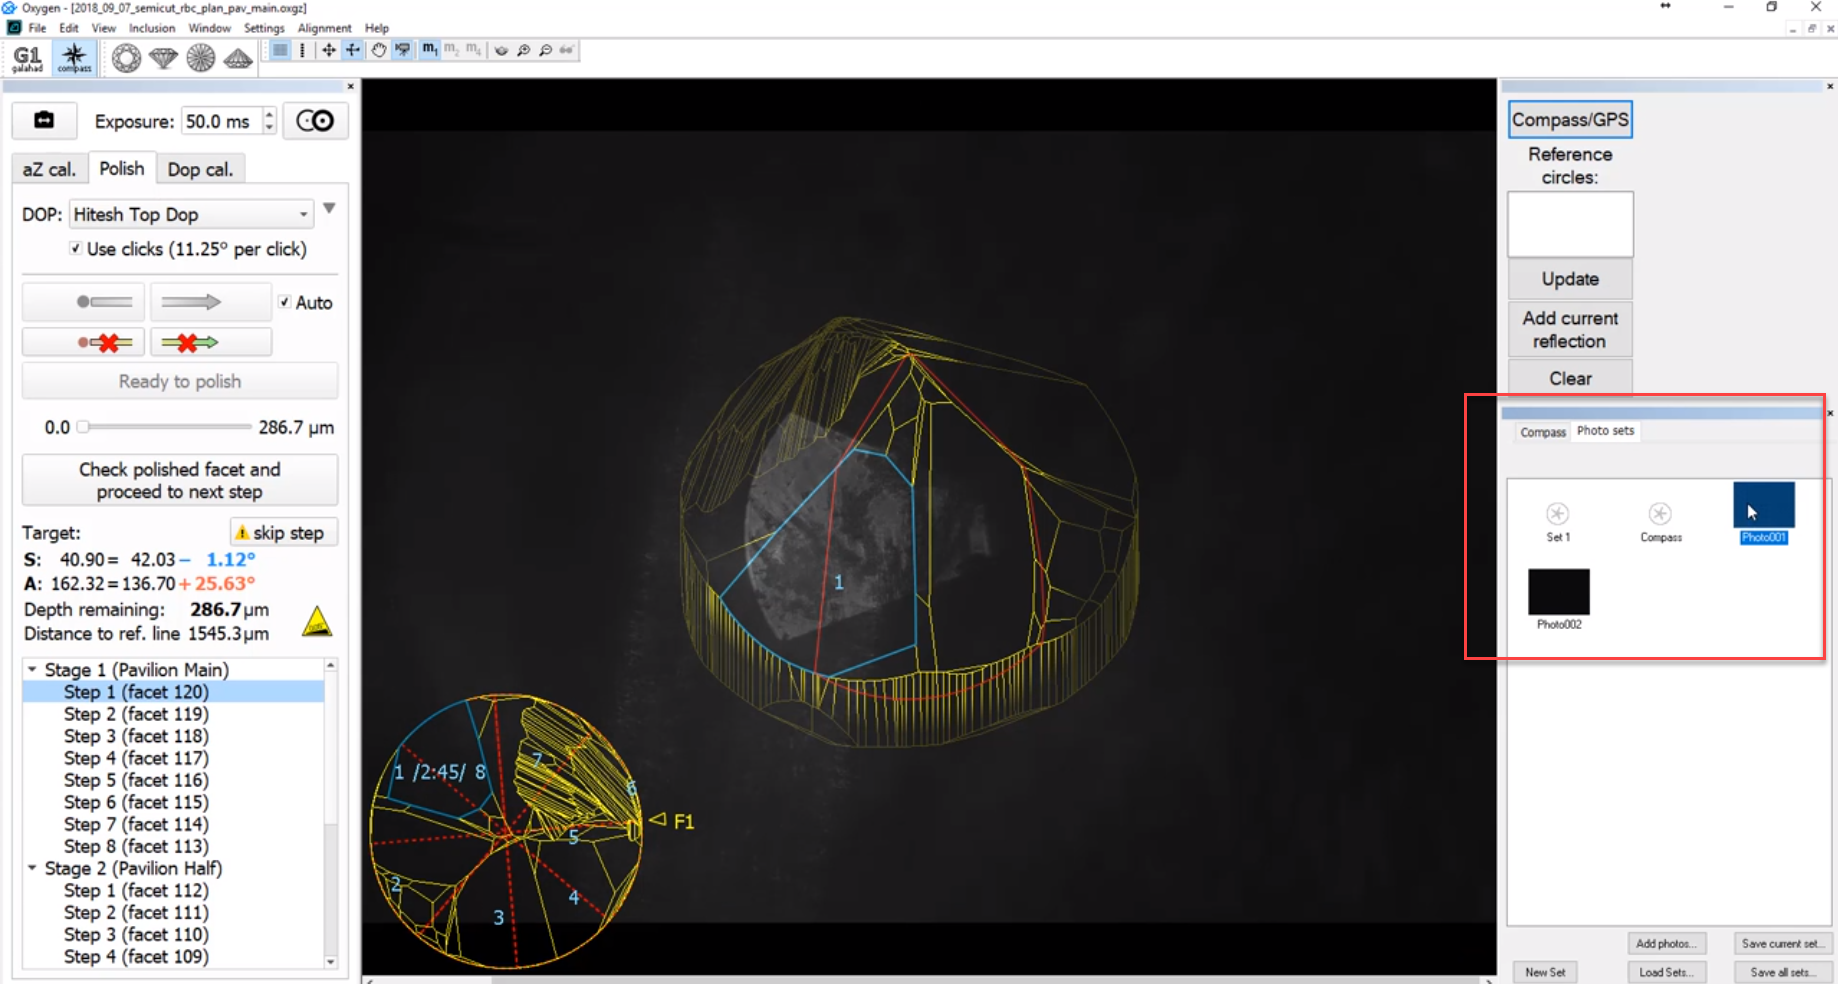
To access taken photos, use the Photo sets tab.
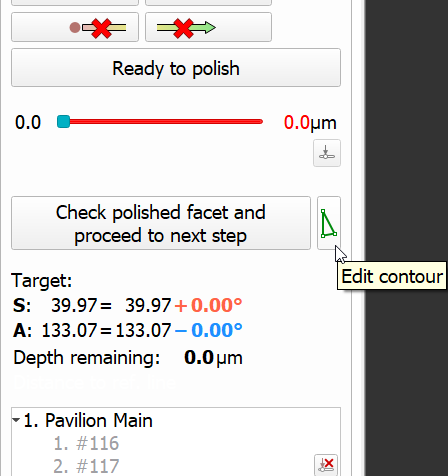
Manual Contour Correction
...
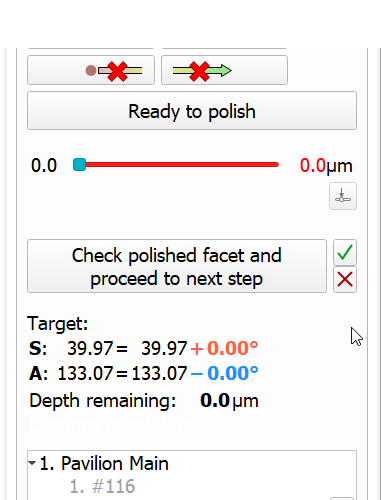
| Start Editing Contour | Editing in Progress |
|---|---|
|
|
To start editing, click the |
|
| |


Fixed Problems and Improvements
...