The system allows registering your own models as cuttings.
This includes:
- Normalization of your model
- Registering the normalized model as new cutting
- Adding allocation forms to your cutting
User Cutting Registration
To register a new cutting from your model:
- For the scan, you want to register as cutting, run the "18. SmartNormalize" algorithm. Several solutions are produced.
- From the solutions, produced by the "18. SmartNormalize" algorithm, select the one you want to register as cutting.
- Right-click this solution, and from the context menu, select Register as new cutting... The dialog is displayed.
- In the Register new cutting dialog, if necessary, specify Facet Marking.
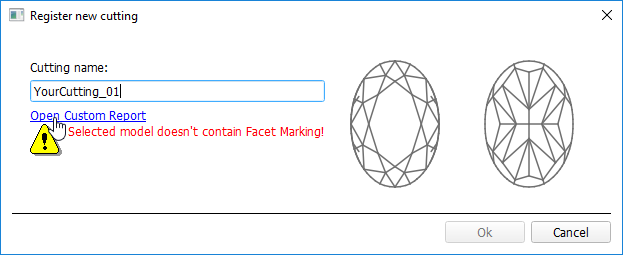
- Set Cutting name.
- Click Ok.
Adding Allocation Forms
This step is optional as algorithms are able to run on a single base form (cutting itself). Still, it is recommended to register allocation forms, especially for the different W:L ratio, as it significantly improves allocation results.
For any registered cutting, immediately after its registering or at any moment later, you can add any number of the allocation forms. Each allocation form is a high-quality solution variant for your cutting. Any solutions or normalized scans can be registered as allocation forms for your registered cuttings.
Although the registering of the allocation forms is optional, it may improve the quality of solutions, because on running your registered cutting, the optimization algorithm will check all the included forms trying to produce solutions well allocated with these forms. This means, the more high-quality solutions you register as allocation forms, the better results you achieve when running optimization with your cutting.
To add a new allocation form to your registered cutting, do one of the following:
- To add a new allocation form from a scan:
- For the scan, you want to register as the allocation form, run the "18. SmartNormalize" algorithm. Several solutions are produced.
- Among the solutions, produced by the "18. SmartNormalize" algorithm, right-click the one you want to register as the allocation form.
- From the context menu, select Add to allocation forms...The dialog is displayed.
- In the Add to allocation forms... dialog, from the Cutting list, select the registered cutting, you want to add the allocation form to.
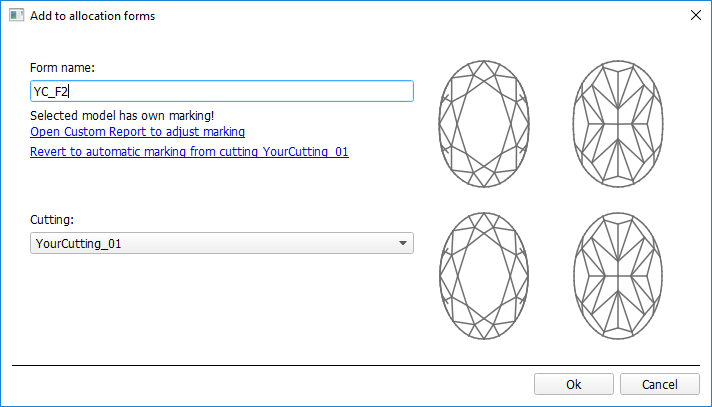
- Facet Marking from the selected cutting is automatically applied to your new form. If necessary, adjust the Facet Marking.
- Set Form name.
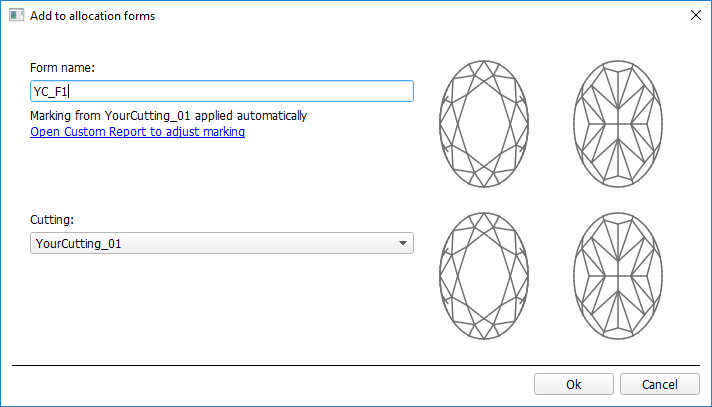
- Click Ok.
To add a new allocation form from a solution:
Right-click the solution you want to use as an additional allocation form.
- From the context menu, select Add to allocation forms...The dialog is displayed.
- Further steps are the same, as described above for the normalized scans.
Managing Allocation Forms
You can manage allocation forms of your registered cuttings in the solution list.
How you can manage the allocation forms:
- You can use an empty project via File > New. This will provide you with an empty solution list.
- Or add your allocation forms to the solution list of any opened project.
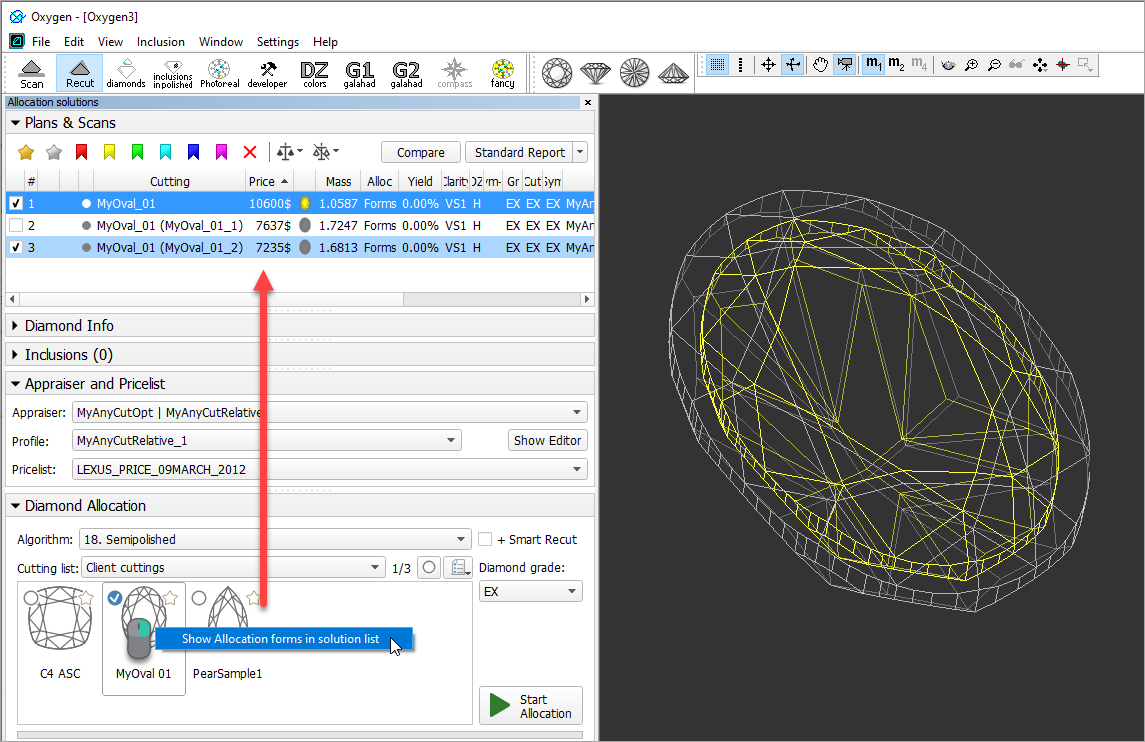
- To show allocation forms, select your cutting, then right-click it and select Show allocation forms in solution list. If your cutting has allocation forms, they will be copied to the solution list.
- You can use all tools of the system, available for usual solutions, to analyze characteristics of your allocation forms.
- Note Your displayed forms are copies. If you make some changes to them, this will not affect the initial copies actually assigned to the cutting. Still, you are able to register changed copy as the additional form for the same cutting.
- In the solution list, from the contextual menu, you can:
- Remove from allocation forms... This is the only operation affecting not only the copy but also the source.
- Add as allocation form to another cutting...
- Register as new cutting...
- If necessary, you can save you displayed copies of allocation forms as a separate project.
Participation in AnyCut Workflow
The User Cutting Registration function is an important part of AnyCut Workflow. The example of how it is involved in it is presented in the video below:
| Video | AnyCut Workflow - Main Steps | ||||
| Published: | 2019, September 3 | Last Updated: | 2019, October 16 | v.2.3 |
| ||||
Video summary:
| ||||
Video keywords: AnyCut, in-house cut, custom facet types, SmartRecut | ||||
| Published in: | Release Notes | 2019-09-13 - HPOxygen Server 5.2.22 | ||
| Documentation | In-house cut workflow, In-house cut registration | |||
| Playlists | All Videos | YouTube: HP Carbon | |||
| Also | As Separate Page | On YouTube | Specification | |||