The system provides the in-house cut workflow which includes the tools and comfortable user interfaces for registering your own in-house cuts from your own designs (ASCII, DMC), sample stone scans, and successful allocation solutions. The workflow is a simple way for both the process of cut registration and subsequent solution allocation, and also provides extended control over the parameters of the solutions. This is achieved by the comfortable user interface for in-house cut registration, as well as adding the new Recut algorithms working with the hybrid appraisers and providing the option of automatic start of Smart Recut basing on the automatically detected best Recut solution.
You can apply the new workflow to any cuts.
For a general overview of the process, see Workflow - in-house cut allocation (diagram)
The AnyCut workflow includes the following steps:
- In-house cut registration
- Allocation (Recut + Smart Recut) with one of the hybrid appraisers and one of the modern algorithms: "19. Single (FixedForm)" or "20. Single (Recut)", see Algorithms comparison.
- (optional) adding allocation forms
Below these steps are described in an overview video and as step-by-step.
Overview Video
| Video | AnyCut Workflow - Main Steps | ||||
| Published: | 2019, September 3 | Last Updated: | 2019, October 16 | v.2.3 |
| ||||
Video summary:
| ||||
Video keywords: AnyCut, in-house cut, custom facet types, SmartRecut | ||||
| Published in: | Release Notes | 2019-09-13 - HPOxygen Server 5.2.22 | ||
| Documentation | In-house cut workflow, In-house cut registration | |||
| Playlists | All Videos | YouTube: HP Carbon | |||
| Also | As Separate Page | On YouTube | Specification | |||
In-house cut registration
Main article: In-house cut registration
This stage includes obligatory normalization of the model you decided to use as cutting, then registration optimal normalization variant as a new cutting.
- For the scan, you want to register as cutting, run the "19. SmartNormalize" algorithm. Several solutions are produced.
- From the solutions, produced by the "19. SmartNormalize" algorithm, select the one you want to register as cutting.
- Right-click this solution, and from the context menu, select Register as new cut... The dialog is displayed.
- In the Register new cut dialog, if necessary, specify facet types.
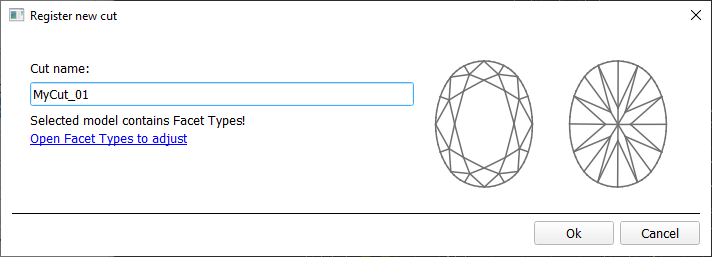
- Set Cut name.
- Click Ok.
Allocation
This stage includes sequentially:
- Recut allocation
- Smart Recut allocation
You can execute both steps within one run.
For the Recut allocation within the in-house cut workflow, two algorithms are presented in the system:
- 19. Single (FixedForm) - is intended to produce solutions in maximum correspondence with registered forms and limited by these forms number. Better to use when there is a number of registered forms and you want to stick to them. See detailed description of allocation forms in the "Adding Allocation Forms" section below.
- 20. Single (Recut) - is intended to produce solutions for forms and then search additionally beyond them (but in the limits specified by the appraiser). Better to use for searching for larger mass, taking into account that some fixed form solutions may be excluded from results if the algorithm finds better solutions.
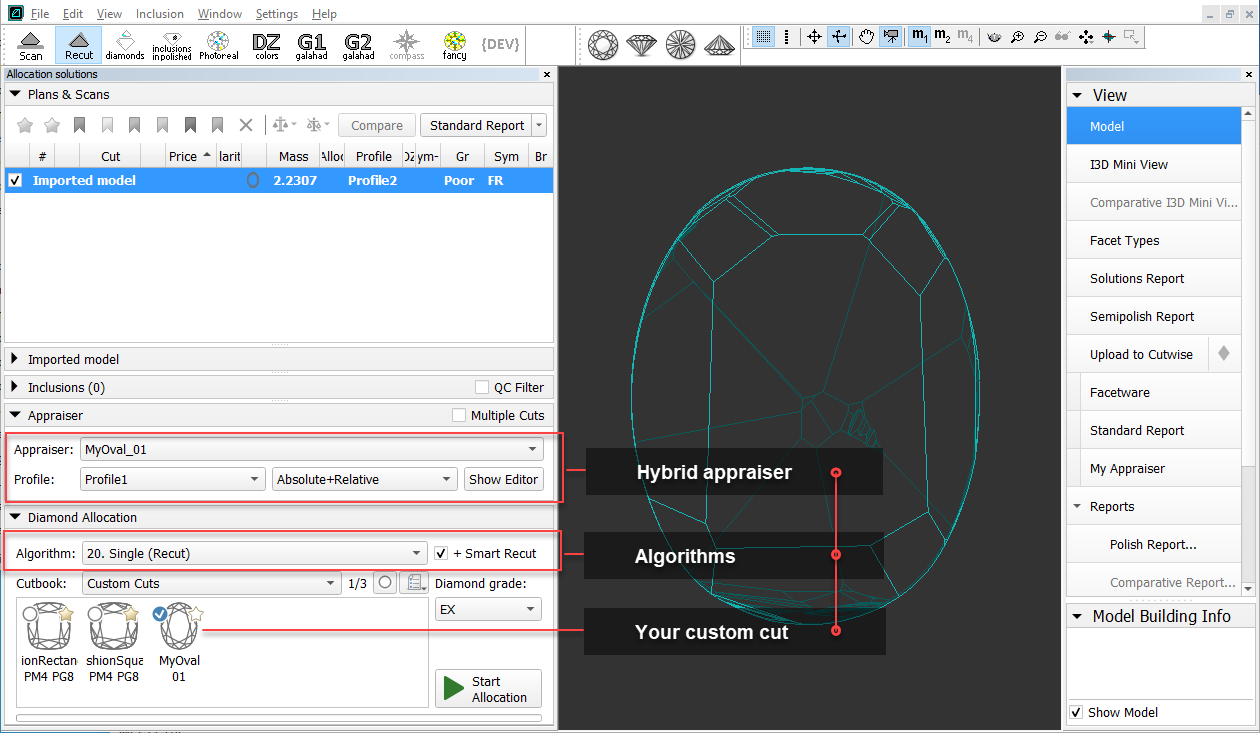
To perform Recut + Smart Recut allocation for your previously registered in-house cut:
- From Cutbook > Custom cuts select your registered in-house cut
- Set:
- Algorithm = "19. Single (FixedForm)" or "20. Single (Recut)".
- Appraiser = hybrid appraiser, linked to your in-house cut or MyAnyCut with the profile configured for your in-house cut.
Select the +SmartRecut option. With this option selected, from the two best by price Recut solutions, the SmartRecut will be immediately started.
Note that the SmartRecut algorithm will run with the latest used options. The latest version of the composite appraiser in addition to others supports Fix Girdle, Fix Crown and Fix Facets options.
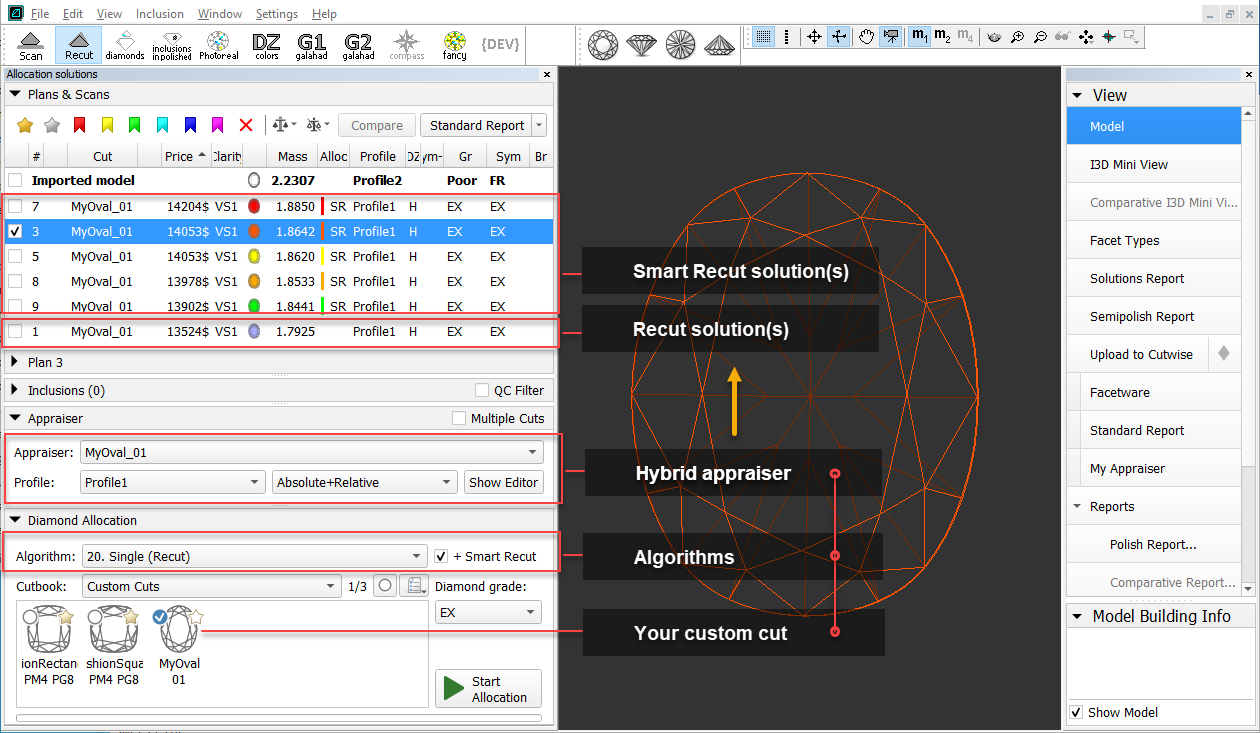
- Click Run. Recut solutions are added to the list, then Smart Recut solutions are added.
Adding allocation forms
Main article: In-house cut registration
This step is optional as algorithms are able to run on a single base form (cut itself). Still, it is recommended to register allocation forms, especially for the different W:L ratio, as it significantly improves allocation results.
For any registered in-house cut, immediately after its registering or at any moment later, you can add any number of the allocation forms. Each allocation form is a high-quality solution variant for your cut. Any solutions or normalized scans can be registered as allocation forms for your registered cuts.
Although the registering of the allocation forms is optional, it may improve the quality of solutions, because on running your registered in-house cut, the optimization algorithm will check all the included forms trying to produce solutions well allocated with these forms. This means, the more high-quality solutions you register as allocation forms, the better results you achieve when running optimization with your cut.
To add a new allocation form to your registered in-house cut, do one of the following:
- To add a new allocation form from a scan:
- For the scan, you want to register as the allocation form, run the "19. SmartNormalize" algorithm. Several solutions are produced.
- Among the solutions, produced by the "19. SmartNormalize" algorithm, right-click the one you want to register as the allocation form.
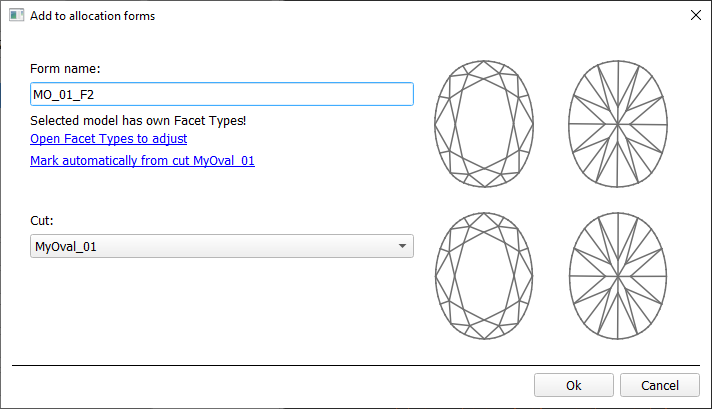
- From the context menu, select Add to allocation forms...The dialog is displayed.
- In the Add to allocation forms... dialog, from the Cut list, select the registered cut, you want to add the allocation form to.
- Facet Marking from the selected cut is automatically applied to your new form. If necessary, adjust the facet types.
- Set Form name.
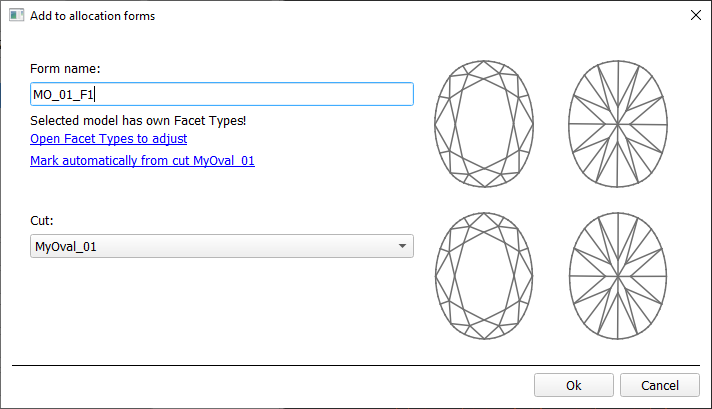
- Click Ok.
- To add a new allocation form from a solution:
- Right-click the solution you want to use as an additional allocation form.
- From the context menu, select Add to allocation forms...The dialog is displayed.
- Further steps are the same, as described above for the normalized scans.
Workflow demonstration and testing
The following elements of the system can be used for testing the AnyCut Workflow:
- Under Custom Cuts, the "Oval_C32P24_Shifted_NBT" cut is presented. The cut contains a number of allocation forms.
- Corresponding profile under the MyAnyCut hybrid appraiser.
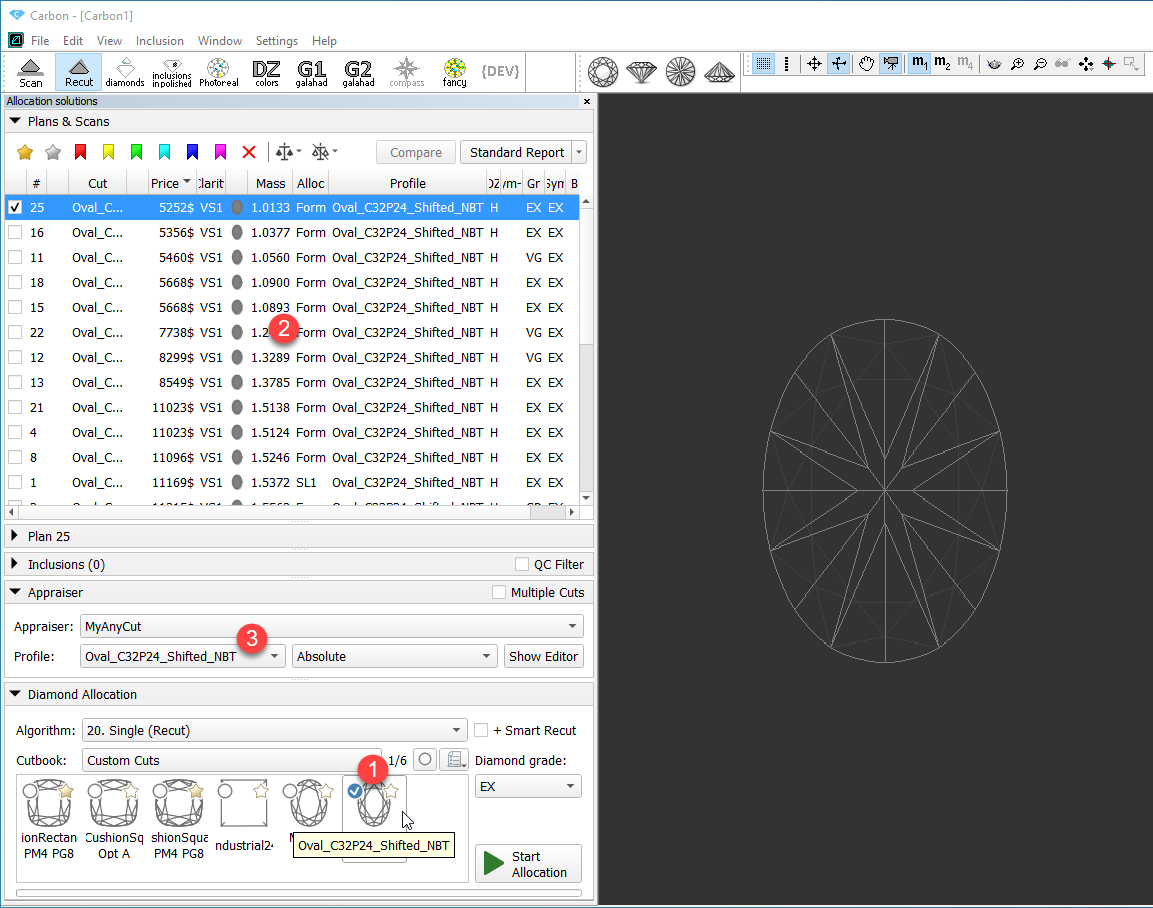
On figure: 1 - demo oval cut; 2 - allocation forms within cut; 3 - MyAnyCut hybrid appraiser with the corresponding profile.