The system allows registering your own models as cuts.
This includes:
- Normalization of your model
- Registering the normalized model as a new cut
- Adding allocation forms to your cut
In-house cut registration
To register a new cut from your model:
- For the scan, you want to register as cut, run the "SmartNormalize" algorithm. Several solutions are produced.
- From the solutions, produced by the "SmartNormalize" algorithm, select the one you want to register as cut.
- Right-click this solution, and from the context menu, select Register as new cut... The dialog is displayed.
- In the Register new cut dialog, if necessary, specify facet types.
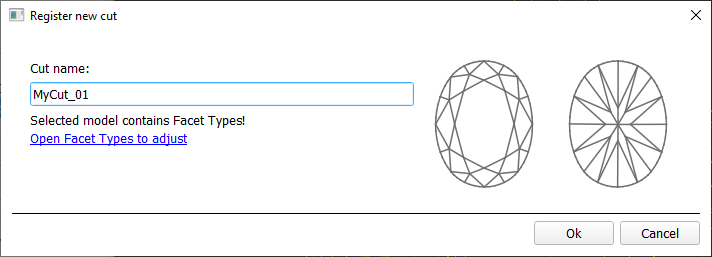
- Set Cut name.
- Click Ok.
Adding allocation forms
See: Workflow - add allocation forms (diagram) | Workflow - add allocation forms virtually (diagram)
This step is optional as algorithms are able to run on a single base form (cut itself). Still, it is recommended to register allocation forms, especially for the different W:L ratio, as it significantly improves allocation results.
For any registered cut, immediately after its registering or at any moment later, you can add any number of the allocation forms. Each allocation form is a high-quality solution variant for your cut. Any solutions or normalized scans can be registered as allocation forms for your registered cuts.
Although the registering of the allocation forms is optional, it may improve the quality of solutions, because on running your registered cut, the optimization algorithm will check all the included forms trying to produce solutions well allocated with these forms. This means, the more high-quality solutions you register as allocation forms, the better results you achieve when running optimization with your cut.
Some questions and answers on allocation forms:
How many and what forms should be added?
You need at least 20-30 forms. It is better to have more*. The quantity depends on the quality: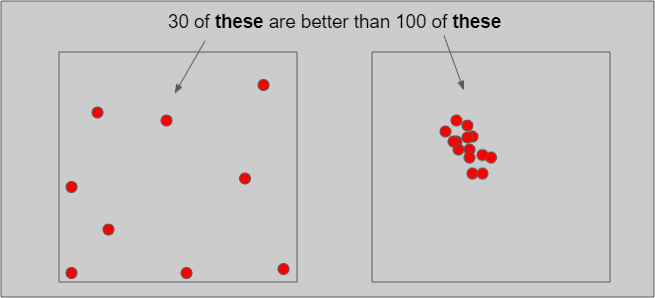
In a multidimensional array of diamond parameters**, the more these parameters differ, the better (array coverage). Also the greater the GirdleRatio of your cut is, the more allocation forms are recommended to achieve a better result.
NOTES
* But how much more? And may adding a form make hybrid appraiser worse? The answer is that the more forms it has, the slower the appraiser is, therefore it is not recommended to have more than 100. Also if the relative part allows getting A from B or vise versa during allocation (click Show Picture... below) then one of them is redundant and again - only slows down the appraiser.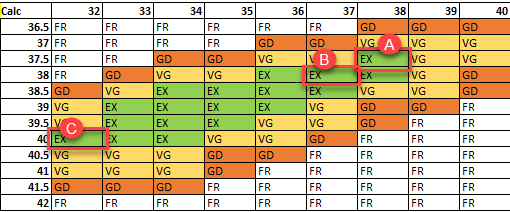
A can be obtained from B during allocation (close, a deviation is allowed by the relative part).
С cannot be obtained from B during allocation (far, a deviation is not allowed by the relative part)
Thus:
either A or B is redundant and only slows down the appraiser,
it is good to have С in addition to A or B.** When we say "parameters" we mean not only the ones presented in the appraiser but also the additional (for example, azimuths of non-main facets of crown and pavilion). Precisely, changing the additional parameters in many cases provides the best form distribution over the array.
- If no allocation forms, is it a hybrid appraiser?
A cut always has at least one form available immediately after cut registration (base form). That is why you need only 10 minutes to start using the new in-house cut (see "Ready for use" in this diagram). Does a linked hybrid appraiser stay hybrid in this situation? See next question. - If only one form was added, is it a hybrid appraiser?
If your cut has only one allocation form or few forms and the relative part of its hybrid appraiser is narrow enough, this creates a great risk of mass loss, as the solution will be searched not along all the array provided by the absolute part but only close to this form. On the other hand, if you significantly widen the relative part, it may become wider than the absolute which means the appraiser degenerates into a simple absolute. - How the SweetLine parameter should be specified in a hybrid appraiser?
The SweetLine slope is specified for an entire cut as described here. As forms belong to the same cut, the slopes of the SweetLines they belong to will be similar. But as good forms are distributed over the array, the position of their SweetLInes may be different: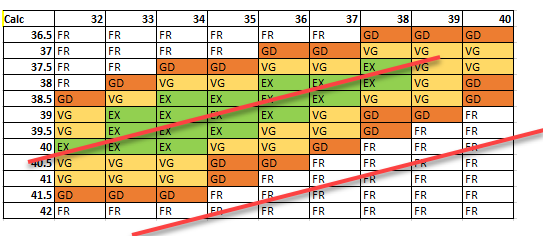
Therefore, for the absolute part of the hybrid appraiser, we should turn off the SweetLine (set all values to "100" which will remove the fixed green zone from the picture above) and only in the relative part set the possible deviation from the SweetLine of each particular allocation form.
To add a new allocation form to your registered cut, do one of the following:
- To add a new allocation form from a scan:
- For the scan, you want to register as the allocation form, run the "SmartNormalize" algorithm. Several solutions are produced.
- Among the solutions, produced by the "SmartNormalize" algorithm, right-click the one you want to register as the allocation form.
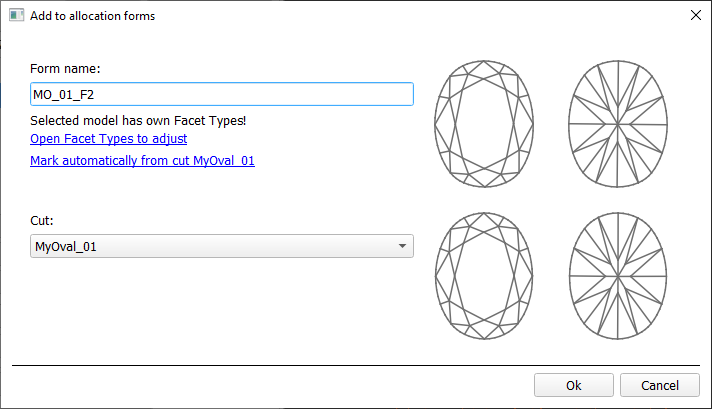
- From the context menu, select Add to allocation forms...The dialog is displayed.
- In the Add to allocation forms... dialog, from the Cut list, select the registered cut, you want to add the allocation form to.
- Facet Marking from the selected cut is automatically applied to your new form. If necessary, adjust the Facet Marking.
- Set Form name.
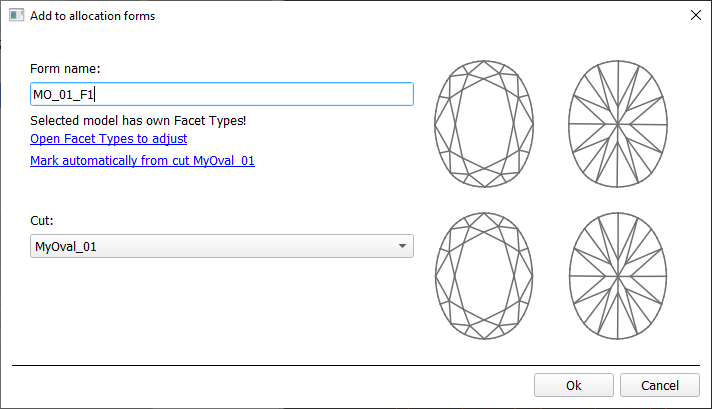
- Click Ok.
- To add a new allocation form from a solution:
- Right-click the solution you want to use as an additional allocation form.
- From the context menu, select Add to allocation forms...The dialog is displayed.
- Further steps are the same, as described above for the normalized scans.
Managing allocation forms
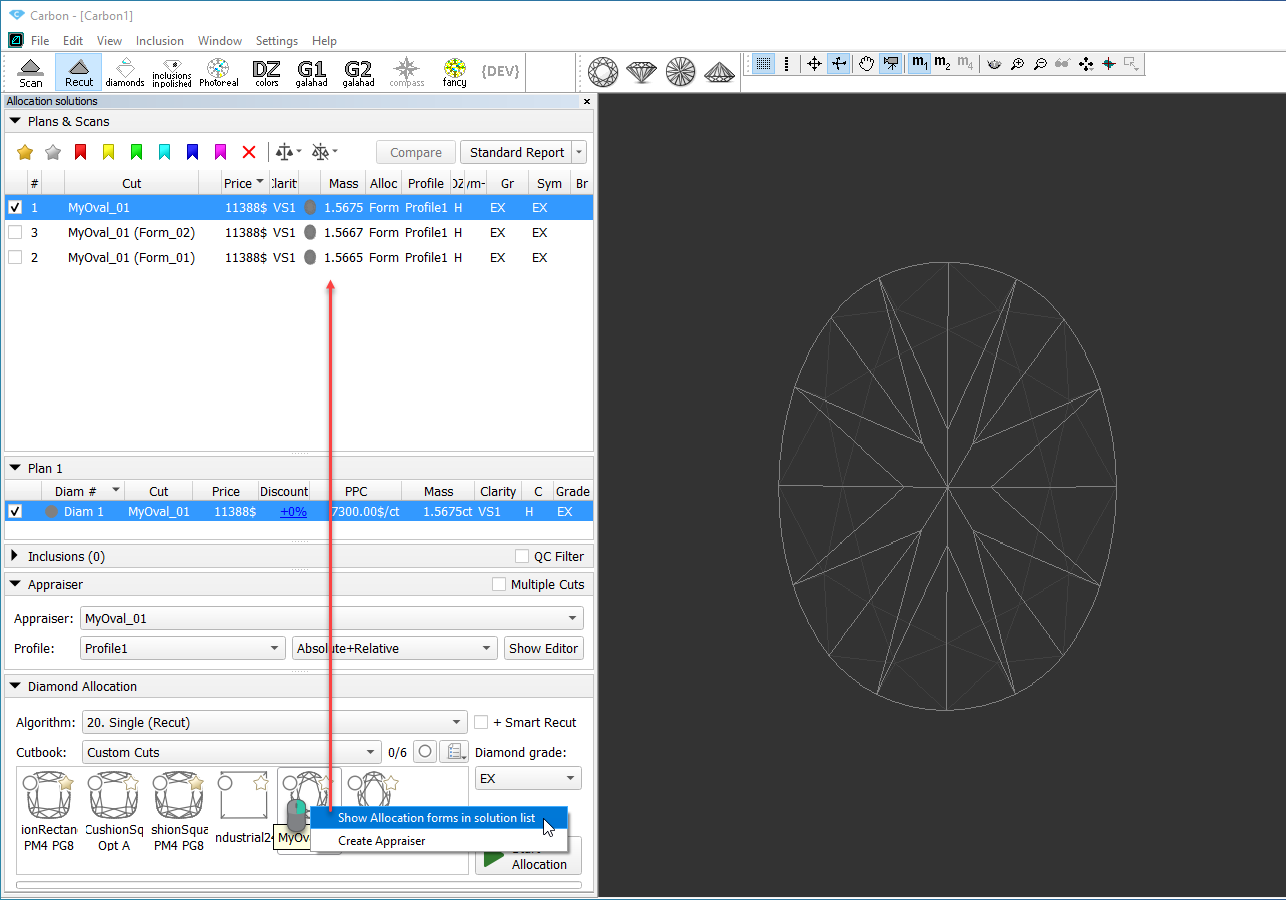
You can manage allocation forms of your registered cuts in the solution list.
How you can manage the allocation forms:
- You can use an empty project via File > New. This will provide you with an empty solution list.
- Or add your allocation forms to the solution list of any opened project.
- To show allocation forms, select your cut, then right-click it and select Show allocation forms in solution list. If your cut has allocation forms, they will be copied to the solution list.
- You can use all tools of the system, available for usual solutions, to analyze characteristics of your allocation forms.
- Note Your displayed forms are copies. If you make some changes to them, this will not affect the initial copies actually assigned to the cut. Still, you are able to register changed copy as the additional form for the same cut.
- In the solution list, from the contextual menu, you can:
- Remove from allocation forms... This is the only operation affecting not only the copy but also the source.
- Add as allocation form to another cut...
- Register as new cut...
- If necessary, you can save your displayed copies of allocation forms as a separate project.
Participation in in-house cut workflow
The in-house cut registration function is an important part of the in-house cut workflow. The example of how it is involved in it is presented in the video below:
| Video | AnyCut Workflow - Main Steps | ||||
| Published: | 2019, September 3 | Last Updated: | 2019, October 16 | v.2.3 |
| ||||
Video summary:
| ||||
Video keywords: AnyCut, user cutting, custom facet marking, SmartRecut | ||||
| Published in: | Release Notes | 2019-09-13 - HPOxygen Server 5.2.22 | ||
| Documentation | AnyCut Workflow, User Cutting Registration | |||
| Playliss | All Videos | |||
| Also | As Separate Page | Specification | |||
Add Comment